Yes folks, I like chillis. I also spell chilli with two l's as that's how we spell it down here in Oz.
Have I mentioned I grow my own chillis? Well, I do grow them. I currently have 8 plants of an African Bird's Eye variety growing and I should have no problems keeping them through the winter (I haven't seen frost in Adelaide for 8 years now).
Normal Bird's Eye top out at around 200,000 scoville heat units (SHU) but I'm pretty sure these are in the 300,000 to 350,000 scu range. Why do I think that? Because I know how to properly grow chillis in pots so that you get maximum fruit and maximum amounts of capsaicin. And I've eaten a regular Habanero which tops out at 350,000 and these puppies are as hot as them.
Not as hot as the Red Savina Habanero and not near the famous Bhut Jolokia that tops out at over 1,000,000 SHU, but still pretty damned hot. BTW, I'll be getting some Bhut Jolokia seeds for next season... Wife thinks I'm crazy.
These chillis and this recipe is NOT for you if you think a Jalapeno is hot, my chillis are 70 times hotter.
These chillis and this recipe is NOT for you if you think Tabasco sauce is hot, my chillis are 70 times hotter than the original Tabasco sauce and 43 times hotter than their hottest sauce.
These chillis and this recipe is NOT for you if a Cayenne chilli is toxic to your taste buds, my chillis are 7 times hotter.
These chillis and this recipe is NOT for you if you a Thai chilli means instant death to your taste buds, my chillis are 3 and 1/2 times hotter.
For those of you with the guts (in every sense of the word) to read on, then please, by all means, READ ON!
Dingo Dave's Dangerously Hot Chili Sauce
I was going to wait to make this sauce till more of the chillis are completely red and half dried, but we had a big windstorm last night and two branches broke on one of the plants. Keep in mind that even in their green state these puppies are as hot as a Thai chilli.
What you need (besides a great love of chillis):
30 Habanero chillis --this is about the SHU equivalent of the variety of African Bird's Eye I grow
1/2 an onion, minced
5 cloves garlic, crushed and minced
1 tsp of each of the following powders: Cardamom, Ginger, Sumac, Coriander, Cumin
1 tbsp tamarind paste
1 tbsp wasabi paste (the really hot green paste you get with sushi)
1 tsp sea salt
2 tbsp olive oil
1 to 2 cups red wine (I used a shiraz-cabernet)
1 cup water (the wet type, not the dehydrated type)
1/2 cup apple cider vinegar
What you do:
Firstly, you need to snip the chilli fruit off your plants, or go to a shop and buy 30 Habaneros. If the wind broke some of your branches then it should go from this:
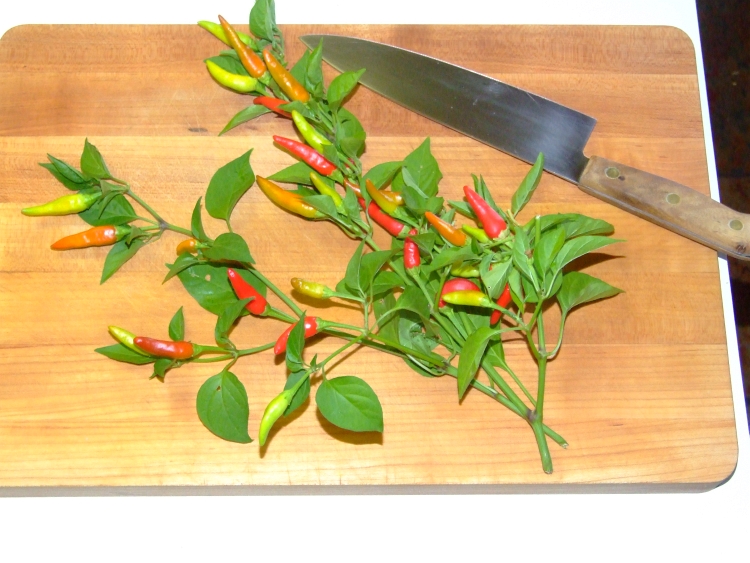
to this:
Please notice I left the "hats" on the chillis. Why? Because under the hat on chillis (eggplant too) is where the most tenderest, succulent part of the fruit is. That's also the area with lots of capsaicin in chilli fruit.
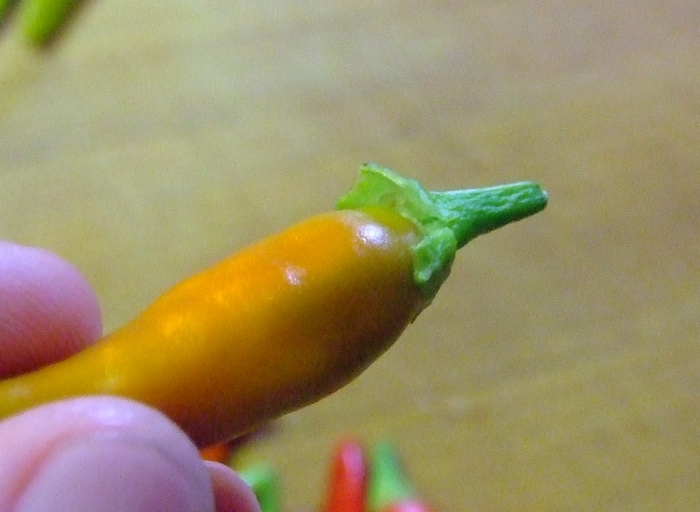
You'll notice I'm not wearing rubber gloves whilst handling the chillis. That is because I'm not a wuss. Although my wife thinks/knows it's cus I'm crazy.
Anyways, remove the hats from the chilli keeping as much fruit as possible:
And then rough chop them:
Now add all the ingredients EXCEPT the wine, water, vinegar to a saucepan. You'll notice I grouped those at the top of the ingredient list for your convenience; you're welcome. Make sure you add the seeds too!
Mix it well and then crank the heat up. Cook for around 5 mins while stirring often. The idea is to sear stuff without burning it. It should look something like this:
The above pic is after 2 mins. After 5 mins you'll notice some of the mix getting stuck to the pan. Once it starts to stick you should also notice the chillis, onion, and garlic are well-seared. Time to add the wine and the water!
So, add the wine and the water, stir well making sure you scrape the pot so everything is incorporated into the liquid. Simmer the pot till the liquid is reduced by at least 3/4 and then add the vinegar. Turn the heat off and let it cool.
Add the whole mix to a blender and blend for a few mins so that every little bit of chilli, onion, and garlic are pureed. Put the mix back in the pot and simmer to reduce the liquid by 1/4.
Your saucepan should now look like this:
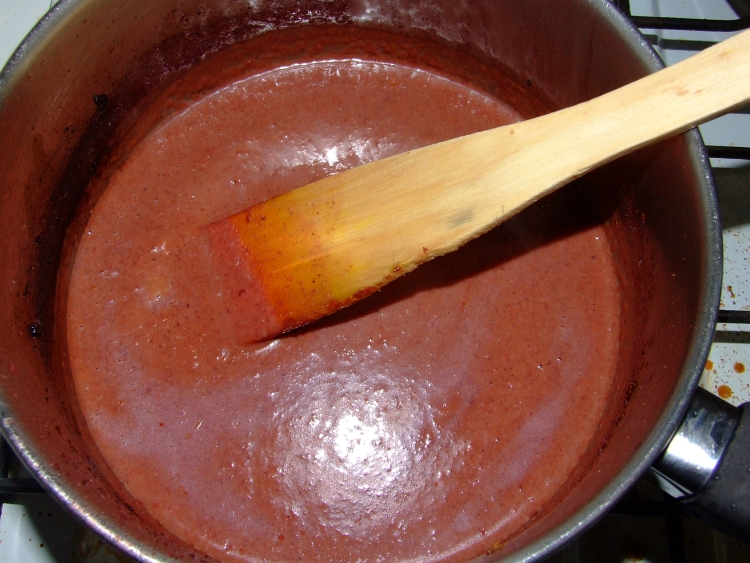
TADA! Done! Now just pour it into a jar you've disinfected, cap it, and refridgerate. Use when needed. It ages quite well and gets smoother over a couple of weeks. No preservatives are needed, I seriously doubt anything has the temerity to grow in it.
Enjoy!
Oh, btw... chilli enthusiasts (snobs) are constantly debating the heat and taxonomy of various chillis so if you think that African Bird's Eye can't get as hot as a regular Habanero then I say you are mistaken. My opinion, and I'm sticking to it.
Sunday, February 21, 2010
Tuesday, February 16, 2010
Cheese Making Tip
If you don't make cheese, you should start. It's much easier than you may have been led to believe, trust me.
Ok, cheesemaking tip: You can save yourself a lot of pasteurizing time by using milk powder. I use full cream milk powder and add a 1/4 to a 1/2 teaspoon of lipase powder to the milk (gives it a nice, fresher milk taste). I also double the amount of milk powder than usual. Why? Because that way you get *ahem* MORE curds, which is always nice.
I'll be back with recipes soon, just wanted to get this tip up while I was thinking about it.
Wednesday, February 10, 2010
This Food Blog Is NOT Abandoned!!!!
And I mean it, seriously!
It's just that I've been rather busy lately. Not only with keeping up around the house and grounds outside, but doing a lot of kitchen work.
Not only have been making cheeses but I've been experimenting with some new processes. I'll, uh, have to wait a few more weeks to find out how it well it works. But you WILL be the first to know!
Tofu making is a weekly --sometimes twice-weekly-- event now. Quick, cheap, and easy.
Bread and beer making too, of course. I've also been experimenting with chia seeds in various breads and curries. So far so good and I'll let you know all about that soon.
Jarring homegrown sundried tomatoes in olive oil happens daily --at least until the tomato plants call it a season. Harvested 1134 tomatoes so far this summer.
Jams from brambleberries and wild rose-hips is going well.
I've also been doing quite a bit of research. Health and nutrition mainly. I want to keep this blog as a "recipe only" type thingy so I've decided to launch a health blog. I'll keep you posted, no worries.
Aaaaaaaaannnnnnddddddd, here's todays recipe! This is more of a tip though.
Have you ever cooked a beef roast and had it come out dry or tough? Or perhaps you didn't have enough pan juices to make gravy? Bland tasting maybe?
I can help, really.
Place your beef roast in your roasting pan with the fat side UP. This way not only will the fat drip down through the roast to keep in tender, but you can also take the lid off the roasting pan for the last 20 or 30 mins to crispy-ize the fat if so desired.
Next, pour a half bottle of a strong red wine over the roast. Shiraz, merlot, cab-sauv, any of those will work nicely. Then grind a lot of black pepper over the top of the roast and rub the pepper in with your fingers. Lightly sprinkle with sea salt, put the lid on it, and then put it in the LOWEST oven temp you can get away with for 2 to 4 hours. The time depends upon the size and how well done you like your roast.
When you take it out of the oven for serving, pour all the pan juices into a saucepan for gravy making. The only thing you'll have to do for the gravy is boil the juices in the saucepan and add cornflour (called cornstarch in the US) --dissolved in cold water, of course-- while whisking. How much you add completely depends on how thick YOU like your gravy.
Gravy making should only take 2 minutes, max.
Thin (or thick, your choice) slice pieces off that roast and serve it up with the gravy! Loads of mashed spuds (potatoes), grilled corn on the cobb, and steamed veggies make great accompaniments to this. Serve with a glass of red wine and a glass of ale.
Subscribe to:
Posts (Atom)