I was planning on putting up a shortbread recipe today --it being the holiday season dontcha know-- but I've just found out that someone way up north is interested in a lamb curry. Specifically, a lamb curry that features cardamom.
Now, I don't have enough time to write a dissertation on cardamom (a spice I LOVE) cus it's already 4:30 pm and I've got a crew to cook for. And I also don't have enough time to completely list exact amounts of every single item. However, she won't mind cus she cooks this way too so I'm sure she'll figure it out --you will too, no worries.
I do have time to tell you that I make many many many different kinds of curries and that this particular one could maybe be classified as a massaman type curry (from Thailand, but this is waaaay different) but until 5 minutes ago I had never even heard that name.
Therefore I think I can safely claim this curry as one of my own.
Alrighty, clock is ticking and after this post I need to get cooking!
Here we... GO!
Dingo Dave's Cardamom Lamb Curry
What you need:
8 green cardamom pods
small palmfull crushed peanuts (put some shelled peanuts in the cupped palm of one hand and run the thumb from your other hand over it; tada! crushed nuts!)
1 crushed garlic clove
2 tsp chilli flakes
1 tsp dried mint
2 tbsp tamarind paste
1 tsp cardamom powder
1 tsp cinnamom powder
1 tsp cumin powder
2 tsp coriander powder*
1 tsp turmeric powder
1 tsp ginger powder
2 lbs diced lamb --whether from chops, a roast, leg, etc. Doesn't matter.
2 or 3 tbsp olive oil
1/2 an onion, finely minced
1 tbsp lemon grass (just use the jarred kind), finely minced
1/2 glass lambrusco wine (it's what I had in my hand at the time)
1/2 glass dark ale (it's what I had in my other hand at the time)
1 can (400 mls --around 13 ounces) coconut cream
*coriander is called cilantro in North America. The powder is the dried, ground seeds of the plant; NOT the leaves.
What you do:
Put the first 5 ingredients (notice how I grouped the goodies so it's easy to see?) in a dry (no oil) wok. Fry for 3 minutes while tossing/stirring. Add the mixture to a mortar and go to town on it with your pestal! Don't worry about the shells of the pods, they'll get ground up and add to the flavour, trust me.
Mix the next 7 ingredients (tamarind paste through ginger powder) in a bowl. Add the diced lamb to the bowl and mix to coat the lamb pieces well.
Put the olive oil (traditionally you'd use ghee, but I use olive oil) in your wok and crank up the heat. After about 30 seconds it should be ready to add the coated lamb, the onion and the lemongrass. Cook and sear for about 2 minutes, tossing/stirring regularly.
Turn the heat down to low, add the wine and the beer. Stir to deglaze the wok. Add the cardamom spice mix from the mortar, stir it in. Let the liquid cook down by half --should only take 1 or 2 minutes. Add the coconut cream, stir everything together and simmer till the texture is to your liking. Just make sure you don't boil the coconut cream or else it'll separate.
Serve it over jasmine or basmati rice (I suggest you cook the rice). If it's too spicy for someone at the table just top their's with some plain yoghurt, no worries. Garnish with fresh basil leaves.
This is good stuff, really.
Monday, December 21, 2009
Saturday, December 19, 2009
Quick and Easy Creamy Cheese Sauce
Have you ever needed to make a really quick cheese sauce to go on something? Then this is for you!
Cheap, easy, simple. I think anyone, and I mean anyone, can make this.
It all started the other day when I had to spin out 2 basa fillets to make a meal for 5 adults. I cubed the fish to about dice size, tossed them in some seasoned breadcrumbs (salt, white pepper, cumin) and then put the tray in the oven. They were to be served over a rice dish --something like a risotto but with way different seasonings.
As the rice was almost done and the fish ready to come out of the oven, I realised that this dish needed a sauce to drizzle over the top! I didn't panic, just took a quick look at what I had on hand so I could make a quick sauce, which would go well with the crumbed whitefish with rice, and decided upon a creamy cheese sauce.
Here's what you need:
1 cup cream
1 tsp crushed garlic
pinch of salt
pinch of ground black pepper
1/2 cup grated colby cheese
1 pinch of dried mint
1 pinch of dillweed
And here's what you do:
Toss everything EXCEPT the cheese into a small saucepan. Light a fire under it and heat till it simmers (DON'T LET IT BOIL OR BUBBLE, else there'll be trouble). Stir it a bit as it heats up. Once it's simmering, add the grated cheese, stir till the cheese is melted and then serve it up!
See? Couldn't be easier. This should also go well over poultry, any non-oily fish, pork or beef roast (drizzle over the slices of beef when you are serving). If you have other thoughts about what this would go well with, just lemme know in the comments.
Oh, if you make this with bleu cheese it'll work great, but the flavour is much stronger so the meat needs to be cooked differently --like fried pork chops with the sauce drizzled over.
Thursday, December 10, 2009
Dave's 2009 Holiday Feast
Yes, this year I've been told to keep Dave's Annual Super-Awesome Holiday Feast down to a more, shall we say, reasonable level than in years' gone by.
So to help with that, I've started making tofu.
Yes, tofu.
Turns out it's very quick and easy to make! Very cheap too AND you get a big batch of okara leftover to make things like fake burgers, fake roasts, fake pork, fake roast chook... well, you get the idea.
And then there's all the neat things you can do with tofu! Marinate it, smoke it, grill it, stuff it, feed it to someone you don't like... See? There's so much you can do with just some plain soy beans and magnesium chloride!
In fact, I have decided that this years' feast will be meat free and all the meat dishes will be made with my own homemade tofu!
Bullshit.
But I have started making tofu. It will, however, of course, have practically NOTHING to do with any of the food this holiday season.
Many of you may be familiar with my previous menus, many of you may not. Just keep in mind that all but a few dishes on the menu are homemade. By me.
And the pots and pans are home cleaned. By me.
Yes, it's amazing what I go through, sigh...
Oh, if you want to learn how to make any of these, then just lemme know and hopefully one of these recipes will appear (like magic!) on this blog.
And don't worry, there'll be a funny pic of dave at the end of all this, so please read --NOTE: the funny pic of me appears at my other blog. And keep in mind that this is meant to be spaced out over 3 weeks. And it's in no particular order. And no food is wasted.
And.
Here.
We.
GO!
holiday feast 2009
stout beer n brats w onions
homemade pizzas
peanut butter cheesecake w/ hot fudge sauce --I've been told if I don't make this each year then I'd better sleep with one eye open.
3 sushi platters
homemade chocolates
homemade tofu, marinated, smoked, grilled, etc.
roast chook w/ all the fixins
baked pumpkin
roasted pumpkin seeds --from the above pumpkin
toasted chilli n garlic almonds & peanuts
pork roast wrapped in banana leaves and slow roasted with polynesian
seasonings.
highland oat cakes
apples n bleu cheese
various homemade cheeses
1 xmas fruitcake
1 xmas pudding
pineapple & maple syrup glazed ham
candied sweet potatoes
fried worms
cinnamon raisin bread
many loaves of white and wholemeal bread
grilled basa fillets
many servings of my extra special chips (thick fries)
advokaat cheesecake
1 bottle of advokaat for above cheesecake
lots of homebrews; stout, lager, dark ale, regular ale, chilli beer, etc.
garden greens salads
marinated fish & onion & cucumber salad
4 kilos of sausage --if we have a pool party
onions for above sausage
1 apricot cobbler
mexican buffet with all the fixin's
champagne n strawberries
green beans n red capsicums w/ bacon & peanut sauce
panforte --awesomely great xmas cake
souvlaki chicken w/ tabouli & tzatziki
devonshire cream tea
pineapple sherbet
pineapple topping
pineapple tarts
pineapple coconut pie
banana jam
charlotte rouse
O'Leary's Irish Cream
brandy
cask of red wine
cask of white wine
shortbread
hot fudge sauce
waldorf salad
herbed, baked spuds
hummus
whipped cream stuffed crepes w/ dark chocolate sauce
See? I've kept it simple this year! Harumph.
Saturday, November 28, 2009
Cheesy Baked Croquettes with Smoked Trout & Prawn Sauce
Yeah, that's quite the title isn't it? The prawn sauce is optional, BTW. One night I served them as a main course without the prawn sauce but with a side salad, and the next night as a side dish with the prawn sauce.
Personally, I like them better with the prawn sauce.
The amounts of each ingredient aren't listed --with one or two exceptions-- you'll see why, no worries.
Cheesy Baked Croquettes with Smoked Trout & Prawn Sauce
What you need:
For the croquettes:
4 to 6 cups of leftover mashed potato --do I REALLY need to explain how to make mashed spuds?
handful of fresh basil leaves
diced cheddar cheese --somewhere around 1.5 cm but please don't be exact
salt
pepper
couple of handfuls of bread crumbs
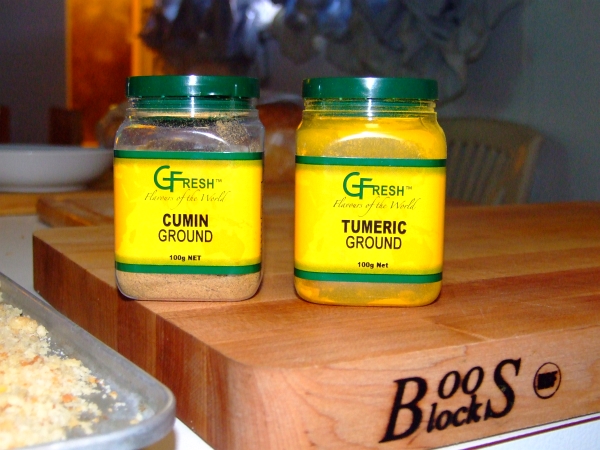
cumin powder
turmeric powder
thin-sliced smoked trout (or smoked salmon)
For the prawn sauce:
Handful of prawn shells (I ALWAYS keep prawn shells after shelling the prawns, they freeze well and you just break off a hunk whenever you want to make a sauce or stock)
1 crushed garlic clove
1 or 2 tsp dijon mustard
1 tbsp lambrusco wine
1 tbsp cream fraiche OR sour cream OR double cream
dash of sea salt
dash of ground white pepper
4 cups H2O (water)
Whut U Due:
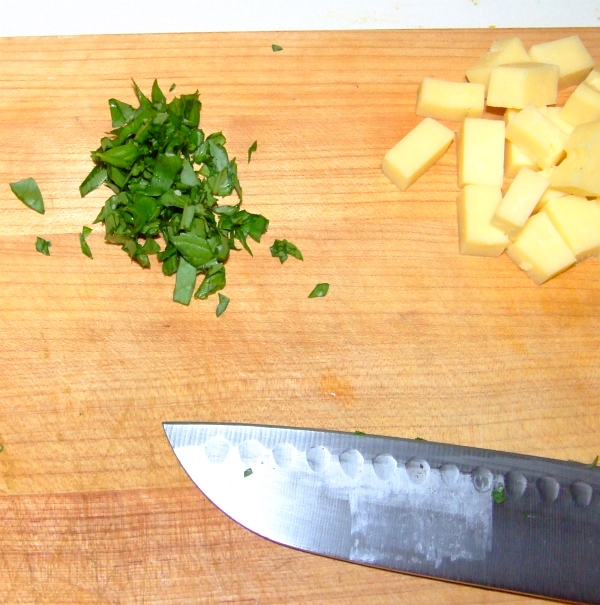
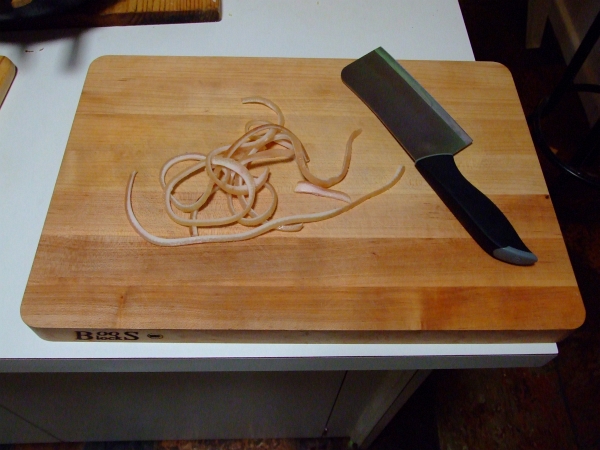
Cube some cheddar cheese to around 1.5 cm (3/5 of an inch) --or somewhere thereabouts. Mince up some fresh basil leaves (rinse them first, could be caterpillars hiding).
Your cutting board should now look thusly:
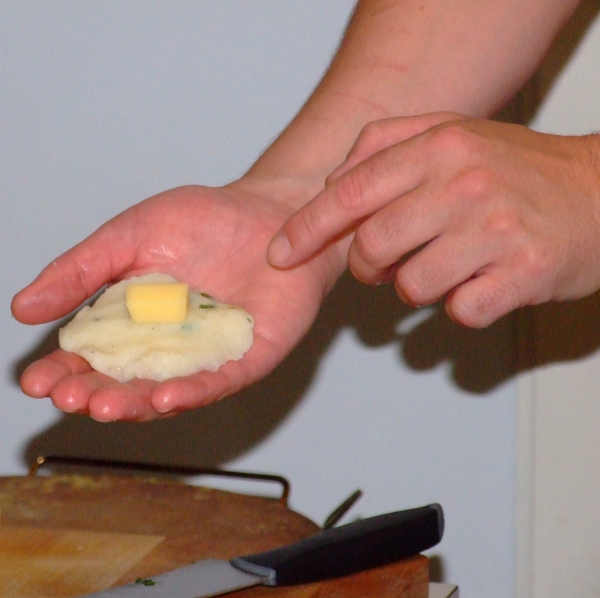
Mix the basil into the mashed spuds. Place some of the spuds into your hand --each croquette should be between golfball and tennis ball size.

Flatten the mashed potato in your palm and place a piece of cheese in the middle.
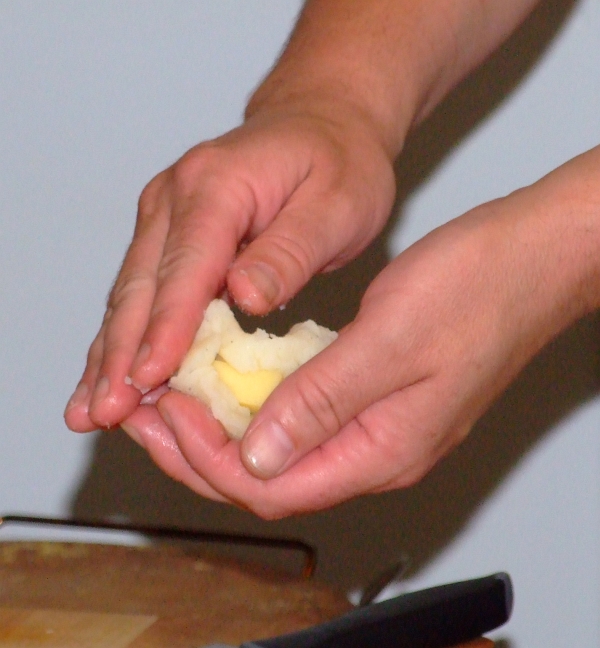
Carefully mold the potato around the cheese
Ta-da!
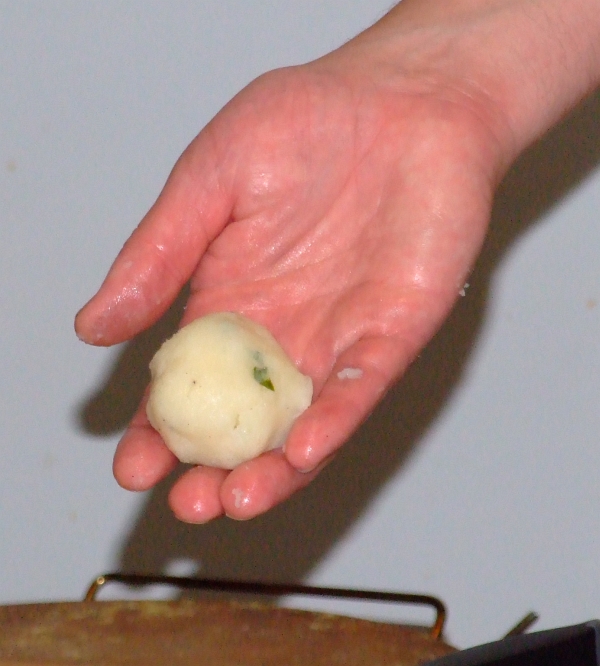
Make up as many or as few as you'd like, no worries. I used three per person as a main and one per person as a side dish. Put them on a plate and then refridgerate for an hour. This way they'll be easier to crumb.
So, like, what to do for an hour while the croquettes chill in the fridge? How about make some prawn sauce!
Add your empty prawn shells and the garlic and 4 cups of water into a saucepan. Crank the heat up and simmer for an hour. If the water gets too low, then just add some more water. You want to end up with around 2 cups of liquid.
Turn off the heat. Take a potato masher and mash the shells flat to extract every last bit of prawny goodness. Strain and return the strained liquid to the pan. Cover the saucepan and set aside. Let's return to the croquettes.
Spread your plain bread crumbs on a tray or plate. The sprinkle on a bit of salt and two of my favourite spices; cumin powder and turmeric powder.
Mix the breadcrumbs around so the crumbs are full of the spices.
After the potato balls have chilled, take them out of the fridge and make up an egg wash: one egg plus equal amount water. And put a bit of flour in a bowl too.
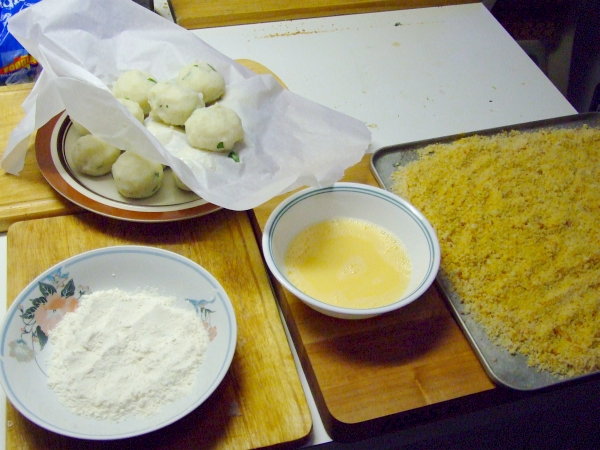
Roll each bowl in the flour (lightly shake off excess), roll it in the egg wash, and then roll in the breadcrumbs.
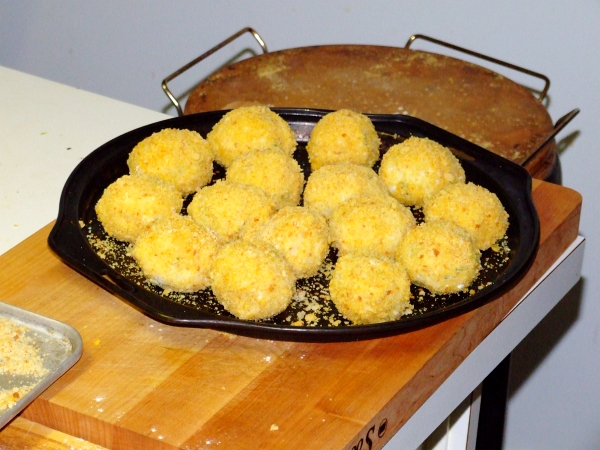
This is what they look like before baking:
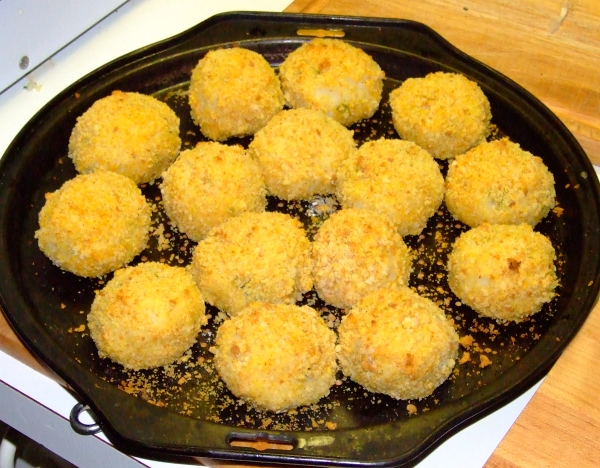
Bake them at around 375 F. Long enough to brown the breading, but not so long that the cheese leaks out. 15 mins should do it --I wasn't timing these but I'd check every few minutes to make sure the cheese wasn't running out.
While they bake, shall we finish the sauce?
Turn the heat on the liquid as low as possible and add the mustard, wine, salt and pepper. Whisk it well, let the sauce come up to a simmer (don't boil it) and taste for seasonings. You might want to add a bit more salt or pepper, but don't make it spicy as this isn't a spicy sauce.
Turn the heat off and cover to keep warm. Just before serving whisk in the cream fraiche (or sour cream or double cream). If you need to heat it back up do so, but it'll only take a minute at most --don't let it boil after you've added the cream.
Spoon it over the baked croquettes BEFORE you top with the smoked trout and basil sprig.
This is what the croquettes look like after baking:
The first night they were a main course without sauce. 3 per plate and a thin slice of smoked trout curled on top. This was my plate:
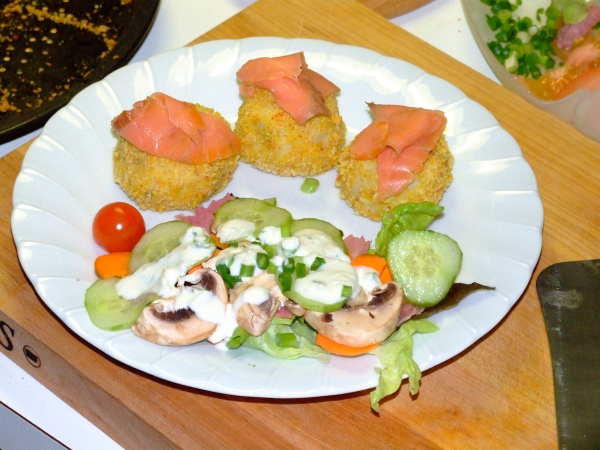
No, that's not gunky, fatty dressing. It's my own homemade tzatziki
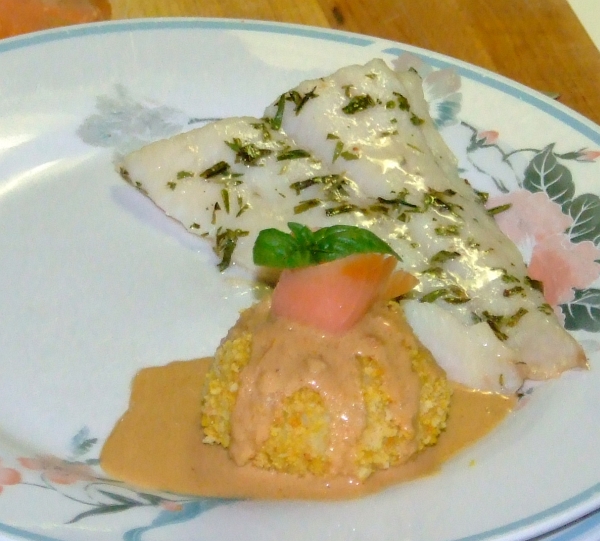
The next night they were a side dish to baked basa and I made the prawn sauce to drizzle over the top. After the sauce is drizzled over the croquettes, then artfully arrange a slice of smoked trout on top and fresh basil to top it. This plate was MIL's just before I added the side salad.
This plate was mine:

I've been told that I can make these ANY time I want, everyone loved them. Enjoy!
Personally, I like them better with the prawn sauce.
The amounts of each ingredient aren't listed --with one or two exceptions-- you'll see why, no worries.
Cheesy Baked Croquettes with Smoked Trout & Prawn Sauce
What you need:
For the croquettes:
4 to 6 cups of leftover mashed potato --do I REALLY need to explain how to make mashed spuds?
handful of fresh basil leaves
diced cheddar cheese --somewhere around 1.5 cm but please don't be exact
salt
pepper
couple of handfuls of bread crumbs
cumin powder
turmeric powder
thin-sliced smoked trout (or smoked salmon)
For the prawn sauce:
Handful of prawn shells (I ALWAYS keep prawn shells after shelling the prawns, they freeze well and you just break off a hunk whenever you want to make a sauce or stock)
1 crushed garlic clove
1 or 2 tsp dijon mustard
1 tbsp lambrusco wine
1 tbsp cream fraiche OR sour cream OR double cream
dash of sea salt
dash of ground white pepper
4 cups H2O (water)
Whut U Due:
Cube some cheddar cheese to around 1.5 cm (3/5 of an inch) --or somewhere thereabouts. Mince up some fresh basil leaves (rinse them first, could be caterpillars hiding).
Your cutting board should now look thusly:
Mix the basil into the mashed spuds. Place some of the spuds into your hand --each croquette should be between golfball and tennis ball size.
Flatten the mashed potato in your palm and place a piece of cheese in the middle.
Carefully mold the potato around the cheese
Ta-da!
Make up as many or as few as you'd like, no worries. I used three per person as a main and one per person as a side dish. Put them on a plate and then refridgerate for an hour. This way they'll be easier to crumb.
So, like, what to do for an hour while the croquettes chill in the fridge? How about make some prawn sauce!
Add your empty prawn shells and the garlic and 4 cups of water into a saucepan. Crank the heat up and simmer for an hour. If the water gets too low, then just add some more water. You want to end up with around 2 cups of liquid.
Turn off the heat. Take a potato masher and mash the shells flat to extract every last bit of prawny goodness. Strain and return the strained liquid to the pan. Cover the saucepan and set aside. Let's return to the croquettes.
Spread your plain bread crumbs on a tray or plate. The sprinkle on a bit of salt and two of my favourite spices; cumin powder and turmeric powder.
Mix the breadcrumbs around so the crumbs are full of the spices.
After the potato balls have chilled, take them out of the fridge and make up an egg wash: one egg plus equal amount water. And put a bit of flour in a bowl too.
Roll each bowl in the flour (lightly shake off excess), roll it in the egg wash, and then roll in the breadcrumbs.
This is what they look like before baking:
Bake them at around 375 F. Long enough to brown the breading, but not so long that the cheese leaks out. 15 mins should do it --I wasn't timing these but I'd check every few minutes to make sure the cheese wasn't running out.
While they bake, shall we finish the sauce?
Turn the heat on the liquid as low as possible and add the mustard, wine, salt and pepper. Whisk it well, let the sauce come up to a simmer (don't boil it) and taste for seasonings. You might want to add a bit more salt or pepper, but don't make it spicy as this isn't a spicy sauce.
Turn the heat off and cover to keep warm. Just before serving whisk in the cream fraiche (or sour cream or double cream). If you need to heat it back up do so, but it'll only take a minute at most --don't let it boil after you've added the cream.
Spoon it over the baked croquettes BEFORE you top with the smoked trout and basil sprig.
This is what the croquettes look like after baking:
The first night they were a main course without sauce. 3 per plate and a thin slice of smoked trout curled on top. This was my plate:
No, that's not gunky, fatty dressing. It's my own homemade tzatziki
The next night they were a side dish to baked basa and I made the prawn sauce to drizzle over the top. After the sauce is drizzled over the croquettes, then artfully arrange a slice of smoked trout on top and fresh basil to top it. This plate was MIL's just before I added the side salad.
This plate was mine:
I've been told that I can make these ANY time I want, everyone loved them. Enjoy!
Sunday, November 15, 2009
Creamy Red Wine Sauce
The other day we picked up some t-bone steaks from our local butcher for an awesomely great price. The consensus for cooking them was lightly salted, seared on the grill, then finished in the oven (actually "ovened" on the grill since it has enough burners and a lid that I can use it as an oven). Their's took 23 mins, whereas mine took 7 (1 min 30 sec a side on a hot grill to sear, then 4 mins in a hot oven --I like mine rare).
Both the rare and well done steaks were very tender and juicy, everybody was happy. They were especially happy with a sauce I decided to make in the wok for a topping for the steaks. You can make this very quickly and easily while the steaks are cooking, no worries. There's numerous substitutions you can use, I'll tell you about that at the end of the post.
Dingo Dave's Creamy Red Wine Sauce
What you need:
1/4 of an onion, finely minced
1 mushroom, minced
pinch of salt
dash black pepper
1 tbsp olive oil
1 tbsp butter
2 cloves crushed garlic
1 glass dry red wine (plus 1 glass for the cook)
2 tbsp dijon mustard
1/2 tsp dried tarragon
3 tbsp sour cream
What you do:
Add the first six ingredients (like how I grouped them for you?) to a hot wok. Stir and cook for about 2 mins. Add the garlic and cook for another minute whilst stirring frequently.
At this point there shouldn't be much of any liquid left in the wok. Now add the red wine to deglaze the wok. Keep the heat on till the liquid is reduced by half. Turn to your lowest heat and add the mustard and tarragon. Stir it through till everything is combined and then turn the heat off.
Now add the sour cream, stir everything thoroughly.
If you've timed it right, your steaks should be coming off the grill and onto plates right about now. Spoon the sauce over the top and ENJOY!
Substitutions:
I was wanting to use thick, double cream but I was out. Hence the sour cream. Next time I'll use the cream.
Use 2 tbsp butter with no olive oil in the initial step. And vice-versa, of course.
Jarred, prepared garlic can be used instead of fresh cloves, no worries.
Add a pinch of mint at the same time you add the tarragon.
Slice up a couple of fresh shrooms and sautee them for 2 mins in butter, salt, and tarragon. Drain the shrooms and then add them at the same time you add the cream. Use a couple of slices of crusty baguette to soak up the drained, flavourful butter.
Wednesday, November 11, 2009
Grilled Garlic & Chilli Prawns
Ahhhhh, this is a great lip-tingling, spicy-hot, tasty, summer grilling treat. Why do you get a great summer recipe as the Holiday season approaches? Cus I'm in Oz where it is late spring and yesterday I saw 110 F in the shade and 143 F in the sun.
Obviously this weather calls for spicy food to help cool you down! Ahem. It works, really. Trust me, 'k?
Wifey-Poo and I got a great deal on some local tiger prawns the other day. I decided I wanted to grill mine and make them rather spicy. I dug back through my ancient memories of when I was in Austin, Texas, USA. There was this one place I found that made the best cajun crawdads.
What I made last night turned out to be a very good approximation of the lip-tingling goodness that I remembered.
You can make this as a main course or a side dish. Just depends on how many prawns ya got.
The first thing to do is make the chilli/garlic paste. There are 3 ways to do this.
An easy way: Mix 2 tbsp prepared garlic with 1 tbsp cayenne powder, a pinch of sugar, 1 tsp sesame oil, and 1 tsp prepared ginger.
Another easy way: Same as above but with 2 tbsp of chilli paste (the real stuff) instead of the cayenne powder.
The easiest way: Go to an oriental grocery store and buy a jar of garlic/chilli paste.
Now put 10 raw, not-shelled, tiger prawns into a bowl, and spoon 2 tbsp of garlic/chilli paste (however you made it) onto the raw, NOT shelled tiger prawns. Use your fingers to make sure the paste coats all the prawns (be careful!!!!!! They are spiny). Then sprinkle 1 tbsp of ground black pepper over the prawns and toss them gently so the black pepper has stuck to the garlic/chilli paste.
Crank up your barby to medium high heat. Place the prawns on the barby and grill for about 2 minutes a side (don't overcook or they'll be tough instead of succulent).
Put the blackened prawns on a plate to cool just enough so that you can handle them. This would be a very good time to wash your hands, BTW.
To eat them, just rip the heads off (make sure you suck out all the juices from the head part of the shell), quickly shell the rest of the prawn and eat it. Continue until all the prawns are gone.
Your brow should have a nice sweat by now. An ice cold lager will take the heat off your tongue and the capillary-dilating properties of the spices will cool your body on a hot summer day.
Seriously, This. Is. Good.
Friday, October 23, 2009
Fish cured in lemon juice
I'm assuming you all know that meat can be "cooked" by using acetic acid instead of heat? Am I right? Or am I wrong? Either way, no matter.
Two obvious choices for sourcing your acetic acid are either vinegar (please use fermented, not distilled) or citrus (lemon juice is commonly used). The longer you marinate the meat, the more "cooked" it becomes.
For this recipe I chose fish, specifically basa, and a very short "cooking" time. If you like sushi, then this is for YOU! As far as the salad fixings... well, I used what I happened to have on hand at the time. Feel free to substitute.
Sorry, no pictures as I was also making dinner for the other 3 folk who live here. They all wanted their basa baked in my special tarragon sauce with chips, so I was a bit busy getting it all together.
Next time though, I WILL take pictures!
Hmmmmm, this turned into a fish salad which was my main (and only) dish that evening. What shall we call it...?
Dingo Dave's Fish Salad!
What you need:
1 small whitefish fillet --I used basa cus that's what I had.
juice from one lemon
1/2 tsp ground black pepper
1/2 tsp sea salt
1 tsp dried tarragon
1 cup (approximate) shredded cabbage
1 tbsp finely minced yellow onion
1 tsp (approximate) sesame oil
1/4 tsp mild curry powder
pinch of sea salt
1 sheet rice paper
1 sheet nori seaweed, torn into small pieces --very healthy!
1 small handful of fresh bean sprouts
1 tbsp finely minced red onion
1 small anchovy, finely minced
What you do:
Put the first 5 ingredients into a ziplock plastic baggie. Evacuate all the air and zip that puppy shut. Very gently massage the bag to mix everything together. Then toss it in the fridge. I left mine in for 30 mins. This left the middle raw with a couple of mm of "cooked" fish on the outside. If you want it "cooked" through, then leave it in the fridge a longer time.
With about ten minutes left of your fish "cooking" time, put the next 5 ingredients in a wok and stir fry on high heat for 45 seconds to a minute --tossing/stirring frequently. Set aside to cool.
Put your sheet of rice paper into lukewarm water to soften. It'll take a couple of minutes so now's the time to thin slice the fish.
Take the cured fish out of the bag and thin slice it. I try to get my slices around 2 to 4 millimetres thick. A sharp knife is a MUST for this step. Also, the cooler the fish is the easier it is to thin slice.
Spread the semi-cooled cabbage from the wok on a plate. Then arrange the fish and the last 4 ingredients however you'd like. Oh, I sprinkled a small pinch of dried chilli flakes on mine, nice kicker!
Next time I'll take pictures, especially of the slicing part so you can see how to thin slice the fish.
Feel free to liberally substitute any of the salad fixings, no worries. This is just what I happened to have handy and would also be quick 'n' easy as I was making dinner for everyone else too.
Sunday, October 18, 2009
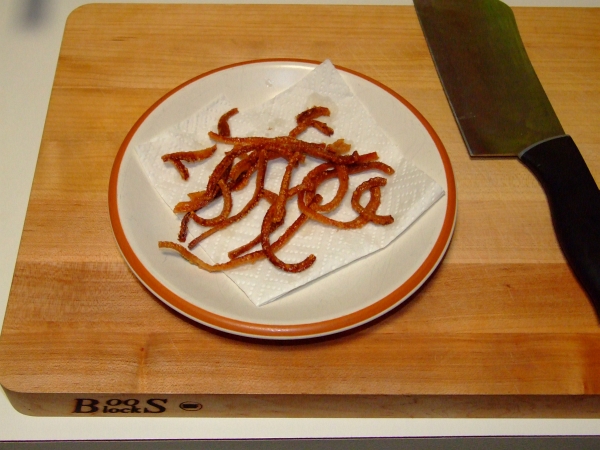
Fried Worms
Did you know that the humble earthworm has (by far) the highest protein content of any critter? 72% protein the are! And virtually fat free!
We are talking some seriously high quality meat here, folks.
And earthworm broth is a very traditional Chinese soup too. Very healthy.
To prepare my fried worms, you'll need to get yourself some bacon rashers with the rind on. What's that you say? Didn't I mention that fried bacon rinds LOOK like fried worms? I didn't? Oh, sorry.
Mmmmmmmm, bacon rinds... Everyone does know that when you buy a bag of "pork rinds" (loaded with so many chemicals it's amazing you're still alive) that you are buying --and then eating-- processed pork leather. You did know that, right?
Back to the recipe...
Down here in Oz virtually all the sliced bacon you buy has the rind still on. And the pieces (called rashers) are HUGE compared to wee little wussy US slices. Imagine a piece of bacon 16 to 18 inches long... drool...
But you do have to slice the rind off. Here's what that looks like:
You have to be very carefull when frying the rinds. Why? Cus they jump, spit, and sizzle. It's often referred to as "pork cracklin'" for that reason.
I find it best to fry them on the hotplate of the barby outside.
I also cut the rinds in half so they are easier to spread out. You have to make sure you spread them out otherwise they stick to each other when they cook.
To cook them, crank up your barby's hotplate burners to HIGH for a minute or two and then turn it to LOW. Arrange the pieces of rind on the hotplate so they aren't touching. Sprinkle with salt.
And then, CLOSE THE LID. It's very important otherwise when the jump around while frying they could end up everywhere except the hotplate.
Here's a pic of them about 3/4 the way done:
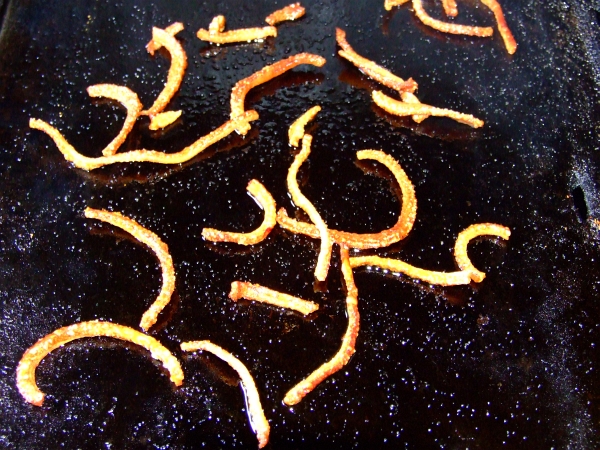
You can turn them if you think they need it. Most of them won't as they tend to turn themselves when popping and crackling.
Here's the finished product, sprinkled with more salt:
Mmmmmmmmmmm, tasty treat!
You can season them with whatever you'd like while frying them and afterwards. I find a nice sprinkle of hot madras curry powder after frying works nicely.
Enjoy!
We are talking some seriously high quality meat here, folks.
And earthworm broth is a very traditional Chinese soup too. Very healthy.
To prepare my fried worms, you'll need to get yourself some bacon rashers with the rind on. What's that you say? Didn't I mention that fried bacon rinds LOOK like fried worms? I didn't? Oh, sorry.
Mmmmmmmm, bacon rinds... Everyone does know that when you buy a bag of "pork rinds" (loaded with so many chemicals it's amazing you're still alive) that you are buying --and then eating-- processed pork leather. You did know that, right?
Back to the recipe...
Down here in Oz virtually all the sliced bacon you buy has the rind still on. And the pieces (called rashers) are HUGE compared to wee little wussy US slices. Imagine a piece of bacon 16 to 18 inches long... drool...
But you do have to slice the rind off. Here's what that looks like:
You have to be very carefull when frying the rinds. Why? Cus they jump, spit, and sizzle. It's often referred to as "pork cracklin'" for that reason.
I find it best to fry them on the hotplate of the barby outside.
I also cut the rinds in half so they are easier to spread out. You have to make sure you spread them out otherwise they stick to each other when they cook.
To cook them, crank up your barby's hotplate burners to HIGH for a minute or two and then turn it to LOW. Arrange the pieces of rind on the hotplate so they aren't touching. Sprinkle with salt.
And then, CLOSE THE LID. It's very important otherwise when the jump around while frying they could end up everywhere except the hotplate.
Here's a pic of them about 3/4 the way done:
You can turn them if you think they need it. Most of them won't as they tend to turn themselves when popping and crackling.
Here's the finished product, sprinkled with more salt:
Mmmmmmmmmmm, tasty treat!
You can season them with whatever you'd like while frying them and afterwards. I find a nice sprinkle of hot madras curry powder after frying works nicely.
Enjoy!
Thursday, October 8, 2009
Greek Spinach Salad
Gee, this doesn't sound very Polynesian, does it? That's cus it's not. I figured we'll go take a quick detour over to the Aegean Sea and see what's cooking. Also I don't think too many folk like my Polynesian dishes, oh well.
UPDATE
To make this into a Vegetarian dish just don't use the bacon, no worries.
END UPDATE
This salad is by no means "traditional" Greek food, it's just something I make when baby spinach is in season using Greek seasonings and such.
You can vary the amounts if you'd like, no worries. Also this salad can easily be a meal by itself. This is good for side salad for four, or one person can use this as a meal themselves --as I've been known to do.
What you need:
6 cups fresh baby spinach, NOT packed down
1/2 of a small onion
2 rashers of bacon --or 4 US sized slices
1/4 cup lemon juice
1/4 cup olive oil
1/2 tsp ground black pepper
1 tsp sea salt
1 tsp dried oregano
1 tsp dried mint
1/4 cup rough chopped kalamata olives
1/2 cup crumbled feta cheese
What you do:
Thin slice the half onion. Get the slices as thin as you can; yes you can cheat and use a food processor if you can't shave an onion with a knife. Place the shaved onion in a bowl and add the lemon juice, salt, black pepper, oregano, and mint. Give it a good stir so the onions pick up that lemony goodness. Then let it sit for an hour.
tick
tock
While the onions are marinating, chop up the bacon rashers. Whatever size bacon pieces you'd like. I usually cut mine to around 3/4 of an inch before cooking. Cook the bacon pieces to your liking --extra crisy or just done, your choice. Drain the cooked bacon and set aside to cool. You don't need the drained bacon fat for this recipe, but I'm sure you'll want to keep it for future use.
After an hour...
Rinse and drain the spinach well. Put it into a large salad bowl. Drizzle with olive oil, toss in the onions WITH their marinade, add the olives and the feta. Mix well. Remember, some of the little tiny bits will end up at the bottom of the salad bowl so make sure you scoop from the bottom.
I do believe the next recipe *could* be for spanakopita, but no promises.
Friday, October 2, 2009
Banana Whip
Do you have any mushy bananas laying around? Gotta couple of egg whites? Sugar? A bit of lemon or lime or orange juice?
If you answered yes, then you can make this RIGHT NOW!
Has anyone noticed just how simple and easy South Pacific cuisine is? Not to say it's not flavourful, but the cooking really let's the fresh food speak for itself.
Oh, here's a tip: you can freeze egg whites. Yup, the next time you are making something like hollandaise sauce and you are wondering what to do with the leftover egg whites just chuck em in the freezer for later use. Just make sure you put them in a container first, ahem.
This comes from Papua New Guinea, as does a great banana jam recipe I have (next time).
Banana Whip
What you need:
2 egg whites
1/2 cup sugar (I use raw, but feel free to use the refined stuff if you'd like)
4 mushy bananas
2 tbsp of lemon, or lime, or orange juice.
What you do:
Mix the egg whites and sugar together. Get your beaters out and whip it till you've got stiff peaks. Peel and mash the bananas and add to the whipped whites. Carefully mix together. Add the citrus juice and slowly mix again.
There! Done! This is tasty stuff. Add a dollop of this onto the top of pineapple sherbet and you'll be happy.
Sunday, September 27, 2009
Polynesian Hibiscus Water
Yes, we are staying in the South Pacific. Why? Cus I like the region, that's why.
Hibiscus...
I'm assuming everyone knows that the flower petals and stamens are edible, and tasty too. If you don't know what an hibiscus flower looks like, just think of any movie set in the South Pacific with the island girls (scantily or unscantily clad) having flower blossoms in their hair. Those flowers are hibiscus. Depending on which island you are on you're supposed to wear the flower over a certain ear during certain times doing certain things. Not many white fellers know that, btw.
There are probably as many different ways to make this as there are islands in Oceania, so don't think this is "The" way.
Oh, it's also made in parts of the Carribean and in the Bajio region of Mexico where it's called Agua de Jamaica. Jamaica flowers are known as hibiscus flowers elsewhere.
Some recipes call for dried flowers, others for fresh; some with dark red flowers only, others with pink. There is no hard and fast rule so feel free to experiment.
Oh, a note or two about the flowers. After you snip them make sure you rinse them well, otherwise you'll have tiny black ants floating in your beverage. Ants are one of the main pollinators of hibiscus. Also make sure you carefully remove the green calyx at the base of the flower.
If your hibiscus bush or tree is flowering profusely now, then harvest a boatload of flowers and put them in your food dryer so you can make this and serve it to your friends in the middle of winter. Lunchtime is an ideal time to start making the drink to serve with dinner.
Here's how I make mine...
Hibiscus Water
What you knead:
20 fresh, clean hibiscus flowers (any colour) OR 10 dried ones
1 to 2 cups of raw sugar --this is to taste
2 quarts --8 cups or 1.892 litres-- of water
2 tbsp grated ginger
juice from 2 limes (1/2 to 3/4 cup) --this is added at the end so it's also "to taste"
What you due:
Put the water, sugar and ginger in a pot. Heat it to boiling (a stovetop works well to boil the water) and then cover and bring it down to a simmer for 10 minutes. Turn the heat off and toss in the hibiscus flowers. Give it a little stir so the flowers don't float on the top and then replace the cover.
Let it sit for a while till it comes down to room temp. Add PART of the lime juice and then give it a taste, add more lime juice (or sugar --just stir it in well) for your taste.
Let it stand for an hour.
Strain the liquid through a cheesecloth (give the bundle a good squeeze to get all the flavourful liquid).
Next... Serve it up and drink it!
This makes a nice mixer with rum or vodka if you are so inclined.
ENJOY!
Monday, September 21, 2009
Polynesian Pork Roast
Yes, this is one you've been waiting for on our gastronomical tour of Polynesia! Polynesians have been roasting pork on every island since the first outriggers landed, and let me tell ya, they KNOW how to roast pork!
First, you'll need a shovel to dig the hole in your backyard. This will become your oven. And you'll need some decent sized rocks for lining it too. And you need to live in an area that has banana trees.
Oh, wait... There *is* an easier way.
I do wrap mine in banana leaves (very handy having that tree out front), but I'll describe the procedure using aluminium foil instead. Cuz I'm nice. We're also going to marinate the roast in a large, ziplock, freezer bag so you don't have to make a few quarts of marinade.
This recipe doesn't really come from any particular island since they all cook this way. And I use a mix of spices, sauces, and seasonings from all over. But if you had to pick one... let's say The South Sandwich Isles.
Here's what you need:
1 pork shoulder roast (or forequarter or any kind of pork roast) around 3 pounds
1 tsp dark soy sauce
2 tbsp worcestershire sauce
3 crushed garlic cloves
2 tsp grated ginger root
small handful finely minced onion
1 tbsp pineapple juice
1 or 2 tbsp water
5 or 6 rings of sliced pineapple
1/2 of a small onion, thickly sliced
small handful fresh spinach leaves
a few large cabbage leaves (large kale leaves work too)
aluminium foil
What you do:
Leave the fat on the pork roast, but score it before marinating.
Mix the next 7 ingredients in a bowl. Put the roast in your plastic, zipperlock freezer bag and then add the marinade (that would be those 7 ingredients you just mixed together). Seal the bag --whilst evacuating as much of the air as is possible-- and then rub the marinade all over the roast (it's all in a sealed bag with no air, you'll figure it out as it really is easy... just hard to describe).
Once the marinade is rubbed into the roast in the sealed bag, pop it in the fridge for a few hours to marinate.
Tick
tock
tick
tock
When a couple of hours are up, you then get to make a faux banana leaf wrap! Put a baking tray on the counter, spread 2 or 3 sheets of foil over it. Make sure you leave enough overlap for the foil to cover the top of the roast with extra left for crimping! Then lay your cabbage or kale leaves over the foil, next is a layer of the spinach leaves. Try to concentrate the spinach leaves in the middle, BTW.
Take the roast out of the bag and put it (the roast, not the bag) in the center of the spinach leaves with the fat side UP. That is important as the fat drips down into the meat while slow cooking and the meat is oh so tender and juicy!
Now comes the fun part. Wrap the roast in the foil till the leaves and the foil are about halfway up the side of the roast (once you do this you'll see how easy it is). Then wedge the pineapple slices between the leaves and the pork, and lay the onion slices on top. Pour whatever marinade is left from the plastic bag evenly over the top. Finish wrapping the whole bundle in the foil and crimp the top to make a tight seal.
Oh, the pineapple and onion slices won't really be tasty after it's cooked, but they infuse the meat with some really nice flavours.
4 hours of cooking time at around 300 F should do the trick. Check it after 2 hours: if too much steam is escaping from the top of the foil then re-crimp.
When it's done and you take it out of the oven, let it sit for 10 mins or so. Unwrap the bundle and you'll find the most tenderest, tastiest pork roast ever! Remove the pineapple and onion slices, and then carefully (it should be close to falling apart) transfer the roast to a large platter for serving. Pour whatever juices are left on the baking tray and in the foil on top of the roast.
Place the platter in the middle of the table with hungry folks all around and tell everyone to dig in!
Sunday, September 13, 2009
Pineapple Sherbet & Pineapple Topping from Samoa (updated)
Yea! We're back in the South Pacific. Western Samoa to be exact. Don't wanna go over to American Samoa since they don't have good, traditional, Polynesian type food over there. Besides, those two islands are sooooooo tiny compared to the Savai'i and Upolu islands of Western Samoa.
These two recipes go together very well. Why, you ask? Cus you need one pineapple for both recipes and the goodies from each are served in each hollowed out pineapple half. It really does make sense to do make these together.
Credit for these two is given to Gwen Skinner from one of her wonderful books The Cuisine of the South Pacific. The book is almost 30 years old and was researched in the 70's as she sailed around Oceania.
I've used several cooking techniques and tips from her book (and many other books from other authors) for many of my own recipes --and modified some that I found in it-- but these two are ones that I don't mess with. For two reasons: Not only are they PERFECT, but I always make them during the holidays. If you've looked at any of my holiday menus (or this one too) --or perhaps this one-- you'll know that I'm pretty darned busy so if I don't have to experiment with something new, all the better.
Oops! I've got to go shred some lamb I just roasted up this morning for tomorrow night's souvlaki. Stay here, I'll be right back.
I'm back! Didja y'all miss me? And I even remembered to wash my hands before and after shredding the lamb.
Ok, pineapple sherbet and pineapple topping.
What you need for the pineapple topping:
1 pineapple
1/2 CUP (oops, forgot the unit first post) unsweetened pineapple juice
1 beaten egg yolk
1 cup sugar
2 tsp butter
2 tbsp cornflour (cornstarch is the same thing, just depends what country you are in)
3 tbsp H2O --this would be water.
What you do for the pineapple topping:
Cut the pineapple in half lengthwise. Cut out the fruit from both halves of the shell (I use a very thin, curved, fish filleting knife) so that you've left about 1/4 inch of pineapple fruit in the shell --this is so none of the goodies leak out. Mince the fruit finely --I use a cleaver for this, goes right through any tough parts of the fruit-- and try to keep as much of the juice as possible.
Toss the minced fruit with it's juice, 1/2 cup pineapple juice also, the egg yolk, sugar and butter into a saucepan and boil it up. Mix the cornflour & water, whisk it into the saucepan and keep on low heat till the whole mess thickens a bit --should take less than a minute.
Let it cool to room temp and then pour/scrape/spoon it into one of the pineapple halves. Refridgerate overnight. Then use it. There are a great many uses for it as it goes quite well with many things --including cornchips! Ice cream topping... Mmmmmmmm!
Next up, the pineapple sherbet
What you need for the pineapple sherbet:
Hollowed out pineapple half from above recipe
2/3 cup sweetened condensed milk
2 tbsp melted butter
1/2 cup pineapple juice
2 tbsp lemon juice
pinch of salt
1 cup crushed pineapple (just use the canned stuff)
2 egg whites --beaten till stiff
What you do for the pineapple sherbet:
Mix the condensed milk and the butter very thoroughly. Then add everything EXCEPT the egg whites. Stir it very well. Chill well for a few hours and then fold the beaten egg whites into the chilled mixture.
Put it into the freezer till it's about half frozen, then scrape the mix into a large bowl. Beat it with a large spoon till it's smoothed out but not melted. Then pour the mix into the hollowed out pineapple half and put it into the freezer.
The next day, serve it up!
Monday, August 31, 2009
Spicy Indian Peanuts
I know, you are asking yourself just what the heck does an Indian recipe have to do with Polynesia? Well, lots. Really.
This recipe comes from Fiji. Yes, I know that *technically* Fiji is Melanesia, not Polynesia. But if you look at the boundaries of Mela- and Polynesia, you'll see that geographically Fiji should be Poly. I quite understand the classification of Fiji as it is not only linguistically based but also based upon settling/migration waves.
But there has been so much Poly influence on the Fijians over the last few hundred years that their foods nowadays have a much more Polynesian tone to them than Melanesian. Especially during all their wars with Tonga in which prisoners from both sides would be taken as slaves and servants which vastly influenced the food.
But dave, what do the Indians have to do with all this?
Good question. It deserves a good answer!
In the late 1800's and early 1900's over 60,000 Indians (60,533 to be exact) came over to Fiji to escape economic bad times bad in India. The worked in the sugar cane fields and in the sugar refineries.
Needless to say, they've rather flourished lately and there are now more Indians than Native Fijians living in Fiji. They've also brought a lot of their cuisine with them. I think this'll be the only Indian/Fijian recipe I'll put up, all the other Fijian recipes will be much more traditional island goodies.
Oh, I do know that peanuts are not nuts. They are beans. Buuuuuuut since we all know them as nuts, I'm keeping them as nuts. Aw, nuts.
Spicy Indian Peanuts from Fiji
What you need:
1 pound of shelled, roasted peanuts --you know, the kind you buy in the store, ready to eat
1 tbsp ghee (clarified butter) OR coconut oil OR peanut oil OR olive oil --I use olive oil
2 crushed garlic cloves
2 tsp curry powder
1/4 tsp to 2 tsp chili powder --just how hot do you want them?
sea salt
What you do:
This is pretty simple... Heat the oil or ghee in a frypan, then fry the garlic, curry powder and chilli powder for 30 to 45 seconds (DON'T BURN THE GARLIC!!!). Add the peanuts, turn the heat way down, toss to coat the nuts, and fry (while shaking those nuts) for a minute or two.
Put em in a bowl, sprinkle with your sea salt and enjoy with a crisp lager.
A note to all you Barkeeps, Taverners, Hoteliers, Publicans, etc. Make these nuts and also my spicy almonds in a large batches, keep em on the counter. You will be GUARANTEED to sell boatloads of cheap beer at highly inflated prices!
BTW; Barkeeps, Taverners, Hoteliers, Publicans translates to bloke or blokette who owns a bar, tavern, hotel, or pub.
Thursday, August 27, 2009
Maori Fried Mussels
And we all know how the Kiwis love their mussels! Heck, just look at the All-Black Rugby team! Ok, just a little humour there...
There are probably about as many different ways to fry mussels as there are chef's in this world so these are definitely NOT the end-all, be-all of mussel frying. BUT (and it's a huge butt) there is one key thing here: fresh ingredients and minimal seasonings.
Why? Cus that's the Polynesian way of cooking, and New Zealand is part of Polynesia.
I'm going to give you 3 "methods" of frying them, no real recipes, just the basics of how to do it.
Oh, if you can't get fresh mussels, then you can use the jarred ones for this, but it won't be as tasty. But you won't have to go through the prep work so it all evens out.
A quick way to de-beard mussels: hold the mussel in one hand with the hinge of the shell towards you. Grab the beard with your other hand and give a quick pull towards you; the shell, as it approaches the hinge, will neatly slice off the beard. If you have a LOT of mussels this is much quicker than using scissors or a knife, AND you always get the entire beard.
1st method:
De-beard the mussels and put them in a pan with enough water to just cover them. Heat em up and take them out of the water as soon as they open. It is important you take them out right when they start to open.
Take the mussels out of their shells and slice or cutaway the tough outer ring around the front edge. Lightly dust them with flour, dip into egg/milk mixture (1 to 1, so about 1/4 cup of milk for each egg), dredge through breadcrumbs, and fry in hot butter until lightly golden brown.
2nd method:
Same as the first, but once you've got them out of the shells and cut away the tough ring you give em a quick rinse in cold water. Then dust with a mix of flour, salt and pepper. Dip in egg wash (all eggs, NO milk), dredge through breadcrumbs, and fry in very hot oil.
3rd method:
De-bread the mussels and pry them shells open (this can be, ummmm, fun!), cut off the outer ring, dust with flour, dip in 100% egg mix and then fry immediately in hot butter. This method produces the MOST succulent fried mussels EVER! But it is also a bit of work gettin' them suckers open without lightly steaming them first.
Any of those methods can be used with jarred mussels, no worries. Oh, and if you can get New Zealand Green-Lipped Mussels... not only are they tasty but have some wonderful pharmacuetical properties too (I'll leave the googling for you).
If you do use a dipping sauce, DON'T use a strong flavoured sauce and DON'T use a lot of it.
A nice, crisp lager goes well with these, BTW.
Friday, August 14, 2009
Polynesian Fried Sweet Potatoes
I'm going to post some Polynesian type recipes for a while. Of course there'll be some times when I have to post something besides that, so the posts won't be 100% Polynesian --I'll (obviously) tell you when it's not.
This, however, is one of those times when the post IS about Polynesian food. I think the title would have given a clue, eh?
Did y'all know that New Zealand is officially part of Polynesia? Tonga is but Fiji (very close by Tonga) is not. However I will be including Fijian recipes. Also one or two from Papau New Guinea even though it's not Polynesian.
Why? Cus this is my food blog! Harumph. Grumble.
One of the hallmarks of South Pacific Island food is the freshness of the ingredients, the way it's cooked, and not overly seasoned. The taste of the fresh food really comes through.
This method for frying the sweet potatoes is a more traditional way than the modern way. The modern way is basically exactly how the Belgians cook Pome Frites. That's chips to the English and french fries to US'ns.
Fried sweet potatoes and fried taro are found all throughout the South Pacific, this recipe isn't from any one particular Island.
Authentic Polynesian Fried Sweet Potato
What you need:
One or two big ole sweet potatoes
Big pot with water
Something for frying (you'll need an inch of oil, I use a wok)
Oil for deep frying --I use sunflower oil.
What you do:
Scrub the sweet potatoes well. You don't need to peel them, no worries. Hack (I like to use my cleaver for this part --fun too!) the sweet potatoes into halves and toss them into a pot of boiling water. If you have a pot large enough then you won't have to chop them in half.
You may have noticed that raw sweet potatoes are much denser and tougher than other spuds. This means you can boil them for 20 mins and although they'll be well-softened they won't be totally cooked through.
Take them out of the water (don't forget to turn the heat off on your stovetop!), let them cool 10 minutes. Slice them into disks 5mm to 10mm thick (around 1/4 to 1/2 inch thick).
Heat up an inch of oil in a wok (or whatever you use for deep frying) and, ummm, deep fry them disks! Obviously, the longer you leave them in the oil, the crispier they'll get. I like to fry mine for about 2 minutes in hot oil (just before the oil starts to smoke), this makes the outer rim crispy and the center soft and SWEET.
Drain on paper towels, lightly (very lightly) salt, and fry the next batch.
This process really brings the sweet, sugary flavour out of the sweet potato.
You may want to fry one disk at a time (with a timer) and then test it for your tastebuds to determine whether you'd like to fry them longer or not.
Once you've made them once, you'll know exactly how long to fry them for your taste and then you can make them at the "drop of a hot". Very tasty, very sweet, very easy.
Wednesday, July 29, 2009
Fried Seafood Dip
Dippity-dippity-do-da! I likes me dips. I also like making them. And experimenting with different ingredients.
Battered or breaded fish just BEGS for a good dip. And I (being a good dip) am only too happy to oblige.
We had beer battered fish fillets, battered peppery squid rings, tempura battered crab, and homemade chips (fries). Yes it needed a dip. It also needed one I could make quickly.
I was out of horseradish so the ole ketchup n horseradish was out.
Hmmmmm, how's abouts ketchup, dark soy sauce, and wasabi paste? It worked! Delish!
Here's what you do: To a few tbsp of ketchup add a small splash of dark soy sauce (only a bit as it's very strongly flavoured) and wasabi paste to taste. I tend to use more wasabi than most westerners so be careful with the amount. You can always add more, but you can't take it out.
Ta-da. Quick n easy dip for fried fishy stuff.
Oh yeah, don't forget to stir it.
Over the next couple of weeks I'll be putting up various Polynesian recipes as I get to plan a South Pacific Party Menu for a friend in the Berks. Once she's finalised the menu from all the options I've given her I'll write up each recipe and also post them here for you all to enjoy.
Tuesday, July 28, 2009
Olive Update
It's now been two months with the fresh-off-the-tree green olives in the brine. The brine is tasting awesomely good, the flesh of the olives is getting to that perfect consistency. They are, however, still bitter. I'll try them again at the end of August.
Here's the first two posts about this years' fresh olives:
First one
Second one
The whole idea with this batch was to lessen the brining time (6 months) down to one or two months --without using lye. Looks like it'll be 3 to 4 months. Still, better than six months, eh?
A polynesian feast menu coming soon!!!!
Saturday, July 18, 2009
Moroccan Lamb Shish-Kebobs
It's the seasonings that make any shish-kabob unique. Whether it's Indian, Persian, Turkish, Greek, or say perhaps Moroccan, the key is in the seasonings and the way they are cooked.
Many kibob dishes aren't cooked on a grill even! However, we'll be sticking with the one most Westerners are familiar with and that means grilling them. Open flame, gas, or charcoal, your choice.
Shish-kibabs specifically refer to those that are grilled. Yummers!
BTW have you noticed I've used a lot of different spellings for "kabob"? You have? Good for you. I'm doing that since there are many different correct spellings depending on what country you are from.
I'll go with kebob from here on out. Also, I'll drop the "shish" since this whole post is about kebobs cooked on a grill. The reason why you are getting this wonderful dish is that a blog-buddy of mine had a Moroccan Feast Night and I thought this would make a good addition. I was right, of course.
I'm not going to give you an exact amount of meat to use. Why? Well you can use this as a side dish or a main course AND once you have the spice mix you can use it for other things. I keep a tin of it made up in the pantry so I only have to use what I need for the amount of lamb I have.
Oh, this also makes a very good rub for lamb roasts, chicken and beef. It's very versatile.
I realize that not all of you will have access to all the ingredients, so I'm also including appropriate substitutions, no worries.
If using bamboo skewers, make sure you soak them for an hour before using, don't want them to flame.
Here's what you need:
Lamb, cut into 1 inch cubes
bbq skewers
Some kind of grill. Gas, charcoal, open flame (be careful!). Heck, you can even do them under the broiler in your oven if need be.
Equal amounts (by volume) of the following:
coriander powder
dried red bell pepper powder
cumin powder
ginger powder
garlic powder
ground, dried sumac
chilli powder (only a bit though)
cassia powder
ground up cloves
sea salt
A tsp of each will make enough for several meals, no worries.
What can be substituted:
Coriander is called cilantro in North America, no worries.
Mild paprika powder can be used in place of the dried bell pepper powder (that's what paprika is, BTW).
Cinnamon can be subbed for cassia -they are so similar some folks think they are the same thing.
Ground sumac is one of the main ones. If you absolutely can't find it, then tamarind powder will work, and as a last resort: Lemon pepper powder.
Here's what you do:
Mix all the powders and seasonings in a bowl. You should have a wonderful, earthy smell from the powder combination. Thread the lamb pieces onto your skewers, and coat them with the rub. If the rub won't stick then you can drizzle a SMALL amount of olive oil on the kebobs to help the rub stick. You shouldn't have do do that though, the rub should stick. Especially if you, ah, rub the rub in.
A little bit goes a long way, btw.
Grill them on a low heat till they are done to your liking.
Serve with a bowl of greek yoghurt for a dipping sauce.
Enjoy!
Sunday, July 12, 2009
My Olives Need More Time
Yes, time. Not thyme, but time.
Remember when I got some fresh green olives at the end of June? Normally they take 4 or 5 months of curing in brine to be really tasty and I thought maybe I'd found a shortcut?
Well, after a month the brine they are in tastes awesomely good, but the olives are still bitter and tough.
So I'll leave them in the brine for two more months and let you know at the end of August how they are, no worries.
Sunday, June 28, 2009
Smoked White Wensleydale Cheese
This is stunningly superb. It's GREAT. My MIL is from an area very close to Wensleydale (just one ridge and a moor away) and she knows all about how Wensleydale cheese should taste.
She also has stated that mine is better than any she's had in the last 80 years. No, she doesn't have dementia! I make very good white wensleydale (ww).
And I also like to experiment...
In the kitchen, duh. Harumph!
The last cheese round of ww I made was three and a half pounds. Not too bad from starting with 5 litres of milk. Anyways, the other night there was just a bit left and I happened to have some red gum wood chips soaking for the smoker.
"Hmmmmmm," thought YT (Yours Truly, me), "I wonder what ww will taste like when smoked?" YT also deduced that, "dang, I'd better put a piece of foil on the rack of the smoker otherwise it'll drip down and be ruined."
To cut a long story short (trust me, I can make this very long), here's what you do when smoking a soft cheese.
Slice your soft cheese to about one cm thick (use a wire cutter). Lay the cheese slices on your smoker rack that has aluminium foil over it. Smoke for 15 mins, then flip the slices and smoke for a further 15 minutes.
Note: the cheese slices will be very soft. If you can't flip them without the slices falling apart, then just lay a piece of foil over the top and flip with your hands on each side. Peel off the old bottom layer before smoking for the last 15 mins, of course.
You can use this in many different ways. The cheese is very soft when it first comes off the smoker so you can use it as a spread before it cools. The other night I spread it on some garlic bread... mmmmmmmmmmmmmm; Ambrosia!
If you can restrain yourself from eating it all in one day, then you'll find it ages quite well and firms up nicely. I like to let the slices age overnight on a rack and then the next day wrap them in grease-proof cooking paper and toss them in the fridge. They are seriously good after a week or so.
Hey, give it a go! You never know till you try. I'd try this with any soft cheese, should be darned tasty with a nice, firm bleu.
Saturday, June 20, 2009
Marinated, Smoked, Tofu
Mmmmmmmm, yummy! I loves me some tofu. It's great to cook with cus it takes up the flavourings of whatever you're cooking. So now it's time to do something with tofu by itself.
I was inspired to do this when WP (Wifey-Poo) and I picked up some seasoned tofu on a quick sale at a grocery store. It was very tasty. Very, very tasty. Obviously, I had to come up with something to make a reasonably close facsimile.
It worked.
Very well!
Now, you'll need a smoker for this. If you don't have a smoker, then it is very easy to make one. One large wok (steel, non-coated), large wire bread rack, top of a large turkey roaster, and some foil. Oh, and wood chips. I use red gum since it's plentiful down here in Oz, but in the US you can get hickory and maple wood chips easily.
Do I really need to tell you how to put it together? No, didn't think so. The foil is used over the top of the wire rack if you are smoking something soft, like cheese or tofu.
Here's a pic of my setup:

I purposefully used a rectangular lid on a circular wok so that heat dissipates so the food only gets smoked, and not baked. Soaked woodchips go in the bottom of the wok and the wok gets set onto the side burner of you OUTDOOR barby. Don't do this indoors.
Here's what you need:
One block of FIRM tofu
For the marinade:
1/2 cup light soy sauce
dash of dark soy sauce
splash of fish sauce
1 tsp balsamic vinegar
2 tbsp sugar
1/2 tsp ginger powder
1/2 tsp cardamon powder
1/4 tsp cinnamon powder
pinch of chilli powder
1/4 tsp onion powder
1/4 tsp garlic powder
1 cup water
1/4 cup port (or sherry or sake or mirin)
What you do:
To make the marinade, add all the marinade ingredients to a bowl and whisk the heck out of it till the sugar is dissolved.
Now you get to cut the tofu. I use a wire cheese slicer for cutting tofu. If you use a knife there is a very good chance you'll pulverise your tofu, make a big mess, and then curse the day you started reading my food blog. So just use a wire! You'll get four equal blocks from a piece of firm tofu.
I even have pictures to show you the cutting process so I don't have to explain it!
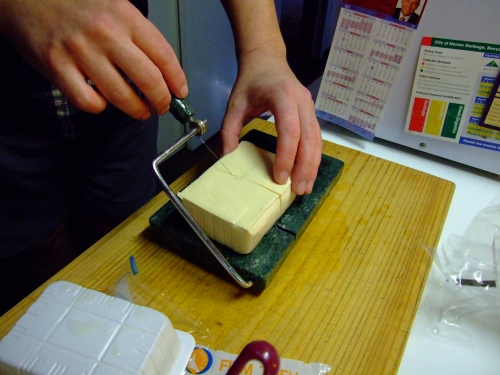
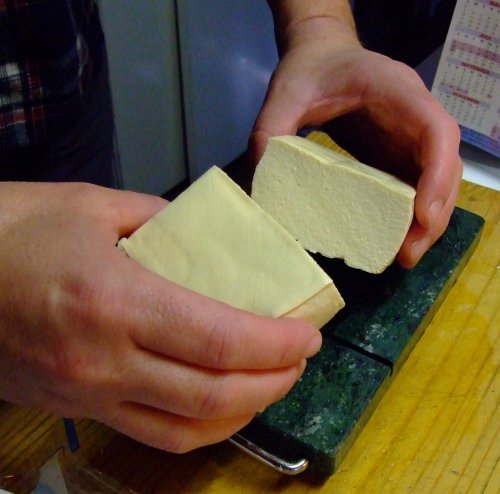
That's a nice, smooth cut!


These are the sizes you'll end up with --you'll get four of them.
I had to slice one of the four pieces in half in order to get them all to fit in the bowl with the marinade.
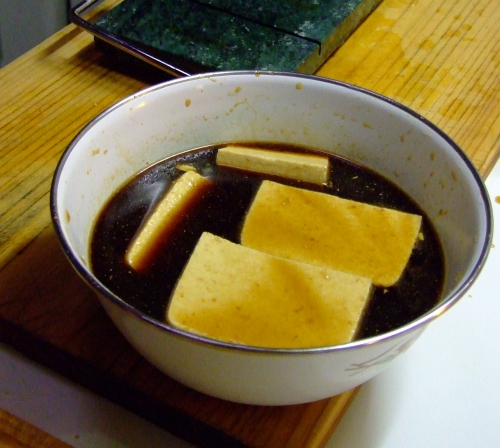
Next time I'll do the ole plastic bag marinade thingy so I have four equal sized pieces.
Let it marinate for 2 hours. Now's a good time to get your woodchips soaking in some water. You'll want enough chips to keep your smoker smoking for 30 mins.
*two hours go by*
Ok, drain the woodchips and put them in the bottom of you wok. Turn your gas burner heat to LOW, put the wire rack over the wok, lay a piece of aluminium foil on top of the rack.
Go inside and get the bowl with the tofu.
Place the tofu pieces on the foil (which is on the wire rack, which is in turn resting on the wok, and the wok is over the lit burner) and put the lid on.
In a few mins your smoker will start to smoke.
30 minutes later, turn the burner off.
Eat the tofu.
It won't last long, very very very tasty!
Don't forget to save the marinade, it has many uses.
I was inspired to do this when WP (Wifey-Poo) and I picked up some seasoned tofu on a quick sale at a grocery store. It was very tasty. Very, very tasty. Obviously, I had to come up with something to make a reasonably close facsimile.
It worked.
Very well!
Now, you'll need a smoker for this. If you don't have a smoker, then it is very easy to make one. One large wok (steel, non-coated), large wire bread rack, top of a large turkey roaster, and some foil. Oh, and wood chips. I use red gum since it's plentiful down here in Oz, but in the US you can get hickory and maple wood chips easily.
Do I really need to tell you how to put it together? No, didn't think so. The foil is used over the top of the wire rack if you are smoking something soft, like cheese or tofu.
Here's a pic of my setup:
I purposefully used a rectangular lid on a circular wok so that heat dissipates so the food only gets smoked, and not baked. Soaked woodchips go in the bottom of the wok and the wok gets set onto the side burner of you OUTDOOR barby. Don't do this indoors.
Here's what you need:
One block of FIRM tofu
For the marinade:
1/2 cup light soy sauce
dash of dark soy sauce
splash of fish sauce
1 tsp balsamic vinegar
2 tbsp sugar
1/2 tsp ginger powder
1/2 tsp cardamon powder
1/4 tsp cinnamon powder
pinch of chilli powder
1/4 tsp onion powder
1/4 tsp garlic powder
1 cup water
1/4 cup port (or sherry or sake or mirin)
What you do:
To make the marinade, add all the marinade ingredients to a bowl and whisk the heck out of it till the sugar is dissolved.
Now you get to cut the tofu. I use a wire cheese slicer for cutting tofu. If you use a knife there is a very good chance you'll pulverise your tofu, make a big mess, and then curse the day you started reading my food blog. So just use a wire! You'll get four equal blocks from a piece of firm tofu.
I even have pictures to show you the cutting process so I don't have to explain it!
That's a nice, smooth cut!
These are the sizes you'll end up with --you'll get four of them.
I had to slice one of the four pieces in half in order to get them all to fit in the bowl with the marinade.
Next time I'll do the ole plastic bag marinade thingy so I have four equal sized pieces.
Let it marinate for 2 hours. Now's a good time to get your woodchips soaking in some water. You'll want enough chips to keep your smoker smoking for 30 mins.
*two hours go by*
Ok, drain the woodchips and put them in the bottom of you wok. Turn your gas burner heat to LOW, put the wire rack over the wok, lay a piece of aluminium foil on top of the rack.
Go inside and get the bowl with the tofu.
Place the tofu pieces on the foil (which is on the wire rack, which is in turn resting on the wok, and the wok is over the lit burner) and put the lid on.
In a few mins your smoker will start to smoke.
30 minutes later, turn the burner off.
Eat the tofu.
It won't last long, very very very tasty!
Don't forget to save the marinade, it has many uses.
Thursday, June 18, 2009
Tortilla Wrapped Baked Feta with Nopalito Sauce
That certainly does sound like a mouthfull. And yes, they are a mouthfull! Tasty too. I was originally planning on using tomatillas instead of the cactus for the sauce, but I couldn't see opening a HUGE can of tomatillas (since I only needed a bit of sauce) when I had a jar of cactus strips.
There's also no pretty pictures of the process as I had a few other things to make and this was kind of a last minute throw-together. BUT, I do have some cool crayon drawings for slicing up the tortilla!
No idea what to call this, but it certainly was tasty. Here's what you need to make a side dish for 2 to go along with a big ole Mexican meal.
What you need:
One 10-inch flour tortilla
8 pieces of feta cheese, two inches by a half-inch by a half-inch
20 to 30 pickled nopalito cactus strips (with some of the sticky juice)
one fourth of a small onion, chopped
2 garlic cloves
1/2 tsp Mexican seasoning
1/2 tsp cumin powder (I LOVE cumin powder and seeds!)
a small bit of minced coriander (cilantro) leaves
1/4 tsp ginger powder
dash of sea salt
1/4 tsp cinnamon powder
1/2 cup water
What you do:
Put the nopalito strips (with a couple of tbsp of the sticky juice from the jar), the onion, the garlic cloves, and the water into a blender. Then blend it. Blend it a lot.
Put the sauce (it should be a bit runny, if not add a bit more water) in a saucepan and add the 1/2 tsp Mexican seasoning, 1/2 tsp cumin powder, a small bit of minced coriander (cilantro) leaves, 1/4 tsp ginger powder,dash of sea salt, and the 1/4 tsp cinnamon powder.
Give it a good stir and simmer till reduced by half. Stir occasionally.
While that's simmerin', we get to slice the tortilla into 8 equal (sorta) pieces. It goes thusly:
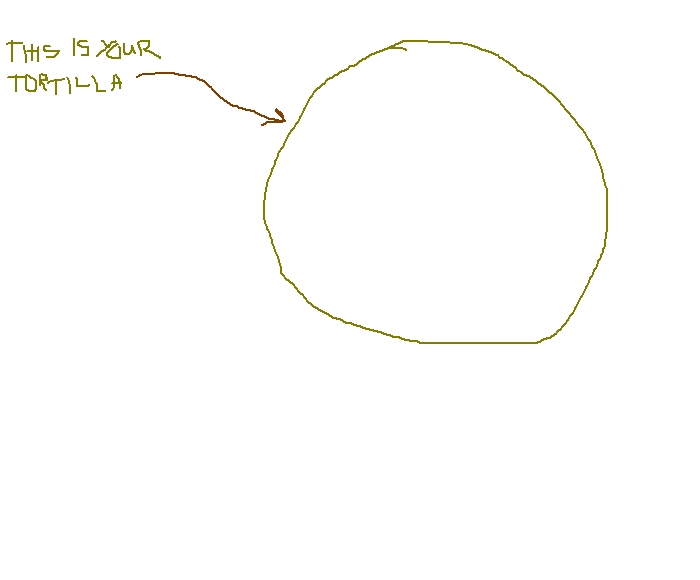
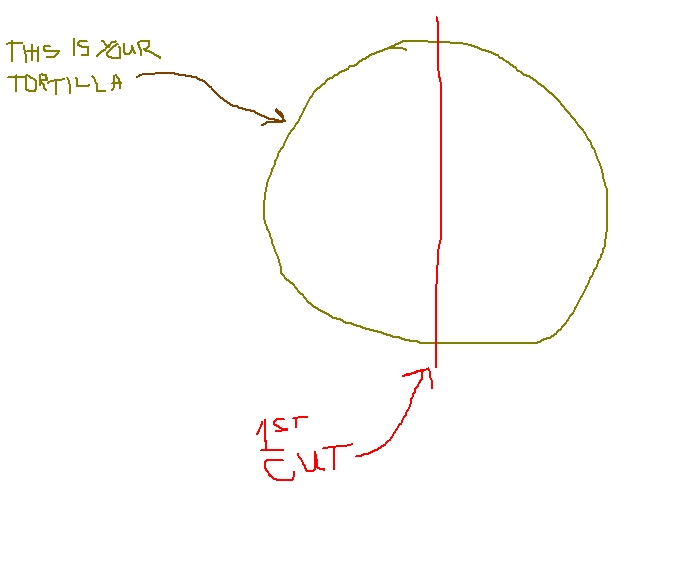
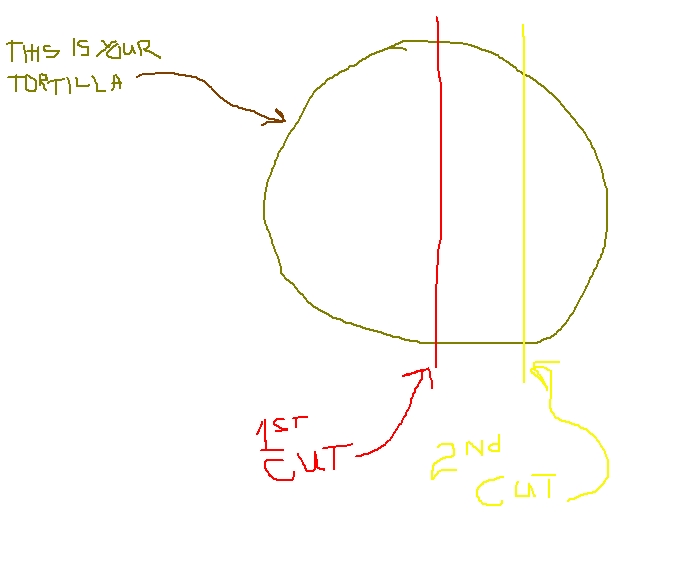
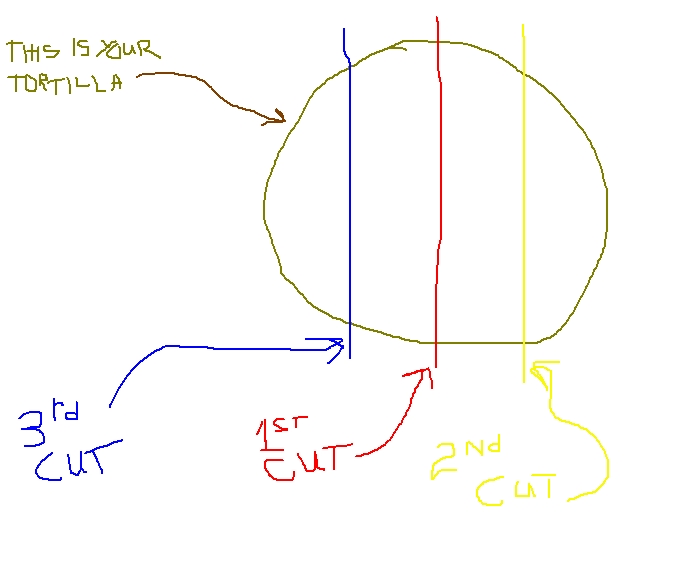
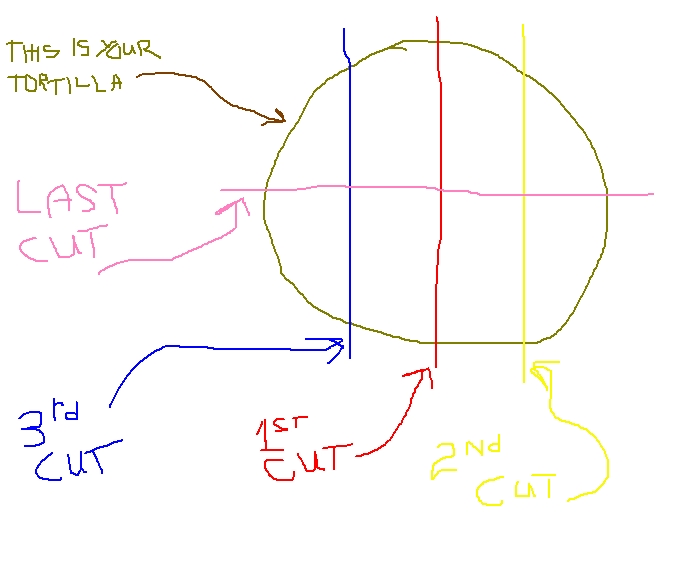
See? Wasn't that easy?
It gets even easier. Just roll each piece of feta in one of the tortilla pieces. Pack four of the rolled feta pieces into a large (4 and 1/2 inches in diameter) ramikin dish --four should pack in quite nicely. Then pack a second ramikin dish with the other four. Pour the reduced nopalito sauce into each dish. Cover with foil and bake for 20 mins at around 350 F.
This made a very nice side dish with the shredded pork and other sundries. I'm sure you can adapt it to a main course, just depending on how much feta you can get your hands on or make.
When cutting the feta, use a wire. That way no matter how crumbly the feta is the piece will hold together. Also, the creamier the feta is, the easier it is to use in this recipe. I tend to make my feta so that it's consistency is halfway between Danish and Bulgarian; just creamy enough to spread, but still firm enough to sprinkle over salad: the perfect texture for wire slicing.
For the semi-creamy feta, you can substitute Quarg, Queso Blanco, or my Lemon Cheese. Or you could just go down to the shops and get some feta. Whatever is easiest for you!
BTW, WP (Wifey-Poo) said I can make this anytime, don't have to wait for a full-on Mexican meal.
There's also no pretty pictures of the process as I had a few other things to make and this was kind of a last minute throw-together. BUT, I do have some cool crayon drawings for slicing up the tortilla!
No idea what to call this, but it certainly was tasty. Here's what you need to make a side dish for 2 to go along with a big ole Mexican meal.
What you need:
One 10-inch flour tortilla
8 pieces of feta cheese, two inches by a half-inch by a half-inch
20 to 30 pickled nopalito cactus strips (with some of the sticky juice)
one fourth of a small onion, chopped
2 garlic cloves
1/2 tsp Mexican seasoning
1/2 tsp cumin powder (I LOVE cumin powder and seeds!)
a small bit of minced coriander (cilantro) leaves
1/4 tsp ginger powder
dash of sea salt
1/4 tsp cinnamon powder
1/2 cup water
What you do:
Put the nopalito strips (with a couple of tbsp of the sticky juice from the jar), the onion, the garlic cloves, and the water into a blender. Then blend it. Blend it a lot.
Put the sauce (it should be a bit runny, if not add a bit more water) in a saucepan and add the 1/2 tsp Mexican seasoning, 1/2 tsp cumin powder, a small bit of minced coriander (cilantro) leaves, 1/4 tsp ginger powder,dash of sea salt, and the 1/4 tsp cinnamon powder.
Give it a good stir and simmer till reduced by half. Stir occasionally.
While that's simmerin', we get to slice the tortilla into 8 equal (sorta) pieces. It goes thusly:
See? Wasn't that easy?
It gets even easier. Just roll each piece of feta in one of the tortilla pieces. Pack four of the rolled feta pieces into a large (4 and 1/2 inches in diameter) ramikin dish --four should pack in quite nicely. Then pack a second ramikin dish with the other four. Pour the reduced nopalito sauce into each dish. Cover with foil and bake for 20 mins at around 350 F.
This made a very nice side dish with the shredded pork and other sundries. I'm sure you can adapt it to a main course, just depending on how much feta you can get your hands on or make.
When cutting the feta, use a wire. That way no matter how crumbly the feta is the piece will hold together. Also, the creamier the feta is, the easier it is to use in this recipe. I tend to make my feta so that it's consistency is halfway between Danish and Bulgarian; just creamy enough to spread, but still firm enough to sprinkle over salad: the perfect texture for wire slicing.
For the semi-creamy feta, you can substitute Quarg, Queso Blanco, or my Lemon Cheese. Or you could just go down to the shops and get some feta. Whatever is easiest for you!
BTW, WP (Wifey-Poo) said I can make this anytime, don't have to wait for a full-on Mexican meal.
Sunday, June 14, 2009
Cider Fadge
Hmmm, methinks there might be a term or two that needs to be defined. Ya think?
Fadge
Knowing how The Urban Dictionary likes to use obscure words to mean other (usually crude) things, I would not be surprised to find "fadge" in their listings. I, however, don't go there. So whatever crude, vulgar, or slang term you think "fadge" means; just don't even go there. This recipe has nothing to do with whatever The Urban Dictionary thinks it means.
Many of you may know of Irish Fadge. It's a pan fried bread made with leftover mashed potatoes (and various bread type things). This post is nothing like that.
Ok, some of you may be thinking of the fadge made in Durham county using a piece of old bread as a starter (the original sourdough). Close, but no cigar.
This type of fadge is made in the south of Durham County and most of Cleveland County (at least it was a hundred years ago) and the starter is the leftover yeasty sludge from the bottom of your primary beer fermenter tank. If you haven't guessed yet, I'm not talking about Cleveland, Ohio, USA but rather Cleveland County, UK.
I got the idea for making this when I was bottling the latest round and had remembered that Cooper's Brewery down here recycles their yeast. That meant the yeasty sludge from the bottom of the tank must be active!
I then chatted about that with a certain octogenerian I know (from Stockon-on-Tees) and she said, "Oh great! I haven't had fadge in over 60 years!" Hmmmmm, well it should work then!
The first batch didn't turn out well. Firstly it was from a batch of dark ale so it didn't have the colour I was hoping for. Secondly I treated it more like a baking powder bread. It ended up tasty, but was very thick and heavy. Good for frying though.
The second batch was PERFECT! I'd just finished up bottling some apple cider and the yeasty sludge at the bottom was not only the colour I wanted, but it also smelled ohhhhhhhh so apple-y. This time I also decided to treat it as a yeast bread (this was a big DUH moment!) and to write down how much of what I used and the procedure.
Now don't think that you can't make this if you don't homebrew cus I've come up with an idea. It has to do with sourdough so if you are familiar with sourdough baking you can probably guess where I'm going with that.
But I'll tell you about that after I get finished with the recipe. You'll just have to read along and be patient.
DINGO DAVE'S CIDER FADGE
What you need:
6 cups high quality baking flour
1 tsp sea salt
2 tbsp sugar
1 and 1/4 cups yeasty cider sludge
2 tbsp olive oil
1/2 cup water
1/4 cup of flour for dusting and kneading
What you do:
First, let your yeasty cider sludge "age" in a small, covered (but not tightly sealed as it needs to breathe) container for 3 to 5 days. Don't worry if it separates cus it's supposed to. When you take the lid off you'll be hit with a beautiful apple smell. Mmmmmmmmmm! Give it a good stir to recombine it (just like you'd do with sourdough starter).
Now follow the "whut yoo due" directions in my easy white bread post. The only exception is when you are supposed to add the 400 mls of water you instead add the cidery, yeasty, sludgy goodness (plus that extra 1/2 cup of water). Oh yeah: DON'T add any yeast! Just use the ingredients from this post, but the procedure from the Easy White Bread post.
The second rise will take anywhere from one to two hours, so be patient! It's worth it, trust me.
Here's some pics of how the cider fadge turns out:
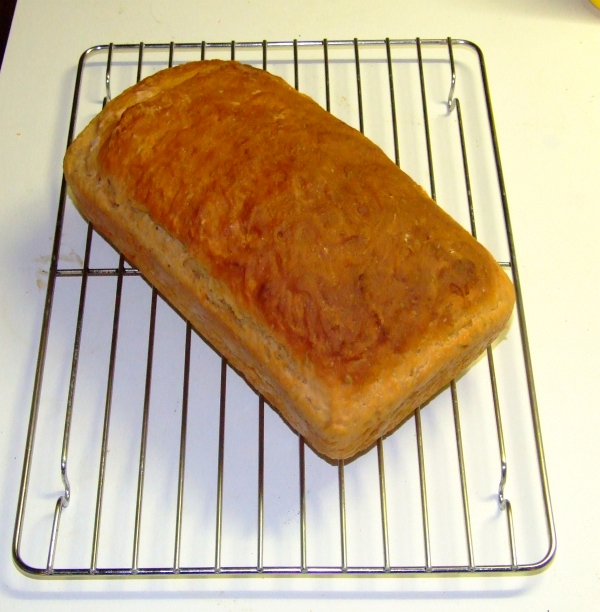
The crust is nice and soft, not sure if you can tell by these next two shots. The first is with my finger on top of the crust and in the second I've pushed the crust down a half inch and the crust sprung right back:
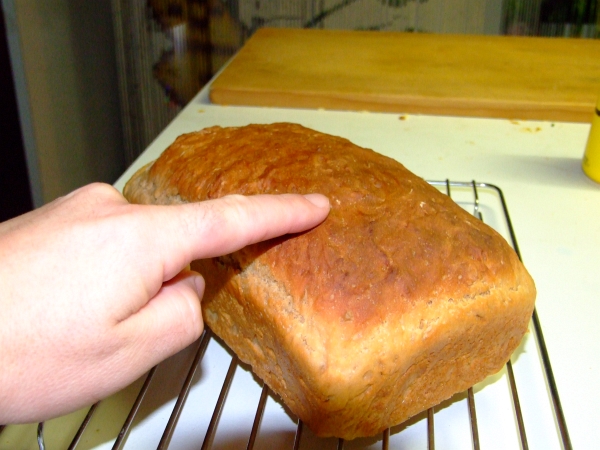

And the texture is ohhhhh so good --along with the apple scent when you slice it!
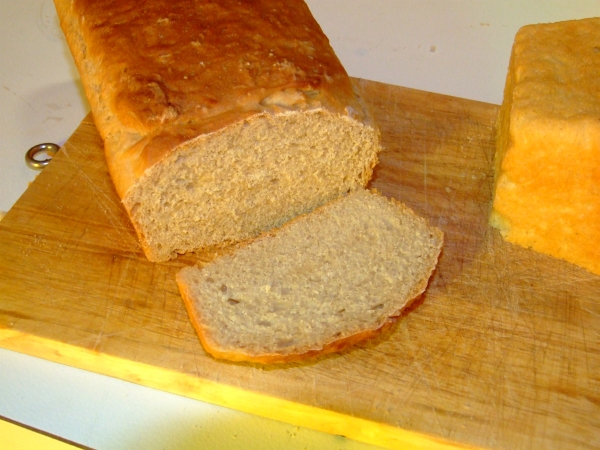
This loaf lasted approximately 12 hours. Gone in a day!
But Dave, I don't homebrew so how can I make this?
Easy. Take some sourdough starter and add a few tbsp of apple sauce to it. Let it sit in a covered (but not tightly sealed, it needs to breathe) container for a couple of days and use it in the recipe where it calls for the yeasty cider sludge. Should be perfect!
But Dave, I don't have any sourdough starter! Help!
No worries. To make sourdough starter all you do is take some leftover mashed spuds, add some water, some flour, some sugar and a bit of yeast. Cover it (but let it breathe and stir a few times per day) and keep it in a warm spot for 3 days --it'll then be nice and bubbly and sour. As far as the amounts go here's a good rule of thumb:
1 medium spud, cooked and mashed
1 cup water
Mix them so you get potato water and then add
1 cup flour
1 tbsp sugar
1 pinch of dry yeast
Easy stuff!
Once your sourdough is ready (3 or 4 days) then add your apple sauce and let it "mingle" for a few days before using.
Yeah, the initial set up may take some time (for the starter) but after that you can make this every day by just keeping some of the starter back to make a fresh batch the next day and then again the next day, etc.
Does this mean I need to make a post about sourdough?
Fadge
Knowing how The Urban Dictionary likes to use obscure words to mean other (usually crude) things, I would not be surprised to find "fadge" in their listings. I, however, don't go there. So whatever crude, vulgar, or slang term you think "fadge" means; just don't even go there. This recipe has nothing to do with whatever The Urban Dictionary thinks it means.
Many of you may know of Irish Fadge. It's a pan fried bread made with leftover mashed potatoes (and various bread type things). This post is nothing like that.
Ok, some of you may be thinking of the fadge made in Durham county using a piece of old bread as a starter (the original sourdough). Close, but no cigar.
This type of fadge is made in the south of Durham County and most of Cleveland County (at least it was a hundred years ago) and the starter is the leftover yeasty sludge from the bottom of your primary beer fermenter tank. If you haven't guessed yet, I'm not talking about Cleveland, Ohio, USA but rather Cleveland County, UK.
I got the idea for making this when I was bottling the latest round and had remembered that Cooper's Brewery down here recycles their yeast. That meant the yeasty sludge from the bottom of the tank must be active!
I then chatted about that with a certain octogenerian I know (from Stockon-on-Tees) and she said, "Oh great! I haven't had fadge in over 60 years!" Hmmmmm, well it should work then!
The first batch didn't turn out well. Firstly it was from a batch of dark ale so it didn't have the colour I was hoping for. Secondly I treated it more like a baking powder bread. It ended up tasty, but was very thick and heavy. Good for frying though.
The second batch was PERFECT! I'd just finished up bottling some apple cider and the yeasty sludge at the bottom was not only the colour I wanted, but it also smelled ohhhhhhhh so apple-y. This time I also decided to treat it as a yeast bread (this was a big DUH moment!) and to write down how much of what I used and the procedure.
Now don't think that you can't make this if you don't homebrew cus I've come up with an idea. It has to do with sourdough so if you are familiar with sourdough baking you can probably guess where I'm going with that.
But I'll tell you about that after I get finished with the recipe. You'll just have to read along and be patient.
DINGO DAVE'S CIDER FADGE
What you need:
6 cups high quality baking flour
1 tsp sea salt
2 tbsp sugar
1 and 1/4 cups yeasty cider sludge
2 tbsp olive oil
1/2 cup water
1/4 cup of flour for dusting and kneading
What you do:
First, let your yeasty cider sludge "age" in a small, covered (but not tightly sealed as it needs to breathe) container for 3 to 5 days. Don't worry if it separates cus it's supposed to. When you take the lid off you'll be hit with a beautiful apple smell. Mmmmmmmmmm! Give it a good stir to recombine it (just like you'd do with sourdough starter).
Now follow the "whut yoo due" directions in my easy white bread post. The only exception is when you are supposed to add the 400 mls of water you instead add the cidery, yeasty, sludgy goodness (plus that extra 1/2 cup of water). Oh yeah: DON'T add any yeast! Just use the ingredients from this post, but the procedure from the Easy White Bread post.
The second rise will take anywhere from one to two hours, so be patient! It's worth it, trust me.
Here's some pics of how the cider fadge turns out:
The crust is nice and soft, not sure if you can tell by these next two shots. The first is with my finger on top of the crust and in the second I've pushed the crust down a half inch and the crust sprung right back:
And the texture is ohhhhh so good --along with the apple scent when you slice it!
This loaf lasted approximately 12 hours. Gone in a day!
But Dave, I don't homebrew so how can I make this?
Easy. Take some sourdough starter and add a few tbsp of apple sauce to it. Let it sit in a covered (but not tightly sealed, it needs to breathe) container for a couple of days and use it in the recipe where it calls for the yeasty cider sludge. Should be perfect!
But Dave, I don't have any sourdough starter! Help!
No worries. To make sourdough starter all you do is take some leftover mashed spuds, add some water, some flour, some sugar and a bit of yeast. Cover it (but let it breathe and stir a few times per day) and keep it in a warm spot for 3 days --it'll then be nice and bubbly and sour. As far as the amounts go here's a good rule of thumb:
1 medium spud, cooked and mashed
1 cup water
Mix them so you get potato water and then add
1 cup flour
1 tbsp sugar
1 pinch of dry yeast
Easy stuff!
Once your sourdough is ready (3 or 4 days) then add your apple sauce and let it "mingle" for a few days before using.
Yeah, the initial set up may take some time (for the starter) but after that you can make this every day by just keeping some of the starter back to make a fresh batch the next day and then again the next day, etc.
Does this mean I need to make a post about sourdough?
Monday, June 8, 2009
Addendum to White Bread Post
My previous post was about how I make the bread for the ole homestead that everyone here loves. I now realise there were one or two thing I've left out. No, not with the basic procedure. Just follow the directions from the previous post and you'll be right.
Rachel (nice lady who cooks wonderful goodies) mentioned she'd like to see a pic of the spongy type bread, and she also was asking about spongecake.
I will, of course, answer the second question first, and the first question second. Just because I can.
Spongecake: I keep forgetting that I've been in Oz for 9 years now. Many of my spellings have become UK standard instead of US standard and I'll be darned if I can figure out which is which nowadays. I also am forgetting whether a term I'm using is an aussie term or something from Alaska.
Hence, spongecake. Think of a cake you've made that has the texture of a sponge. Not soft like an angelfood cake, but has that same texture. Here, maybe this picture will help,
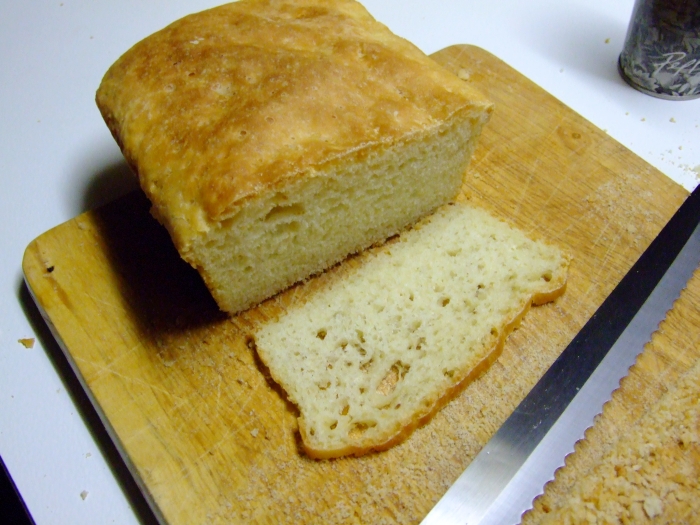
Notice how thin I'm able to slice the bread even though it has a very "airy" texture. This is what you get if you let the bread from the previous post rise for 4 or 5 hours during it's second rise after the punch down. Make sure that you divide the dough into two buttered bread pans, otherwise it'll do a blob-dripping-down-the-side routine.
Reminder, here's what you'll get if you follow last post:

Excellent toasting and sandwich making bread
And this is the airy, spongelike bread you get by dividing in two and letting the second rise go for 5 hours:
Obviously, this spongy bread isn't good for toasting. I tried just to make sure, but it don't toast well. However, it makes the most awesome bread for soup dunkers! It's also great just buttered and eaten. It's not too good for sandwiches; the reasons should be obvious.
But if you want a slice of plain buttered bread or something to dunk in soup, this "takes the cake" if you know what I mean.
Up next: cider fadge! And then how to make great feta cheese!
Rachel (nice lady who cooks wonderful goodies) mentioned she'd like to see a pic of the spongy type bread, and she also was asking about spongecake.
I will, of course, answer the second question first, and the first question second. Just because I can.
Spongecake: I keep forgetting that I've been in Oz for 9 years now. Many of my spellings have become UK standard instead of US standard and I'll be darned if I can figure out which is which nowadays. I also am forgetting whether a term I'm using is an aussie term or something from Alaska.
Hence, spongecake. Think of a cake you've made that has the texture of a sponge. Not soft like an angelfood cake, but has that same texture. Here, maybe this picture will help,
Notice how thin I'm able to slice the bread even though it has a very "airy" texture. This is what you get if you let the bread from the previous post rise for 4 or 5 hours during it's second rise after the punch down. Make sure that you divide the dough into two buttered bread pans, otherwise it'll do a blob-dripping-down-the-side routine.
Reminder, here's what you'll get if you follow last post:
Excellent toasting and sandwich making bread
And this is the airy, spongelike bread you get by dividing in two and letting the second rise go for 5 hours:
Obviously, this spongy bread isn't good for toasting. I tried just to make sure, but it don't toast well. However, it makes the most awesome bread for soup dunkers! It's also great just buttered and eaten. It's not too good for sandwiches; the reasons should be obvious.
But if you want a slice of plain buttered bread or something to dunk in soup, this "takes the cake" if you know what I mean.
Up next: cider fadge! And then how to make great feta cheese!
Friday, June 5, 2009
Easy White Bread
Firstly, let's start with a picture of how the bread is supposed to turn out.
Yeah, looks good! Mmmmmmmmmm... But dave, how do I make it?
This could be the easiest yeast bread you've made; time involved, ease of making, ease of cleaning up, etc. If you've done a bit of bread baking before, you'll quickly notice that this is NOT a standard bread recipe and it doesn't use all the "standard" techniques. But it works nonetheless!
I came up with this myself after doing some experiments. Hey, you never know if something will work till you try. Remember the saying, "From the ashes of disaster grow the roses of success!"
Here I am showing my age again...
Ok, let's get on with it!
Dingo Dave's Easy (and tasty) White Bread
What you need:
One large mixing bowl (the one I use is 13 inches wide (330 mm) at the top
One heat source for baking --I recommend an oven, preferably gas
Sturdy wooden spoon for stirring
One or two 9" by 5" bread pan(s)
Pie dish with some water in it
Ingredients:
4 cups baking flour (minimum 11.9% protein)
1/2 cup flour (for dusting and kneading)
2 tsp sea salt
3 tbsp raw sugar
1 and 1/2 tsp dried yeast
400 ml (1 and 2/3 cups) water
4 tbsp extra virgin olive oil
Whut yoo due:
First, fill your shallow pie dish about half full of water and put it on the bottom rack of your oven. I always do this first so that I don't forget to later on, ahem. What the water does is keep the oven humid so that not matter how dark your bread crust looks, it's nice and soft.
Next, put 4 cups of the baking flour in your large bowl. Remember, your flour should be at least 11.9% protein. Most household flours are anywhere from 9.6% to 10.9% protein and they don't make really awesomely good bread. Just check the nutritional info on the back.
Ho[pefully it'll look something like this:
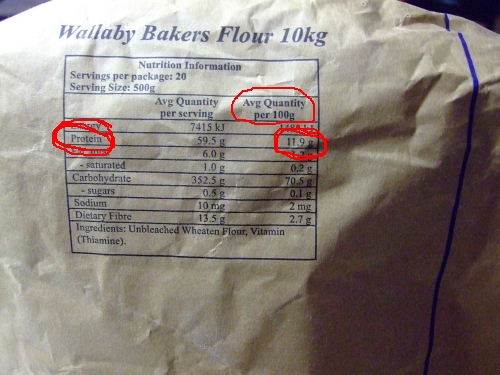
Wallaby Bakers flour is made at Strath, about 30 miles from here. It has one ingredient: Unbleached wheat flour. Gotta like that!
So here's where we are at:
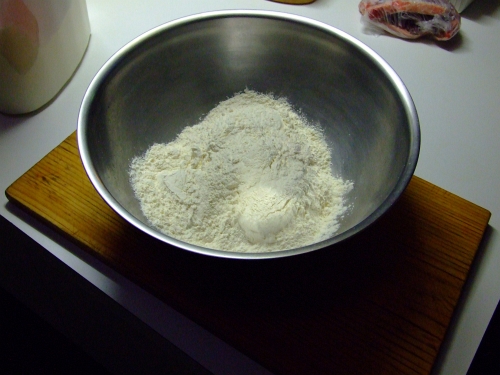
Just ignore that pack of thawing lamb chops in the background...
Now add your sea salt, raw sugar, and dried yeast. Give the bowl a couple of quick tosses to mix things (or use a spoon).
A quick word about dried yeast. If you buy it in large quantities you'd better make sure you use it within a few months. Otherwise your dough rising won't be too good. This size cannister lasts me about 2 months:
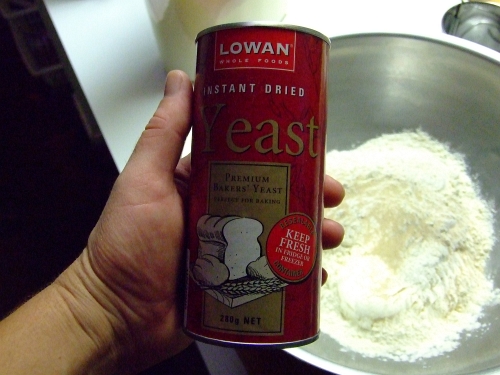
Add your 400 ml of water

And then drizzle the olive oil over the top

Grab your solid wooden spoon and start mixing!
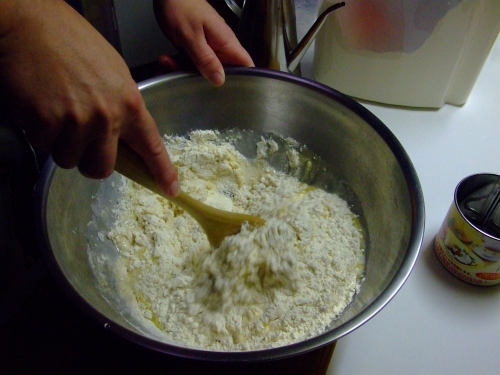
In about 10 seconds it'll start looking like this

Now's the time to turn your oven on high. Don't worry, you'll be turning it off in a minute or two, this is just to get a nice warm place to rise the dough.
Kinda roll the sticky dough around the bowl to get all the stuff off the side
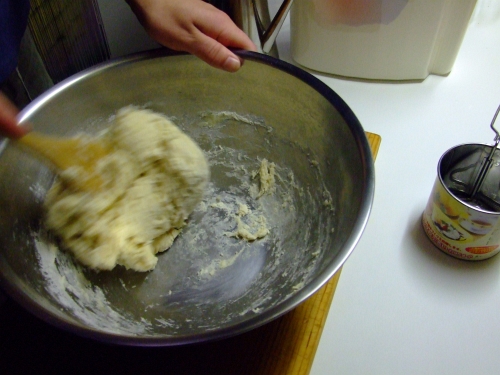
In around 30 seconds your dough should look something like this

Make sure you get all the doughy goodness off the spoon!
Sprinkle some flour on, it looks like I used about 1/2 of a cup
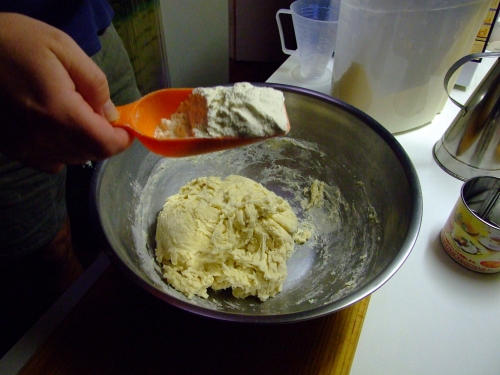
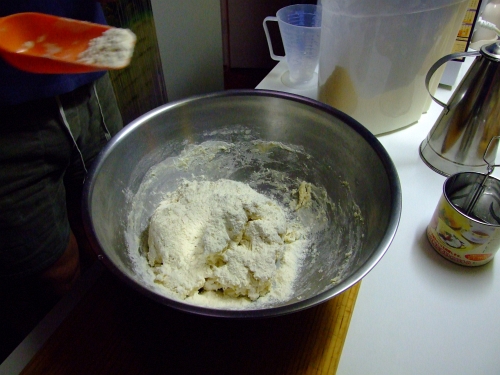
Please note, my orange scoop holds 1/2 a cup
Roll the dough around the bowl to get the dusting flour on it

Now you get to start kneading the dough. Remember, always use the "heel" of your hand to knead. The only time you use your fingers with the dough is just to move the dough towards you so you can knead it again.
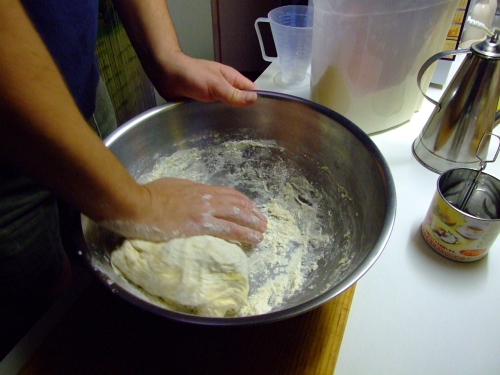
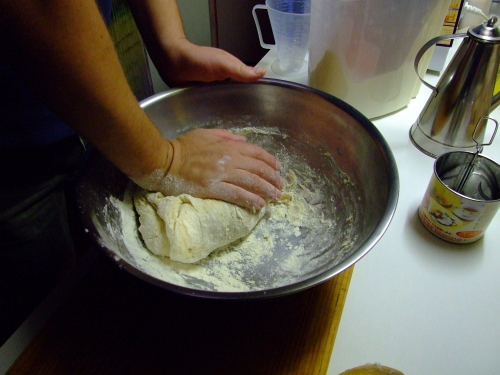
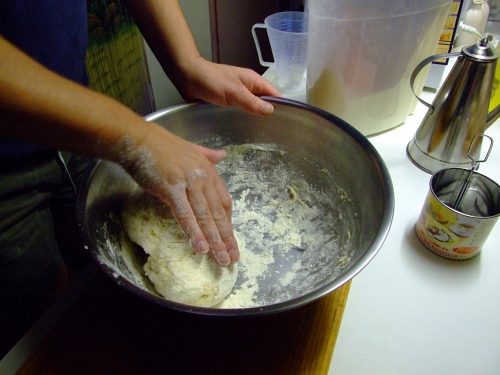
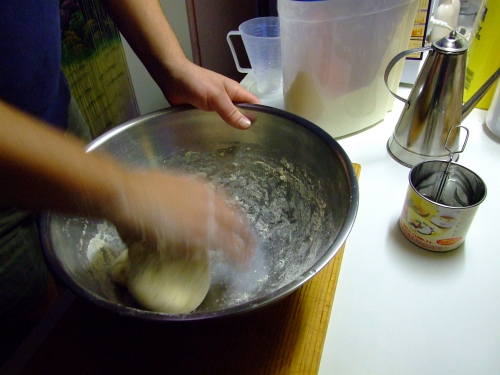

And in less than a minute it'll look like this!
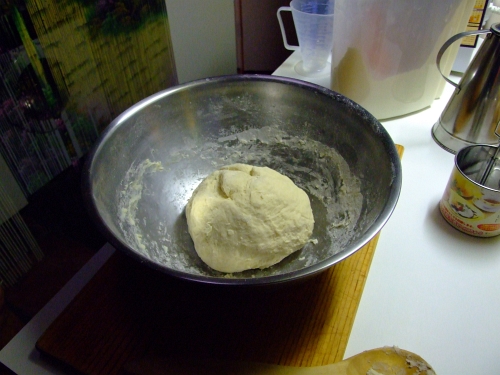
Ok, turn the oven off. It should only have been on for 2 minutes MAX. This is just so there's a nice warm place to rise the dough. You may want to leave the oven door open for a minute if it got too hot.
Now put the bowl in the warm oven. Let it rise for around 90 mins. It should then look like this:
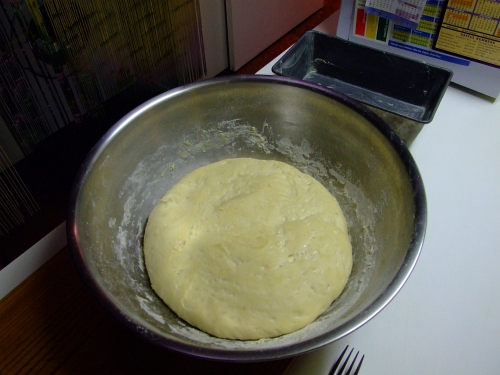
Here's the point where you need to make a decision... do you want one really good loaf (like the pic at the top of this post) or do you want TWO really soft, sponge-cake like loaves?
Let's say you want one. Butter up one bread pan. Just use your finger, no one's looking I promise. You don't need much, maybe 1/2 a tbsp.

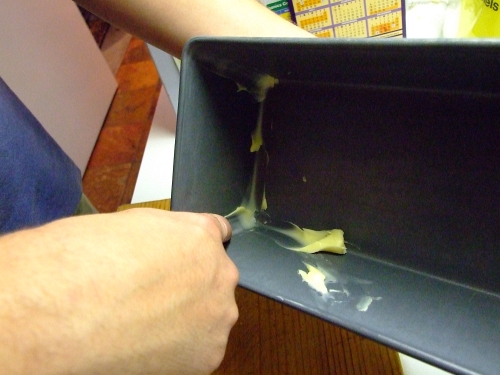
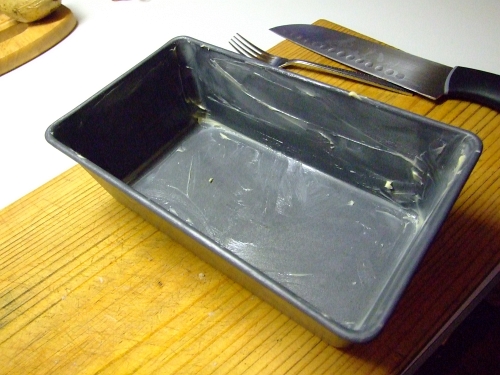
Now is when you get to punch down the dough! Always a fun thing, woo-hoo!
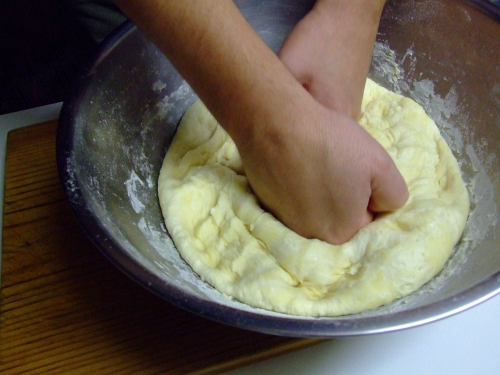
Then gather the dough up (the bottom will be a bit sticky)
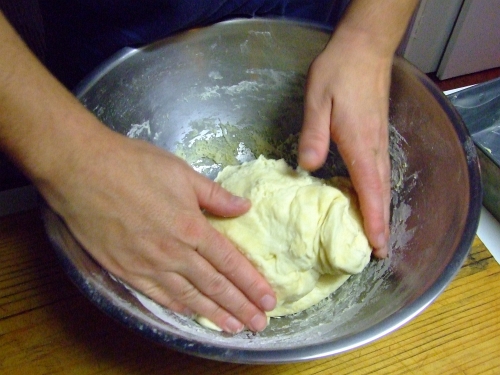
Look! Dough!

Form it into a roughly bread pan shape
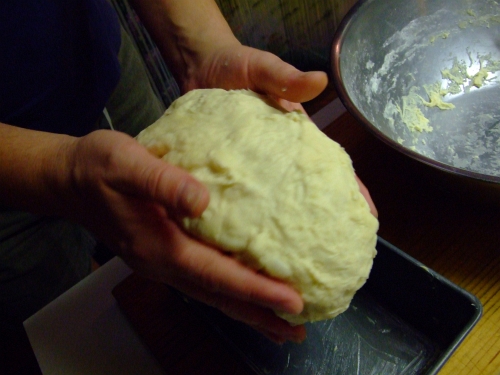
And plop that puppy into the bread pan
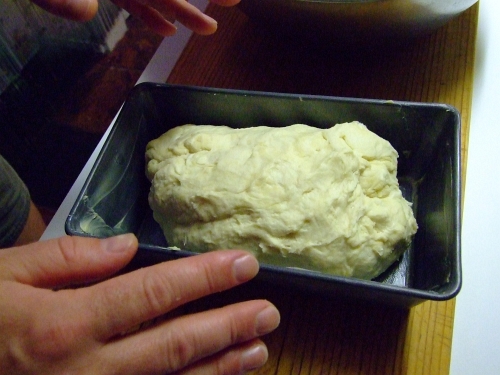
Plop!
Here's another technique that baking purists won't like... Stretch the dough so it forms into the pan
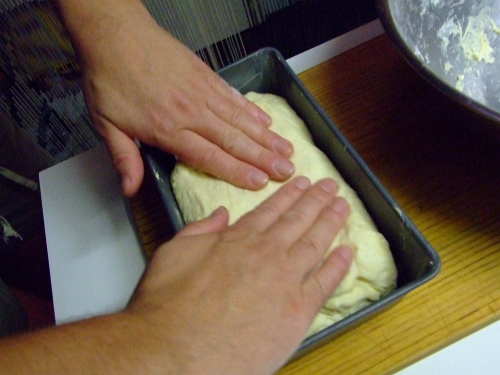
And it'll look something like this
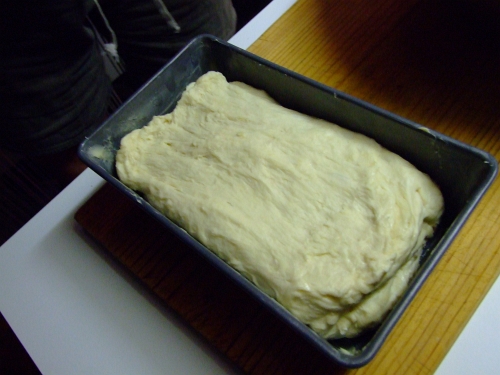
But maybe not as blurry
Put the bread pan into your (hopefully) still warmish oven for the second rise. When the bread reaches the top of the bread pan, then turn the oven on. 180 C (that's 350 F) for 45 minutes should do the trick.
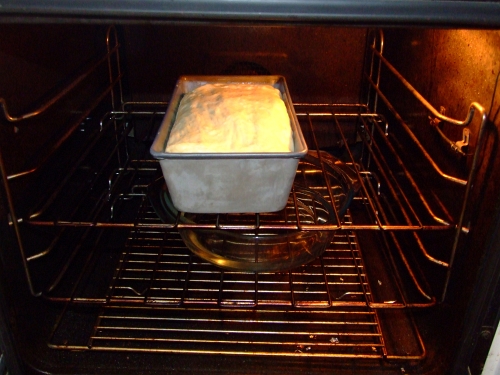
And when it looks like this, it's done! Cool on a rack, then enjoy!
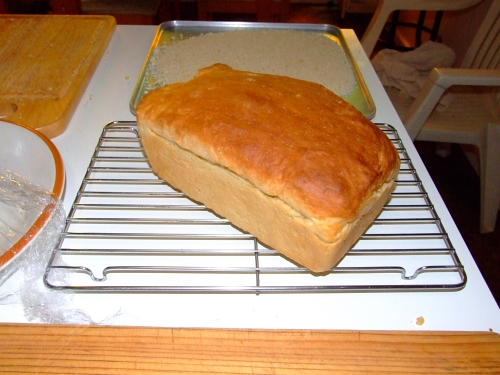
Remember, the top may look crusty, but it's very soft cus of the water in the dish in the bottom of the oven.
Let's say you wanted the two loaf spongy type. Once the dough has risen the first time, butter up two bread pans. After punching the dough down, divide it into two. Shape each into somewhat bread pan size and plop them in. Now, let them rise in a warm place (like the still warm oven) for FOUR OR FIVE HOURS. Then turn the oven to 180 C with the water dish still in the oven. It'll be like spongecake!
I'm sure I'm going to hear from some bakers saying that this is all wrong, but it really does work! Try it.
And clean up is a breeze. Just soak the large mixing bowl in water for a while and then wipe it clean. Ta-da!
Yeah, looks good! Mmmmmmmmmm... But dave, how do I make it?
This could be the easiest yeast bread you've made; time involved, ease of making, ease of cleaning up, etc. If you've done a bit of bread baking before, you'll quickly notice that this is NOT a standard bread recipe and it doesn't use all the "standard" techniques. But it works nonetheless!
I came up with this myself after doing some experiments. Hey, you never know if something will work till you try. Remember the saying, "From the ashes of disaster grow the roses of success!"
Here I am showing my age again...
Ok, let's get on with it!
Dingo Dave's Easy (and tasty) White Bread
What you need:
One large mixing bowl (the one I use is 13 inches wide (330 mm) at the top
One heat source for baking --I recommend an oven, preferably gas
Sturdy wooden spoon for stirring
One or two 9" by 5" bread pan(s)
Pie dish with some water in it
Ingredients:
4 cups baking flour (minimum 11.9% protein)
1/2 cup flour (for dusting and kneading)
2 tsp sea salt
3 tbsp raw sugar
1 and 1/2 tsp dried yeast
400 ml (1 and 2/3 cups) water
4 tbsp extra virgin olive oil
Whut yoo due:
First, fill your shallow pie dish about half full of water and put it on the bottom rack of your oven. I always do this first so that I don't forget to later on, ahem. What the water does is keep the oven humid so that not matter how dark your bread crust looks, it's nice and soft.
Next, put 4 cups of the baking flour in your large bowl. Remember, your flour should be at least 11.9% protein. Most household flours are anywhere from 9.6% to 10.9% protein and they don't make really awesomely good bread. Just check the nutritional info on the back.
Ho[pefully it'll look something like this:
Wallaby Bakers flour is made at Strath, about 30 miles from here. It has one ingredient: Unbleached wheat flour. Gotta like that!
So here's where we are at:
Just ignore that pack of thawing lamb chops in the background...
Now add your sea salt, raw sugar, and dried yeast. Give the bowl a couple of quick tosses to mix things (or use a spoon).
A quick word about dried yeast. If you buy it in large quantities you'd better make sure you use it within a few months. Otherwise your dough rising won't be too good. This size cannister lasts me about 2 months:
Add your 400 ml of water
And then drizzle the olive oil over the top
Grab your solid wooden spoon and start mixing!
In about 10 seconds it'll start looking like this
Now's the time to turn your oven on high. Don't worry, you'll be turning it off in a minute or two, this is just to get a nice warm place to rise the dough.
Kinda roll the sticky dough around the bowl to get all the stuff off the side
In around 30 seconds your dough should look something like this
Make sure you get all the doughy goodness off the spoon!
Sprinkle some flour on, it looks like I used about 1/2 of a cup
Please note, my orange scoop holds 1/2 a cup
Roll the dough around the bowl to get the dusting flour on it
Now you get to start kneading the dough. Remember, always use the "heel" of your hand to knead. The only time you use your fingers with the dough is just to move the dough towards you so you can knead it again.
And in less than a minute it'll look like this!
Ok, turn the oven off. It should only have been on for 2 minutes MAX. This is just so there's a nice warm place to rise the dough. You may want to leave the oven door open for a minute if it got too hot.
Now put the bowl in the warm oven. Let it rise for around 90 mins. It should then look like this:
Here's the point where you need to make a decision... do you want one really good loaf (like the pic at the top of this post) or do you want TWO really soft, sponge-cake like loaves?
Let's say you want one. Butter up one bread pan. Just use your finger, no one's looking I promise. You don't need much, maybe 1/2 a tbsp.
Now is when you get to punch down the dough! Always a fun thing, woo-hoo!
Then gather the dough up (the bottom will be a bit sticky)
Look! Dough!
Form it into a roughly bread pan shape
And plop that puppy into the bread pan
Plop!
Here's another technique that baking purists won't like... Stretch the dough so it forms into the pan
And it'll look something like this
But maybe not as blurry
Put the bread pan into your (hopefully) still warmish oven for the second rise. When the bread reaches the top of the bread pan, then turn the oven on. 180 C (that's 350 F) for 45 minutes should do the trick.
And when it looks like this, it's done! Cool on a rack, then enjoy!
Remember, the top may look crusty, but it's very soft cus of the water in the dish in the bottom of the oven.
Let's say you wanted the two loaf spongy type. Once the dough has risen the first time, butter up two bread pans. After punching the dough down, divide it into two. Shape each into somewhat bread pan size and plop them in. Now, let them rise in a warm place (like the still warm oven) for FOUR OR FIVE HOURS. Then turn the oven to 180 C with the water dish still in the oven. It'll be like spongecake!
I'm sure I'm going to hear from some bakers saying that this is all wrong, but it really does work! Try it.
And clean up is a breeze. Just soak the large mixing bowl in water for a while and then wipe it clean. Ta-da!
Subscribe to:
Posts (Atom)