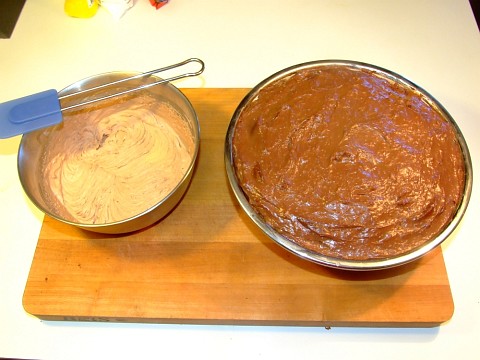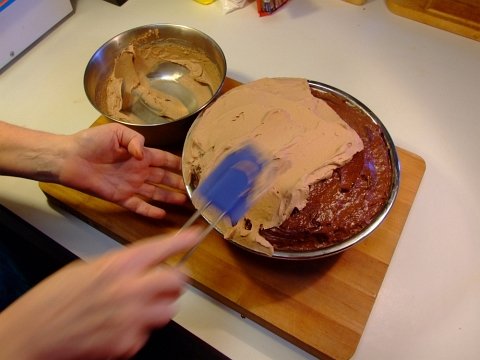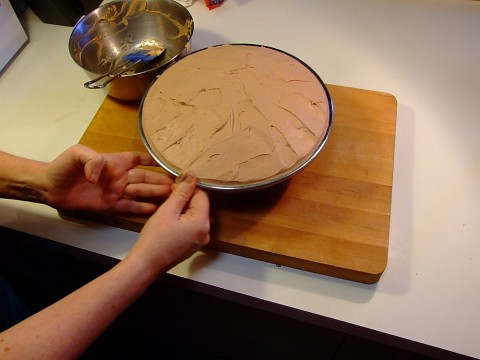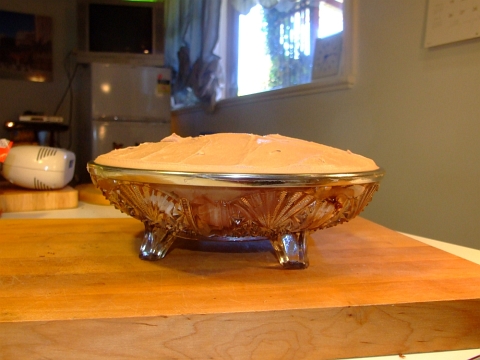
Showing posts with label dessert. Show all posts

Sunday, April 29, 2012

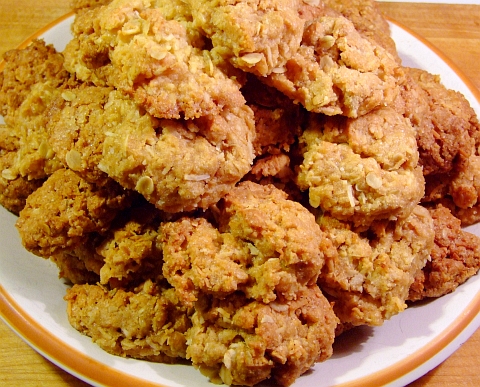
ANZAC Biscuits

DSCF0023

Dang, I wanted to write up the recipe for the onion/garlic gratin I made last night, but I realised I'd better get this ANZAC bikkie recipe up before it gets even FARTHER past ANZAC Day.

Me? Procrastinate? Nevah!

A quick notice to my American readers; biscuits do NOT mean what you think they mean. Down here in Oz (and in the UK) bikkies (slang for biscuits) are what Americans know as "cookies". And what Americans know as "biscuits" are what Aussies (and POMS) know as "scones".

Yes, the first time I told the family down here I was making Biscuits n Gravy for dinner I received some rather peculiar looks.

So if you are in the US, think of these as ANZAC cookies!

And for you longtime Aussies, these are NOT the hard, break-your-teeth, thin bikkies that are still in an "edible" state after almost 100 years. These are soft, chewy, delectable bikkies that won't last 100 minutes as they will all be devoured as soon as they are cooled!

I found this recipe in a mailer from me local member of Parliament regarding the ANZAC celebrations. It was originally credited to a certain Mr Bob Lawson who was at the landing in Gallipoli all those yonks ago.

I'm guessing that Bob was a cook with the ANZACs and wanted to come up with a slightly more palatable version of the ANZAC wafers they were being served. A bikkie that could perhaps be used for something besides scrapping mud off the bottom of you boot perhaps.

The recipe didn't specify what type of sugar to use so I, of course as always, used raw sugar. That's probably more in keeping with the times back then than today's highly refined gunk referred to as "sugar".

Even if you don't like coconut or oats in your bikkies (cookies) make sure you include them as these are the most absolutely BESTEST tasting cookies or bikkies EVAH!

ANZAC bikkies (cookies)

What you need to make 25 to 30 bikkies:
1 cup flour
1 cup raw sugar
1 cup rolled oats
1 cup shredded, dessicated (fancy word for "dried") coconut

1/2 stick of slightly softened butter --no, DO NOT use margarine!
1 tbsp golden syrup (treacle) You can use molasses, but DO NOT use corn syrup!

2 tbsp boiling water (H2O)
1 tsp bi-carb (baking soda)

What you do:
Grease up a coupla baking sheets. I use butter. Preheat your oven to 180C which is about 356F.

Stir the dry stuff together in a mixing bowl. That's the first four (4) ingredients on the list.

In a separate bowl, mix the butter and golden syrup together. A large spoon should do the trick nicely.

Combine the boiling water with the bi-carb then immediately add to the butter/syrup mix. Stir quickly to combine.

Pour the contents of the butter etc mix into the bowl that has the dry ingredients. Mix with a strong, solid wooden spoon. Feel free to drizzle in a bit of hot water if it's too dry.

Grab a ping-pong sized ball of dough and plop it on a buttered baking tray. Continue till all the dough is on the trays. Make sure you leave plenty of room for spreading as these will soften and spread.

Bake for 10 to 12 minutes. When they start to brown around the edges they'll be done. Remove the trays from the oven and let the bikkies cool for about 10 minutes before you put them on a cooling rack. Trust me on that!

These bikkies are powerhouses of calories and energy! Seriously, if you aren't going on a 200 km bike ride immediately then I wouldn't suggest eating more than 2 or 3 at a time. Of course the fact that they taste sooo darned delicious may make that difficult!


DSCF0023
Full disclaimer: I had 13 of these for dessert the day I first made them. Ummmm, I didn't need to eat the next day, that's for sure!

Friday, October 14, 2011

Sticky Fingers Dessert! A Happy Accident!

Sometimes you do something in the kitchen without thinking about it and you end up with something miraculous. Usually this doesn't happen, but this happened to be one of those times when it did! So I'll share it with you, no worries.

Side note: I AM the Iron Chef of leftovers, as you'll soon see.

A few days ago I made my Award Winning* Beer Batter Waffles. I made enough so that there'd be some for lunch the next day.

I had forgotten that BIL would be out the next day and that MIL doesn't usually eat large lunches. I had some batter LeftOver! No dramas though, this is the point where I cook it all up in the waffle iron, chuck the finished ones in the freezer, then use em in the toaster for brekkie for the week.

This time though, I needed the large mixing bowl the batter was in to make The Dish that crowned me Iron Chef of Leftovers and I had already put the waffle iron away.

I casually reached into the cupboard and pulled out the first thing I found that would hold waffle batter. It happened to be a 9 inch diameter glass pie dish! No worries, poured in the batter, rinsed the bowl and proceeded to make The Dish.

Later on I puzzled over the fact that the waffle batter was in a pie dish. Hmmmm, I hadn't buttered the dish, no crust, and there wasn't too much --about 1.5 cm or just over 1/2 inch.

"I wonder how it'll bake like this," I thought. Next thing I knew I had chucked it into a cold oven, turned the heat to 180 C (350F) and went on to other tasks... completely forgetting to set a timer.

tick

tock

45 minutes go by and I notice a nice odor emanating from the cooker! Ah, memory is jogged!

As I took the waffle pie out of the oven I notice it had (quite predictably) foofed up whilst baking. I left it in the dish, set it on a cutting board, and continued with whatever it was I was doing.

In 10 minutes it had fallen back down to level. "Hmmmmm, maybe if I dust it with icing sugar they might actually eat it," I thought.

dust

dust

dust

cool

cool

cool

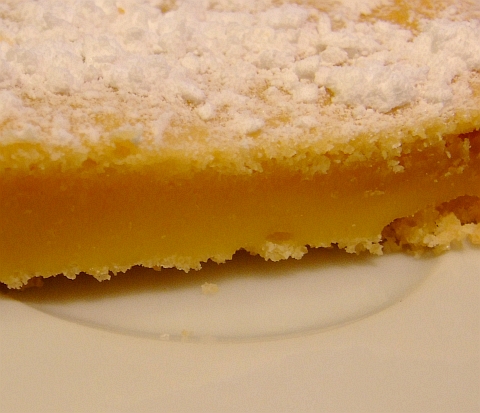
When it came time for dishing it up for dessert, it was very easy to cut, had a cheesecake-like texture, and had formed it's own bottom and top "crust"! See, here's proof:
DSCF6943


When Wifey-Poo saw it she said it'd be perfect with some maple syrup and cream on top! Ummmm, yes dear, that's exactly what I had in mind.**

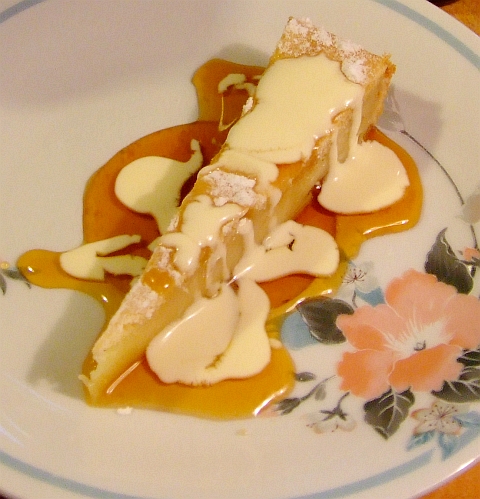
So the beer batter waffle pie (which had been previously dusted with icing sugar) was cut into thin wedges and then had maple syrup and fresh cream drizzled over it.

Sticky Fingers Dessert was born!
DSCF6869


Yes, it tasted even better than it looks!

*dave is lying his *ss off, but they are darned good tucka!

**quick thinking on my part mates!


Stay tuned to this channel as next time dave learns how to boil water!

Sunday, April 17, 2011

Dave's Decadent Death By Chocolate Cake

So what makes this cake so special? I mean BESIDES the fact that I made it? Heck, it even uses a standard off-the-shelf cake mix as the Base! What make this special is the add-ons and various wonderful chocolaty "things" you do to this cake.
Like adding a bunch of chocolate drops to the chocolate fudge cake batter before baking. *drool*

There will be pictures, no worries. This is not one of my most photogenic creations, but it ranks waaaaaaaay up there on the taste scale! And the chocolate scale.
What you need:

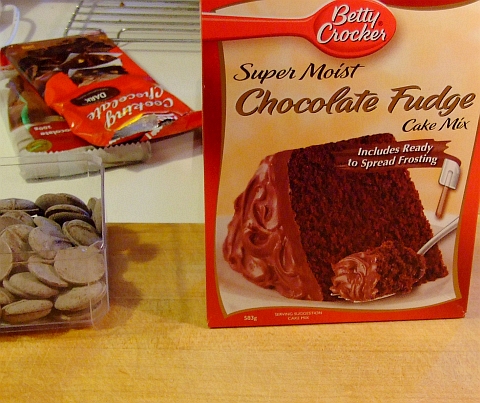
One box of Betty Crocker Super Moist Chocolate Fudge Cake Mix
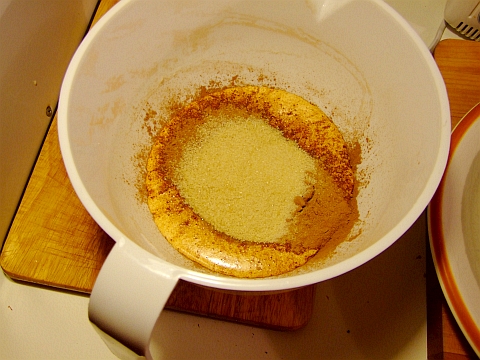
1/2 cup of chocolate melts -see the first picture

1 cup heavy whipping cream
1/4 cup raw sugar
1/3 cup cocoa powder

1 bar (375 grams or 12 oz) dark cooking chocolate
1 tbsp butter
1/3 cup of cream

You'll also need some sort of oven-like heating device, I'd suggest using an actual oven. Don't forget a cooling rack, and a LONG bread knife.


What you do:

Firstly, you'll want to make the cake mix according to the directions, pour it into a circular baking dish, but DON'T put it in the oven yet. This is the EXACT kind of cake mix you want:
dbc01


Do you see those chocolate drops to the left in the above picture? You do? Good! Now take about 20 or 30 or them and carefully put them into the batter you've already poured into the baking dish. You want to insert them vertically so they don't float on the top. What happens when the cake is baking the melts don't fully "diffuse" through the cake so that when the cake cools you have a whole bunch of "nuggets" of chocolate throughout the cake!

When the cake is done --ALWAYS test it with a skewer, NEVER trust the time on the directions-- take it out and put it on the cooling rack. Let it cool for hours. You don't want any heat left in it at all.

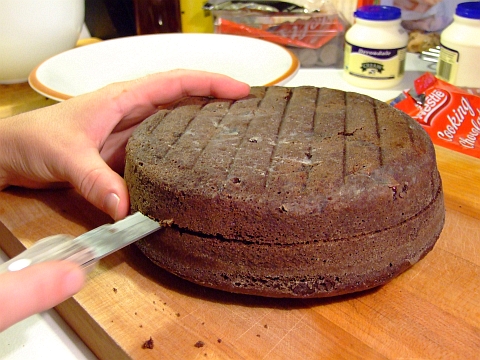
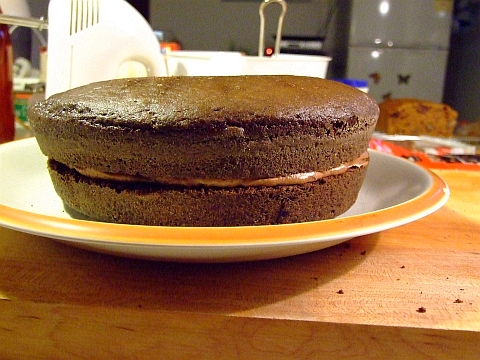
Once it is completely cooled off, you want to slice the cake in half horizontally. Make sure you use a long, serated bread knife and don't be in a hurry. Remember, you'll encounter pockets of chocolate from the drops you put in the mix.
dbc02


Now you want to make the chocolate cream! Add the 1 cup heavy whipping cream,1/4 cup raw sugar,1/3 cup cocoa powder to a mixing bowl and whip it up with you electric beaters till it's stiff.
dbc03


Put 1/3 to 1/2 of the stiff, chocolate cream betwixt the cake layers thusly:
dbc04
I'm sure you can figure out the process yourselves.

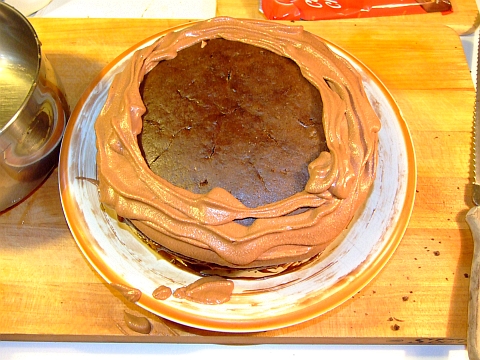
Oh, remember that bit of "icing" that came with the cake mix? Slather it around the sides of the cake, there will not be enough for more than that.

Next you want to slather on the rest of the cream around the top edge of the cake. Don't worry if it doesn't look all "showy" as all you really want is a lip so the sauce (next step) doesn't drain off.
dbc05


Now put it in the fridge to chill of 30 mins or so.

Is it chilled yet? Good, time to make the chocolate sauce. You may note that this sauce has different amounts of butter and cream in it from my usual ones as I want this to firm up and almost harden upon cooling.

And no, you don't need a double boiler. A small, thick bottomed NON-COATED stainless steel saucepan works perfectly fine.

Add the last 3 ingredients into your saucepan. That'd be
1 bar (375 grams or 12 oz) dark cooking chocolate
1 tbsp butter
1/3 cup of cream
and put it on your lowest heat. Whisk everything together whilst everything melts together. This really should only take 3 mins at the most. Once everything is just melted, turn the heat off and continue to whisk for another minute.

Set the saucepan aside for 5 minutes or so till the sauce is partially cooled yet still pour-able.

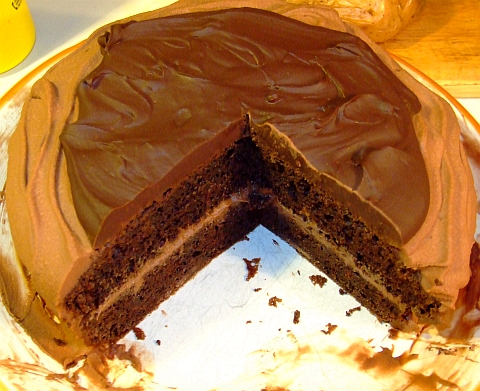
Take the cake out of the fridge and slowly pour the chocolate sauce over the top. Put it back in the fridge. When the sauce on the top is firmed up (30 to 45 mins), then call it DONE!

Slice it and serve it!

dbc06


Your taste buds will thank you for making this. Your waistline may not. You've been warned.

As a variation you can make more of the choc sauce and less of the choc cream and use the choc sauce as the layer betwixt the cake halves. I think I'll do that next time.

Friday, December 31, 2010

Satan's Trifle

Oh yes. The many folks on twitter and various blogs have been BEGGING me to post the how to for to make it.

Satan's Trifle.

Firstly, let me give full acknowledgment for the name to one of my twitter followers, Michelle Rodriguez.

Nextly, to my wonderful Wifey-Poo for coming up with the idea.

And finally, thanks to all of you for letting me string you along for a week as you wonder about this wonderful dessert.

Does anyone like chocolate? Does anyone like cherries? Does anyone like Baileys? If you answered, "Hell yeah!" to all of those queries then you'll love this trifle.

Wife and I came up with this as we were perusing the pantry trying to find trifle fixin's. We saw that if we made it all chocolate then we'd have everything 'cept the chocolate sponge roll. Poof! Idea was born!

Please note, I used Father O'Leary's instead of Baileys as O'Leary's is better. And Australian. So there.

And a last note, if you don't feel confident making your own chocolate custard (it is easy, trust me) then you can use a choc custard or choc pudding mix but you've got to make it THICK. Very thick.

Last note... I never measure for this type of dessert, but I did measure for the custard. You're welcome. For those of you who normally make your own custard, the amounts will seem "off". That's ok, it's is supposed to be very thick and set like chocolate concrete.

On with the show, cus the show must go on.

Satan's Trifle

What you need:
One chocolate sponge cake roll (see pictures)
Father O'Leary's Velvet Cream --or Baileys
Cornflour --cornstarch to you North Americans
Large bar of dark cooking chocolate
Skim milk powder --I usually use full cream milk powder
200 grams of pitted, halved, fresh cherries
milk chocolate melts
raw sugar
thickened whipping cream
drinking chocolate OR 100% cocoa powder plus confectionery sugar

Now doesn't that just put POUNDS on your middle? Ohhhhhhhhh... Yeaaaaaaaaaah!

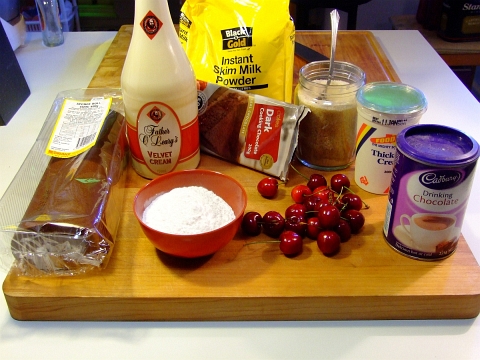
Here's the assembled goodies:
trifle ingredients


Lastly, you may want to use a trifle dish. You can't use mine as it's from the 1890's and is leaded crystal. It also has a big crack in it from MIL's mum. See, me granmum-in-law was kind of a dill in the kitchen and she had inherited this trifle dish from her mum. She thought cleaning it with boiling water after just serving up a cold trifle in it would be a good thing. Sigh.

But if you can't get a trifle dish, then use a large plate and make SURE the chocolate custard is very thick. Like mortar consistency thick.

What you do:

This particular "what you do" will be picture orientated as I know you all likes piccies. Food piccies, of course.

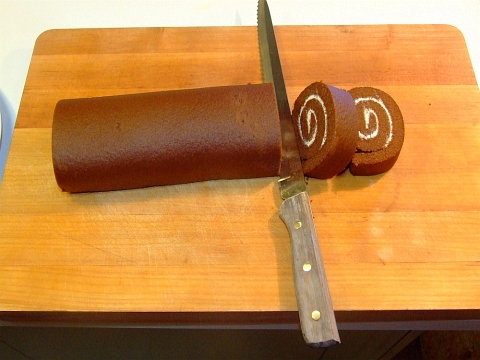
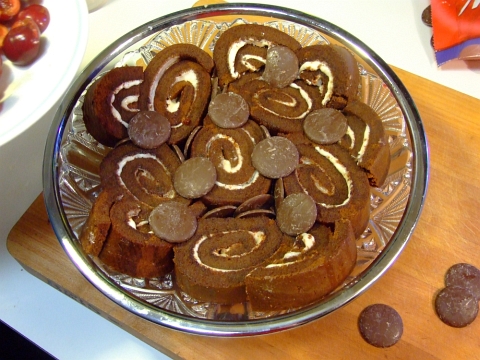
The first thing is to slice the chocolate sponge roll into one inch thick slices. Thusly,
trifle01
Yes, that is a 50 year old Pierre Santini bread knife, thankyouverymuch.


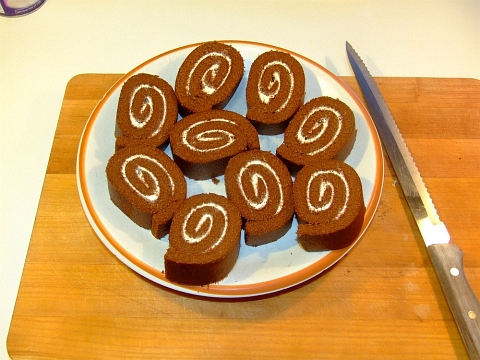
At this point you want to lay the slices out flat on a plate...
trifle02
and put them in a very warm place to dry out for an hour or two. Being in Oz, that means I just put em outside in the sun for a few minutes.

The reason you want the slices to dry out is so that when you saturate the slices with O'Leary's it (being the Baileys) doesn't cause the chocolate sponge cake to go mushy. If you aren't sure what I'm talking about, just trust me and dry out the slices, 'k?

Whilst the slabs of chocolate sponge cake roll are drying, you'll want to make the chocolate custard. If you choose to use packet mixes of chocolate pudding or chocolate custard, then you are excused from looking at the next few pics. Just make sure you make your custard THICK!

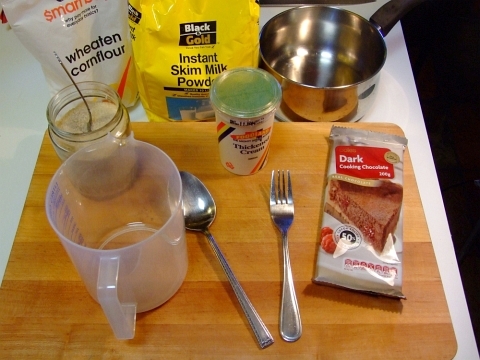
Now, let's assemble the stuff for the chocolate custard. That'd be raw sugar, cornflour (cornstarch), milk powder, thickened whipping cream, and dark cooking chocolate.
trifle03p
And a thick bottomed steel saucepan.

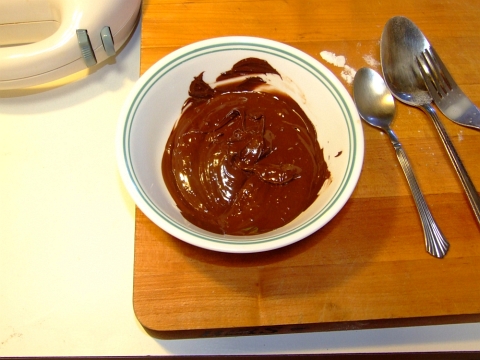
First, melt 100 grams dark cooking chocolate. You can use a double boiler, but I usually use a microwave on low.
trifle04


To make the really thick chocolate custard do this:
to 1 and 3/4 cup water (H2O), mix in
8 tbsp cornflour (cornstarch)
5 tbsp raw sugar
7 tbsp skim milk powder (or full cream, your choice)

Whisk it all together THOROUGHLY!

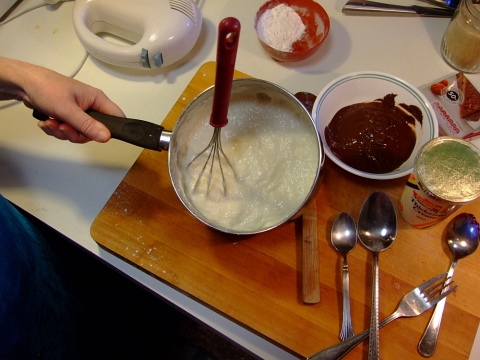
Heat it in your thick bottomed saucepan whilst whisking the whole time. It will, not surprisingly, thicken up till the whisk stands up!
trifle05


Once it starts to really thicken, you obviously want to take it off the heat and let the heat from the pan base do the rest. At this point, it'll be close to concrete like consistency and you'll have thought you ruined it. No, you didn't.

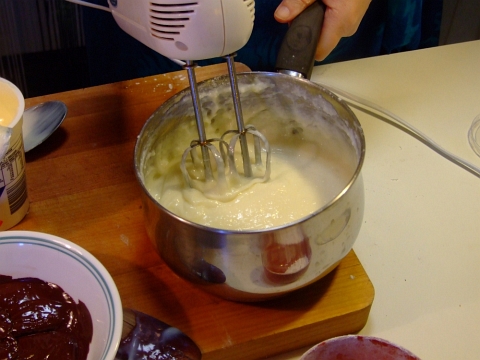
Now, to that pan add 1/2 cup thickened whipping cream plus 2 tbsp icing sugar and beat like crazy! I recommend an electric beater.
trifle06


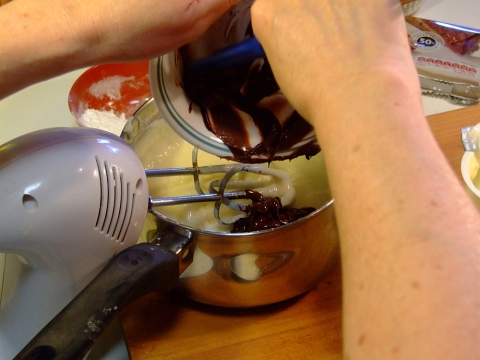
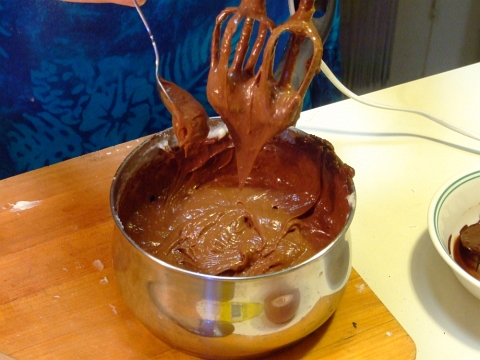
Then add the melted chocolate as the electric beaters do their thing!
trifle07


You should (fingers crossed) end up with a chocolately custard of a consistency like thus:
trifle08


It really does only take ten minutes to make the custard, and no fridge setting time either. I much prefer this to using the pre-made powder packets.

Getting back to the trifle.

Spread your semi-dried slabs of chocolate sponge roll onto your trifle dish. Feel free to cut some of them in half so they all fit nicely into the dish:
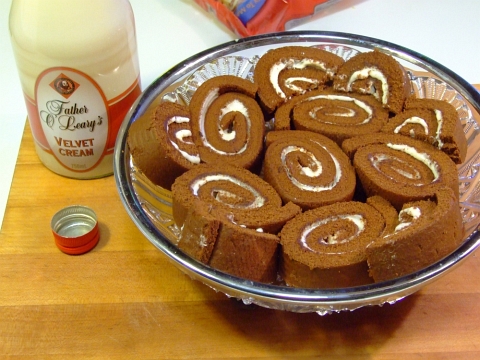
trifle09


Didja notice that bottle next to the dish? Of course you did. Next pour at least 1 cup of Baileys or O'Leary's over the slices.
trifle10
You'll be quite happy you dried the slices, otherwise the liquid would turn the whole thing into mush at this point. And you don't want that!

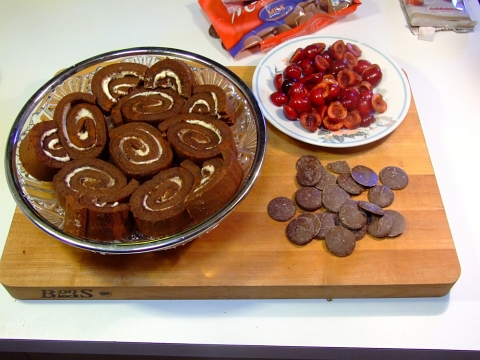
Remember those chocolate melts and the cherries?
trifle11


First, fill all the gaps betwixt the chocolate cake slices with chocolate melts. Then layer a few on top just for the heck of it!
trifle12


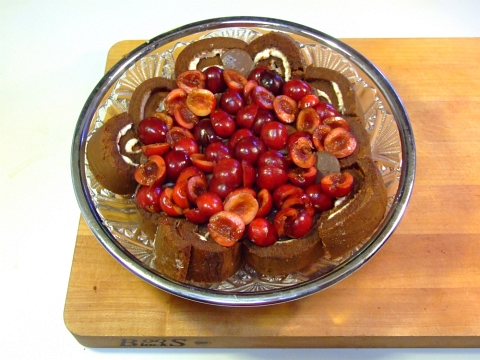
Your delicious, fresh, pitted, sliced cherries go on next:
trifle13


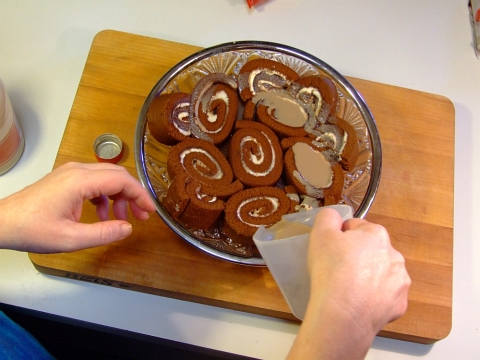
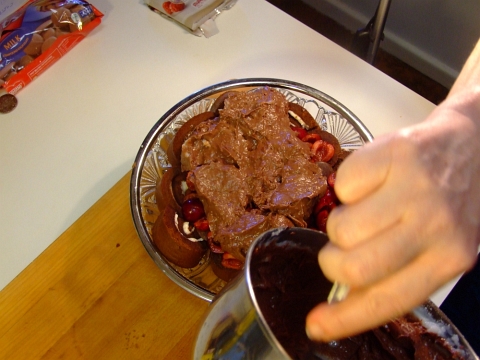
Now it's time to start packin' that chocolate custard on!
trifle14


As you are packing on the custard, you want to make sure it gets into all the gaps. Cus when you put this baby into the fridge to set, you'll have chocolate mortar betwixt the chocolate cake bricks!

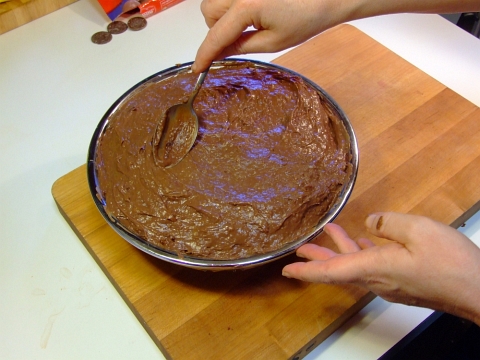
Smooth all the custard out till it looks all purdy like.
trifle15


Now it's time to make the chocolate whipped cream. If you are using "drinking chocolate" then add a 4 tbsp to 300 mls (that's one cup plus a bit) cream. Then beat with your electric beaters till "stiff peaks form". If you are using cocoa powder and icing sugar, then use a tbsp or two of each, no worries.

Your chocolate whipped cream should now look thusly:
trifle16


Not even sure if I need to tell you this next step, but go ahead and start slathering that chocolate cream over the chocolate custard which itself covers the cherries, chocolate melts, and chocolate cake.
trifle17


Don't forget to clean up the edges for presentation purposes!trifle18


At this point, your Satan's Trifle should look something similar to this:
trifle19


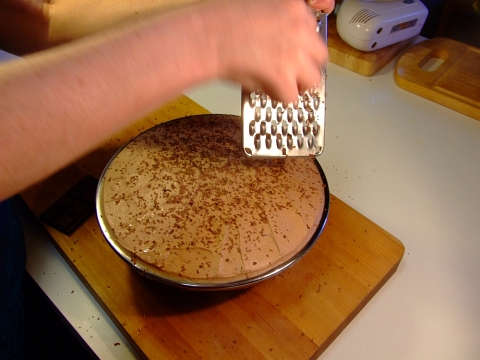
But we aren't done yet! Remember that other half of your bar of dark cooking chocolate? Good, you do. Go grab it and grab a cheese grater.
trifle20


Ladies and Gentlemen... Start your grating!
trifle21


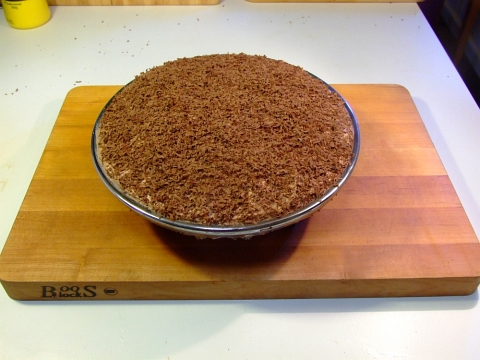
And don't stop grating till you are out of chocolate and your Satan's Trifle looks like THIS!
trifle22


Chill that baby in the fridge for a few hours, then ENJOY!

It took 4 of us 3 days to finish this. It is rather... rich.

Disclaimer: blog author is not responsible for pimples, heart palpitations, sugar highs, or anything else you can damned well think of. So there.

Sunday, August 15, 2010

Bacon Wrapped Bananas with Chocolate Sauce

And doesn't that just sound AWESOMELY delicious? I know it does "it" for me! Seriously, what dish can't be improved by adding bacon?

I got the idea for this from a yoga teacher in New Zealand who has a cool food blog called Couscous & Consciousness. In one of her posts she asked folks about what trio or trios of food combination go well together. One of the ones I mentioned was bacon wrapped chocolate that gets battered and deep-fried. She thought it sounded ok but suggested some with bananas to go along with the bacon and chocolate.

Hence, this beauty of a recipe was born!

I made it last night, we all loved it. And that includes BIL who has a very fussy palate. In fact, he licked the plate clean!

Dingo Dave's Original Bacon Wrapped Bananas with Chocolate sauce with thanks to Couscous & Consciousness for inspiration.

What you need:

For the bananas and bacon:
One banana per person
1 to 3 slices of bacon per banana depending on size of slice

For the chocolate sauce:
175 grams of dark chocolate --that's 6.141592654 or pi+3 ounces
2 heaping tbsp butter
1/3 cup cream
1/4 cup cream port (or regular port, or a sherry variety)
1/4 tsp cinnamon powder
1/8 tsp cayenne powder (I usually double or triple this, but that's for when it's just me)

What you do:

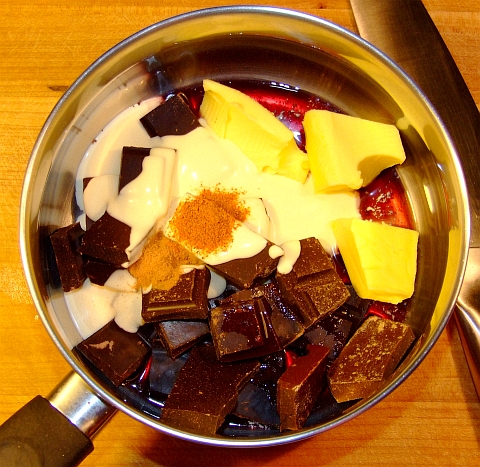
Put everything for the chocolate sauce in a small, thick-bottomed saucepan. Your saucepan should now look like this:
stuff for chocolate sauce


Put the saucepan on the lowest heat possible and stir or whisk it while it heats. Make sure nothing sticks to the bottom and that it's well mixed. This should only take a couple of minutes.

Turn the heat off and cover it.

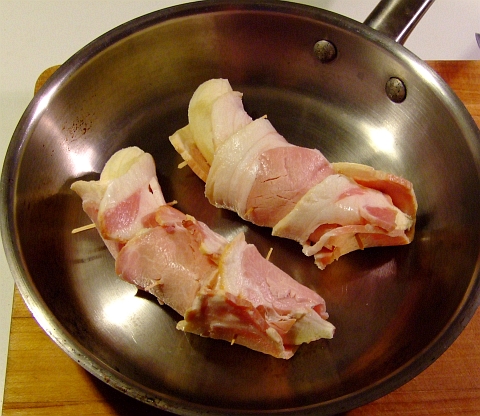
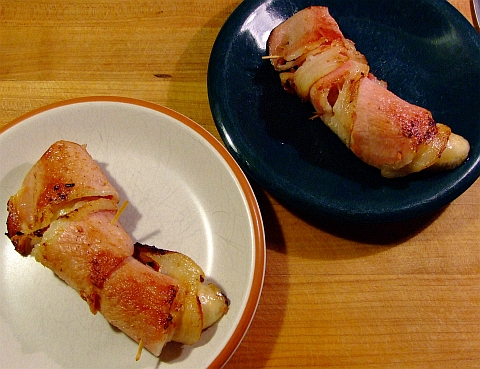
Now to assemble the bacon and bananas. Ummmmmm, this is pretty simple, just wrap the bacon around the bananas. If you need to secure the bacon with toothpicks the go for it.
bacon wrapped bananas raw


Then cook them till the bacon is done to your liking. Be gentle when turning them as you don't want to bananas to break apart.
bacon wrapped bananas cooked


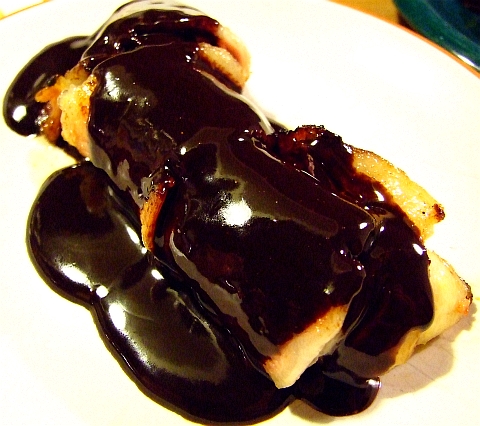
Remove the toothpicks if you used them and liberally ladle the sauce on top!
bacon wrapped bananas with chocolate sauce
Notice how I used one dark plate and one light plate so that the color balance in the photo is way off? Yeah, I did that on purpose. Maybe.

And the obligatory closeup:
bacon wrapped bananas with chocolate sauce closeup


Use a sharp knife and a fork for eating. Why a sharp knife? So that you don't mush down the banana as you cut a piece.

You'll have lots of leftover sauce, I'm sure you'll think of some use for it.

Oh, next time I'm going to roll the bananas in brown sugar before wrapping the bacon around them!

Monday, June 14, 2010

Easy chocolate sauce

Yes I know I've written quite a few posts that involve chocolate (food of the Gods) sauce, but I thought I'd sorta consolidate them. Maybe give some tips, tricks, what goes well in it, etc.

The basic chocolate sauce has just three things: dark chocolate, butter, and cream. The less cream and butter, the thicker the sauce will be and if you only use a tiny amount of each then it'll harden upon cooling --great for things like chocolate coated strawberries. Or pretty much ANYTHING you want to chocolate coat (^_^)!

And the best thing is that you DO NOT NEED A DOUBLE BOILER! And it's quick too. You will need a thick-bottomed saucepan though so if you don't have one then go run out to the shops right now and get one.

I'll start with the basic sauce, and then talk about the various additions you can, ummm, add.

The basic chocolate sauce (this makes A LOT):

What you need:
One bar (375 grams or 12 ounces) of dark cooking chocolate
3 tbsp butter
1 cup cream

This'll make a sauce that is liquid at room temp, but thicker than motor oil. If you want a thicker sauce, just use less cream and less butter.


What you do:

Break the chocolate bar into pieces and put them all into your saucepan. Add the butter and the cream. Turn on the heat to low. Give it a stir to mix things well. Once the chocolate starts to melt, then take out a whisk and start whisking it. Almost continuously, in fact.

Once all the chocolate is melted and everything is thoroughly incorporated together, turn the heat off and continue whisking for another 30 seconds or so. Make sure you get to the bottom of the saucepan during the whisking so nothing burns.

Ta-da! Done! The whole process should have taken 2 or 3 minutes.

Now comes the FUN part! What you can add and when you should add it.

Substitute half the cream with a dark red wine like shiraz. Add at the same time as the cream, of course.

1 tsp of cinnamon powder and a half tsp cayenne powder. Add while whisking. Taste it afterwards and add more of either if you wish, no worries.

Cumin powder and cardamom powder go well too!

If you want it slightly tart, add some ground sumac.

Hard to go past ginger powder too.

My point is, the possibilities for flavorings are endless. I can tell you for a fact that the cinnamon and cayenne combo is wonderful! I'm still experimenting with the others to find the best combos that suit my palette.

So have some fun and experiment! Heck, make a batch of standard sauce and then divvy it up into bowls and mix different spices into each. Just make sure you write down which spices went into which bowl. And be sure to let me know what combinations of spices you find that are really good!

Sunday, January 3, 2010

How To Make A Charlotte Russe

It's not that there's anything particularly difficult about making a charlotte russe, nor is it very expensive. It has more to do with the time --there's a lot of fridge time while parts of it "set", and the actual construction of it.

It's worth the time though. Drool...

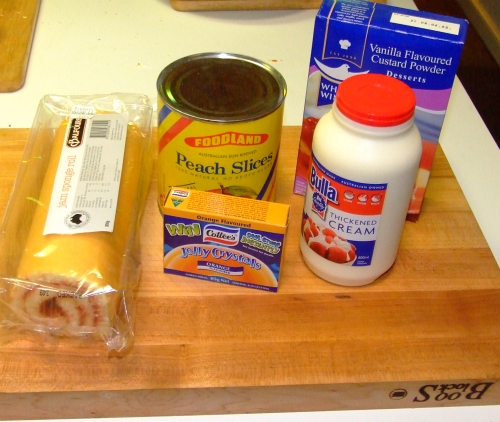
All you need is a bit of jello mix, some whipping cream, custard powder mix, and a swiss roll (commonly called a jam sponge roll).

This is all you need:
charlotte rouse 01


The first thing you do is mix your jello according to the package instructions. And then let it cool. DO NOT LET IT COOL SO LONG THAT IT SETS!

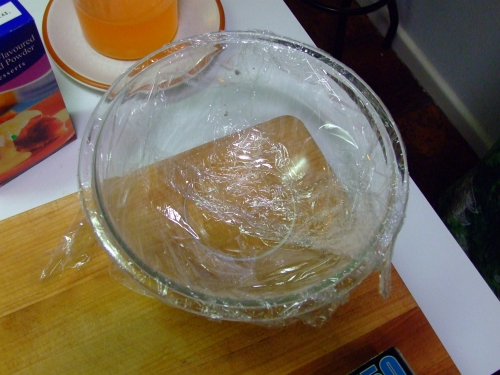
Then line a really large glass bowl with cling wrap. It doesn't have to be pretty or neat:
charlotte rouse 02


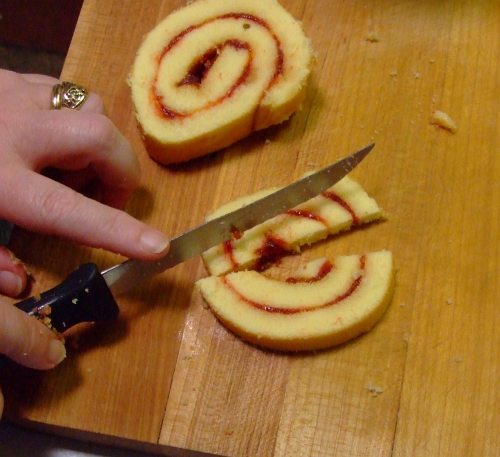
Slice the swiss roll into 1 cm thick pieces:
charlotte rouse 03


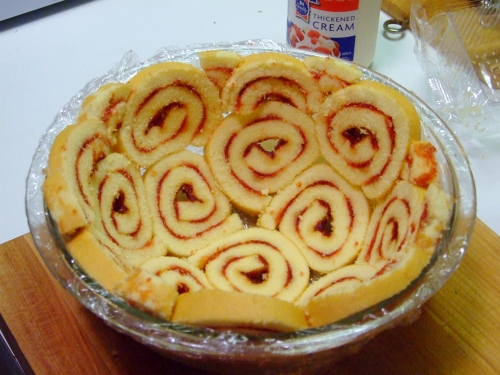
and then line the bowl with the pieces.
charlotte rouse 04


Cut up the last two pieces to fill in the gaps:
charlotte rouse 05

charlotte rouse 06


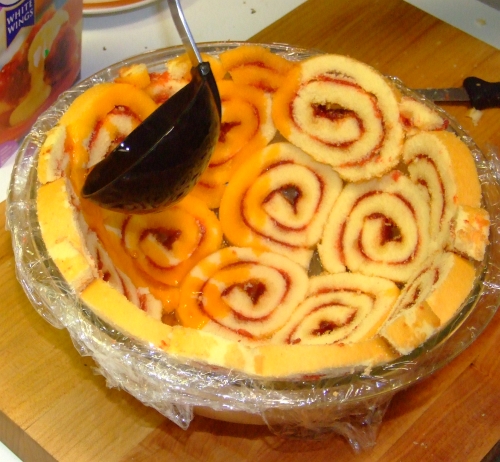
Now you ladle your cooled but not set jello over the roll:
charlotte rouse 07


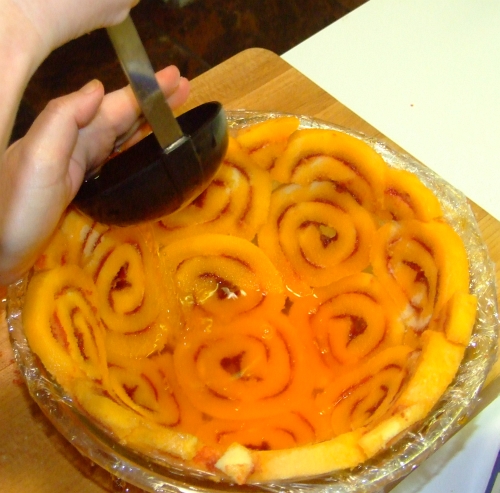
Make sure the sponge rolls are completely soaked in jello!
charlotte rouse 08


Now put it in the fridge overnight (or all day) to really set the jello.

Let's make the custard --it too goes in the fridge all day.

Add three times as much custard powder as the directions call for. Yes, it will be lumpy even after heating and stirring thoroughly. Remove from the heat and let it cool for 15 mins or so. It will look like you ruined the custard, don't worry.

Put the lumpy, ugly custard into a mixing bowl, pour in scant 1/2 cup of whipping cream and then beat the heck out of it with your electric mixer. See, all nice and purdy and really tasty now!

Put that bowl in the fridge overnight too.

The next morning...

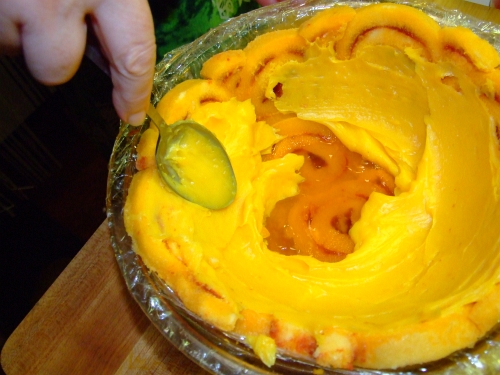
The custard should be thick enough to paste to the inside of the jello-set spongecake:
charlotte rouse 09


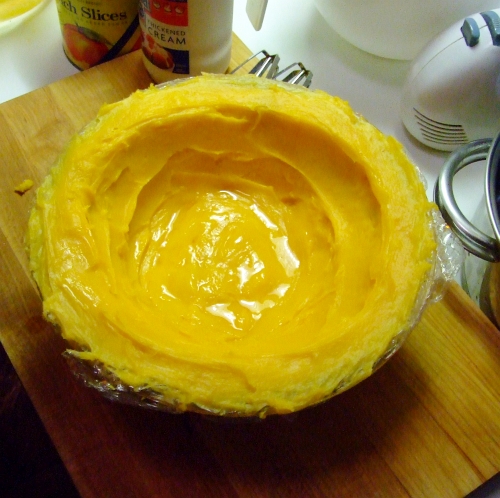
Don't be afraid to use lots of custard!
charlotte rouse 10


Now put it back in the fridge for a few hours.

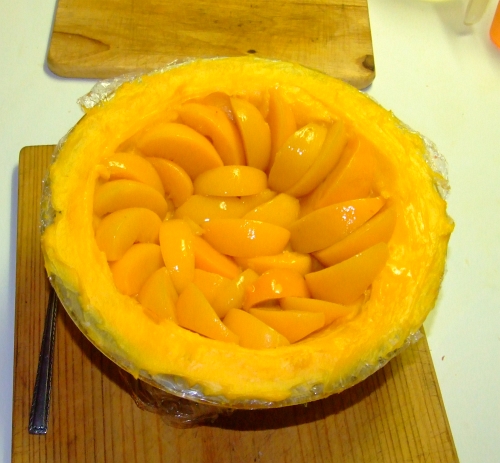
At around lunchtime open your can of peach slices and drain them really really really well.

Arrange them nicely in the custard thusly:
charlotte rouse 11


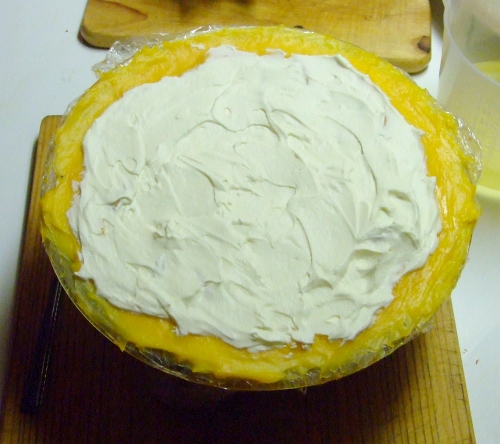
It's now time to whip the whipping cream! Once it's whipped so it's really thick then pile the whipped cream on!
charlotte rouse 12


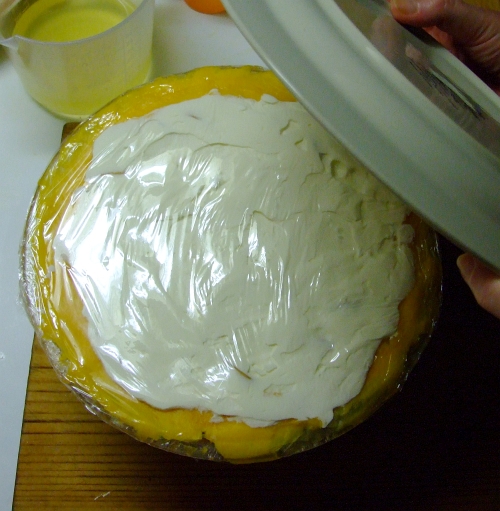
Place a piece of cling wrap over the top, and set a large plate on top:
charlotte rouse 14


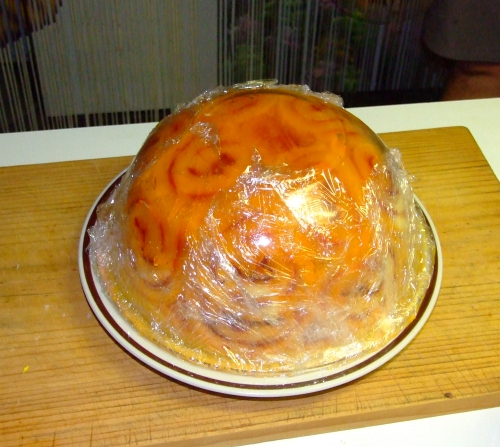
Turn it over so the plate is now on the bottom:
charlotte rouse 15


Put it in the fridge till dessert time. It's own weight will pack it down nicely after a few hours.

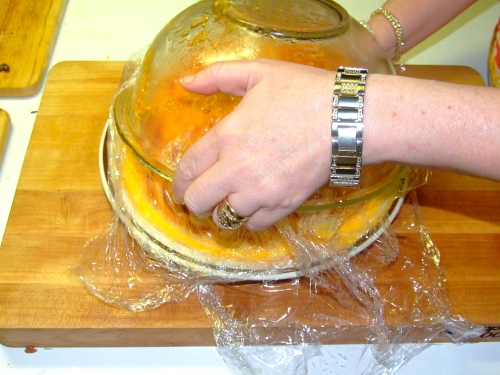
When you are ready to serve it, take it out of the fridge. Take the bowl off:
charlotte rouse 16


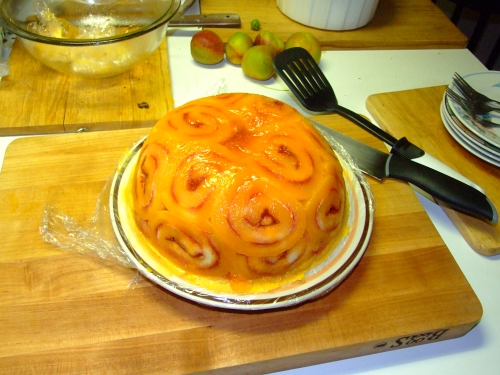
Remove the cling wrap too.
charlotte rouse 17


Get ready to slice and serve!
charlotte rouse 18


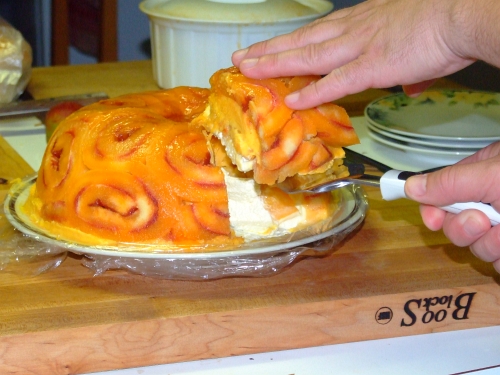
It holds together quite well:
charlotte rouse 19


Mmmmmmmmmmmm...
charlotte rouse 20


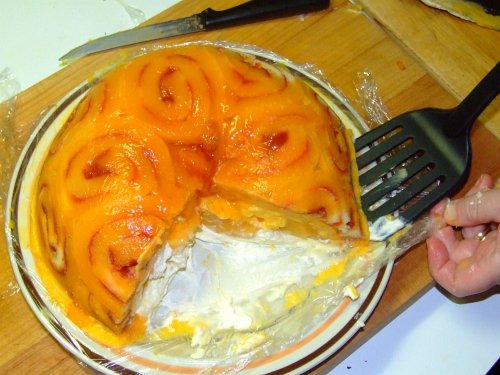
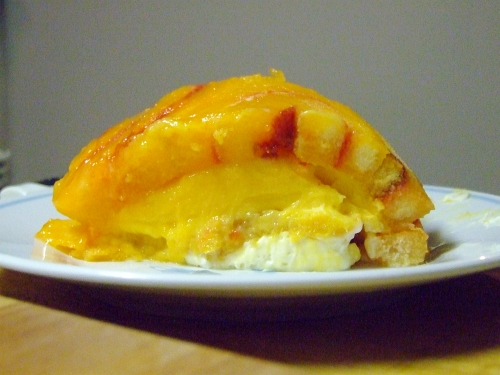
This piece is MINE! You can't have it so go make your own!
charlotte rouse 21


And don't forget to run an extra 20 miles the next day...