Or sammy. Or sarnie. Or buttie. Or pieces. They all mean SANDWICH!
I don't think (yes, I'm sure you all know that already) that I've ever posted a sandwich recipe before as they always seemed rather intuitive to mean. I also didn't think anyone would be interested in a sandwich recipe.
Boy was I wrong. I sorta kinda let it slip (accidently of course) that I make a really good grilled cheese sandwich. So I now feel honour-bound to post my Perfect Grilled Cheese Sandwich recipe complete with the high quality pictures you've come to expect from me.
This is my basic, standard grilled cheese. I also make premium ones with various additions which I'll put on the end of the post, no worries.
The most important thing for making a grilled cheese sandwich is to have a pan or griddle that heats evenly and holds it's heat for a while. I recommend cast iron. Something like this:
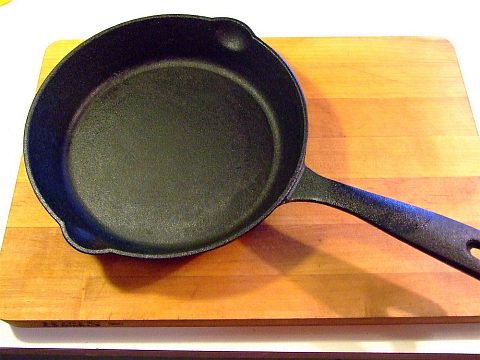
If you don't have cast iron, then a thick bottomed stainless steel one will do, no worries. I don't recommend anything thin, but if you are used to that and can control the temp then it should work.
Some folks say white bread only for grilled cheese. I'm not one of them. I prefer wholemeal. I don't use multigrained bread for my grilled cheese sarnies as I don't like the taste of the multigrain bread to interfere with the toasty, gooey, cheesy goodness.
The basics needed for The Perfect Grilled Cheese Sandwich
2 slices of bread, white or wholemeal
2-3 tbsp of butter
4 slices of REAL cheddar cheese
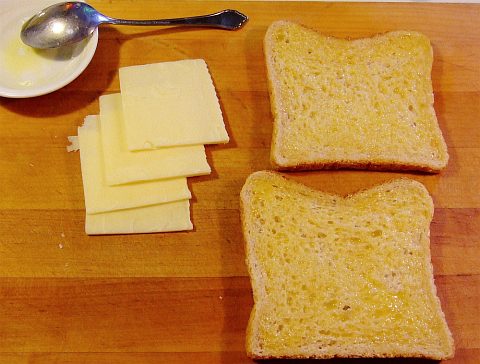
The first thing you need to do is just slightly melt the butter. Just enough to soften it, but not enough to separate the butter. Have a look at the melted butter up at the top of this picture and you'll see what I mean:
Don't worry if your cheddar isn't white, but please don't use any of the "processed" stuff.
Spread the melted butter over one side of each bread slice. Make sure you get all the way to the crust as that is VERY important, trust me. What I do is spoon on a bit of the butter, then spread it around with the back of the spoon. Remember, you only want the butter to be *just* melted so it doesn't seep through the entire slice.
You should have put your frypan on the heat before you spread the butter, that way it should be just about ready by now. A low heat is to be used as you don't want the bread to burn before the cheese is melted. I've been known to turn the heat off completely for a few minutes and let the residual heat from the pan continue to toast the bread and melt the cheese.
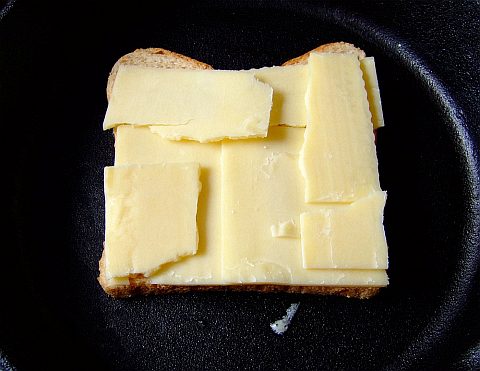
Place one slice butter side down on your pan and cover EVENLY with the cheese. A common mistake is to have too much cheese in the middle. If you do that the edges will be dripping out onto the pan before the middle is melted. Just break up the pieces to whatever shape is needed to cover the bread evenly.
Now immediately place the other slice of bread on top, butter side facing up of course.
After about 2 minutes it'll be ready for it's first flip. The first flip is the only one that's hard as the cheese hasn't melted into the "top" slice to hold things together yet. I just lightly place my fingertips on the top slice as I quickly flip the sandwich.
If the fry pan is heating up too quickly at this point you can turn the heat way down or even off. This is the point I turn the heat off for 3 to 4 minutes and let the heat from the cast iron frypan take over. This lets the cheese melt evenly while not burning either slice of bread.
Don't worry if you need to turn the sandwich a couple more times in order to get both slices of bread evenly toasted. Besides, when the bread is evenly toasted it also means the cheese is melted through if you use a low heat.
The finished product should look like this:
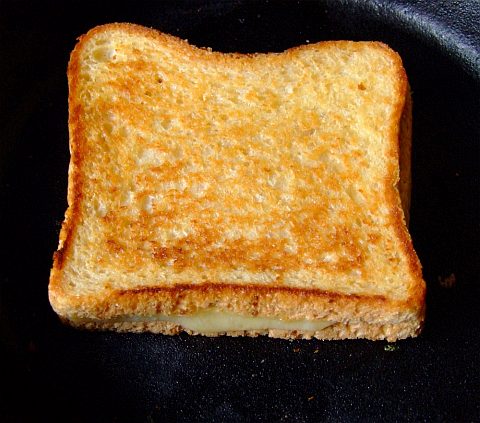
And if you are sharing the sandwich with someone and you slice it, you'll notice the cheese is melted evenly throughout.
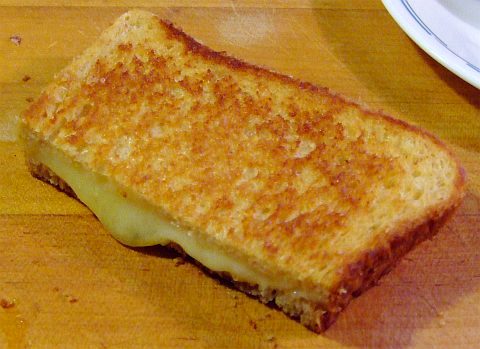
That's my basic Perfect Grilled Cheese Sandwich.
There are other things you can do. Some folks like to press the sandwich together. In fact, sandwich presses are very popular down here in Oz. Personally though, I don't like them pressed. But if you do want to press them you can, just don't let me catch you doing it with mine!
Additions:
salt
thin-sliced onion
minced garlic
thin-sliced tomato
shaved ham
various types of salami type meats
any type of pickled veggie
Salt: Some people sprinkle some salt on the buttered side of each bread slice before or after cooking. I've been know to do this, but mostly not.
Thin-sliced onion: And I do mean THIN! I don't like thick slabs of onion on the sandwich as it can (and will) slide apart as you eat it. Put the onion down before the cheese, that way the cheese will melt the onion onto the base slice so it doesn't slide apart as you flip it.
Minced garlic: You can spread it on the buttered side so the garlic toasts along with the bread, or on the inside if you really love that garlicky flavour!
Thin-sliced tomato: Again, very thin slices so the sandwich doesn't slide apart as you eat it. Use same as the onions.
Shaved ham: Same thing as the onion or the tomato.
Salami type meats. Cured meats are much denser than shaved ham so after slicing them I'll slice each slice into strips. That way when you bite into the sandwich you won't pull out a whole wedge of salami at once.
Pickled veggies. Ah yes. Pickled veggies. Obviously pickled cucumber leaps to mind, but pickled cabbage or pickled carrots go quite well. Pickled peppers too! Whatever pickled veg you choose to use, make sure it is drained well! Otherwise the pickle juices will seep into the bread and it won't be nice a crispy, toasty, grilled-like, crunchy texture. It'll be soggy instead and I don't like that --and neither will you I'd imagine.
I will get the seitan recipes up! I promise! I'm doing many different things with it so it'll be like 3 or 4 posts in one, lucky you!
Thursday, June 16, 2011
Friday, June 3, 2011
Braided Bread Rolls
I'm sure many of you have been wondering why I haven't been posting food stuff lately. Well, I have a very good reason! I've been busy. Working on a project. What kind of project? I'll tell ya at the end of this post. Or you can just scroll to the end but you'll miss all the cool pics.
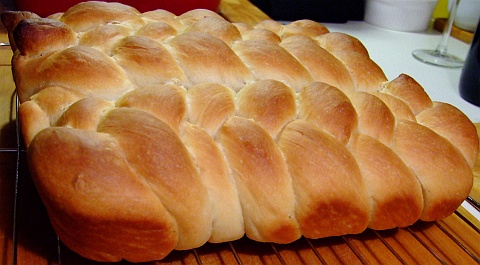
Braided Bread Rolls. These are very easy to make, look beautiful and taste even better. Plus they'll impress the heck out of whoever you are cooking for!
First you need to make a simple bread dough. Not difficult!
4 cups baker's flour
400 ml water (just over 1 2/3 cups)
1 tsp salt
2 tsp yeast
2 tbsp sugar
2 tbsp olive oil
Mix the dry stuff. Then add the wet stuff. Mix together, then knead in a bowl or lightly floured surface till it is dough.
Drizzle a bit of olive oil over the dough and let it rise in a warm spot for an hour. Punch the dough down, knead for a minute.
Ta-da. Simple bread dough. Your bowl should now look something like this:
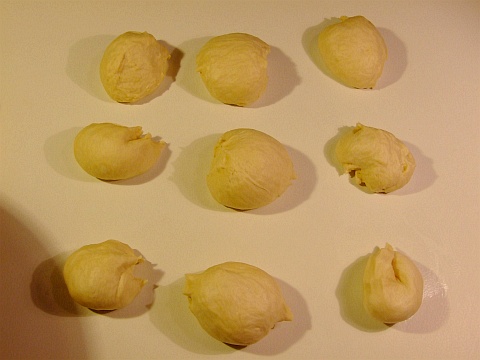
Separate the dough into 9 somewhat, sorta, kinda-like evenly sized pieces. Something like this:
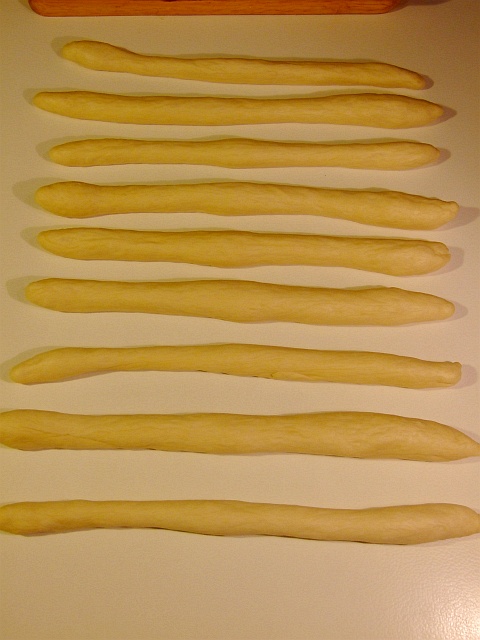
Now roll out each piece into a strand around 16" long. You'll end up with 9 16" long strands of dough. Here's what they look like. Oh, these are the same length, it's just the perspective distortion that makes the far ones seem shorter.
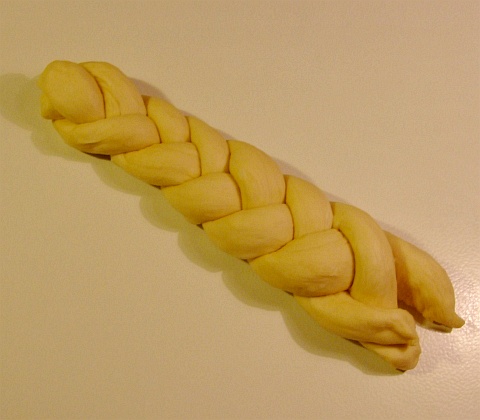
Here's where you get to braid them! Do 3 at a time. Lay out 3 strands parallel to each other and start by laying an outer strand over the middle, then the other other strand over the new middle. Like this, see:
If you aren't sure on how to braid just ask your mother, wife, sister, girlfriend, daughter, gay neighbor, etc. It really is easy to do. My wife showed me how.
Don't worry about finishing the end nicely, no need to. You should now have 3 bread braids and each one should look something like this.
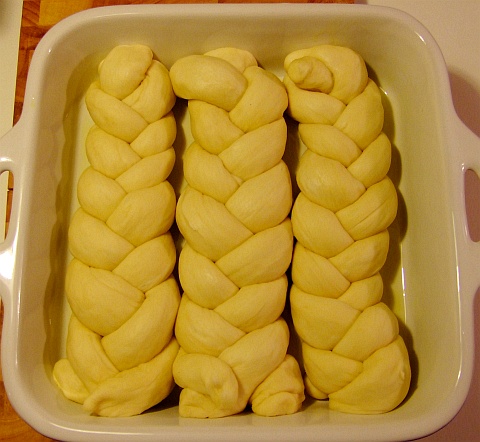
You'll need a baking dish. I used one that's a foot square. Worked perfect. Olive oil the bottom and sides of the dish. Now lay each braid into the dish. As you stuff them in you'll understand why you didn't need to finish off the braid. Here is what you should have.
I also drizzled a bit of olive oil along the outer edges of the bread. Put it into a COLD oven, turn heat to around 180 C or 360 F. You want the oven to be cold so that the bread rises in the dish as the oven heats up.
Bake for 40 minutes or so. Or until it looks like this.
Let it cool in the dish for a few minutes. Put a plate on top, flip over, then flip back over onto a cooling rack. Ta-Da! Done and DONE!
I made it as a pull-apart for dunking in soup, everyone loved it. You can also separate it along the two central seams and the slice up each braid for rolls.
And it looks as good as it tastes!
Now then, since you've made it this far, I'll tell you why I've been busy. I'm working on a series of cookbooks. Yes, you read that right. The bloke who has no official culinary training nor any official writing training (except for the odd research paper in kolledge) is writing a SERIES of cookbooks.
Needless to say, this project has strained my last few remaining brain cells to the point where food blogging was neglected. But no more!
Next post will be how to make a meat subsitute out of plain ole flour so stay tuned mates.
Subscribe to:
Posts (Atom)