Showing posts with label butter. Show all posts

Thursday, June 16, 2011

The Perfect Grilled Cheese Sandwich

Or sammy. Or sarnie. Or buttie. Or pieces. They all mean SANDWICH!

I don't think (yes, I'm sure you all know that already) that I've ever posted a sandwich recipe before as they always seemed rather intuitive to mean. I also didn't think anyone would be interested in a sandwich recipe.

Boy was I wrong. I sorta kinda let it slip (accidently of course) that I make a really good grilled cheese sandwich. So I now feel honour-bound to post my Perfect Grilled Cheese Sandwich recipe complete with the high quality pictures you've come to expect from me.

This is my basic, standard grilled cheese. I also make premium ones with various additions which I'll put on the end of the post, no worries.

The most important thing for making a grilled cheese sandwich is to have a pan or griddle that heats evenly and holds it's heat for a while. I recommend cast iron. Something like this:
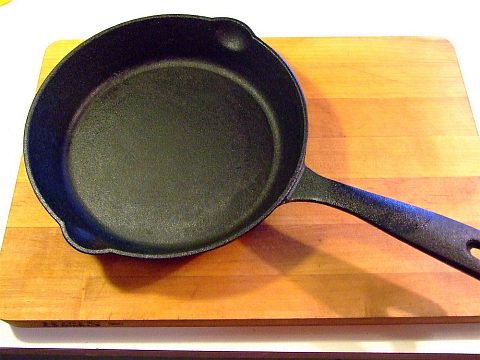
grilledcheese01


If you don't have cast iron, then a thick bottomed stainless steel one will do, no worries. I don't recommend anything thin, but if you are used to that and can control the temp then it should work.

Some folks say white bread only for grilled cheese. I'm not one of them. I prefer wholemeal. I don't use multigrained bread for my grilled cheese sarnies as I don't like the taste of the multigrain bread to interfere with the toasty, gooey, cheesy goodness.

The basics needed for The Perfect Grilled Cheese Sandwich

2 slices of bread, white or wholemeal
2-3 tbsp of butter
4 slices of REAL cheddar cheese

The first thing you need to do is just slightly melt the butter. Just enough to soften it, but not enough to separate the butter. Have a look at the melted butter up at the top of this picture and you'll see what I mean:
grilledcheese02
Don't worry if your cheddar isn't white, but please don't use any of the "processed" stuff.

Spread the melted butter over one side of each bread slice. Make sure you get all the way to the crust as that is VERY important, trust me. What I do is spoon on a bit of the butter, then spread it around with the back of the spoon. Remember, you only want the butter to be *just* melted so it doesn't seep through the entire slice.
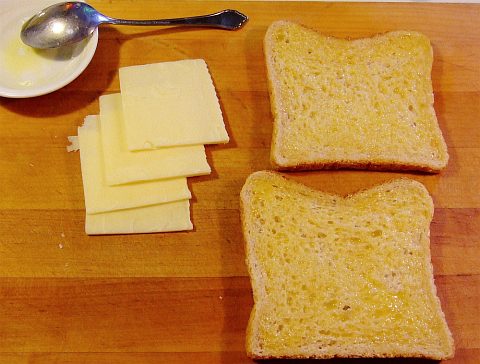
grilledcheese03


You should have put your frypan on the heat before you spread the butter, that way it should be just about ready by now. A low heat is to be used as you don't want the bread to burn before the cheese is melted. I've been known to turn the heat off completely for a few minutes and let the residual heat from the pan continue to toast the bread and melt the cheese.

Place one slice butter side down on your pan and cover EVENLY with the cheese. A common mistake is to have too much cheese in the middle. If you do that the edges will be dripping out onto the pan before the middle is melted. Just break up the pieces to whatever shape is needed to cover the bread evenly.
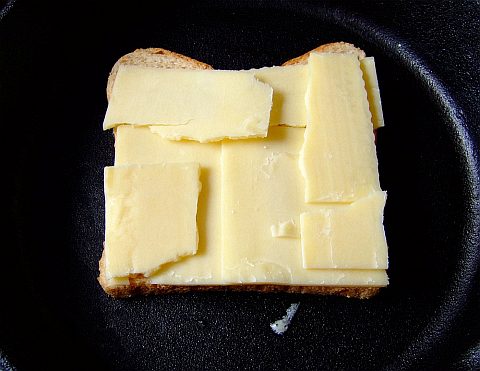
grilledcheese04
Now immediately place the other slice of bread on top, butter side facing up of course.

After about 2 minutes it'll be ready for it's first flip. The first flip is the only one that's hard as the cheese hasn't melted into the "top" slice to hold things together yet. I just lightly place my fingertips on the top slice as I quickly flip the sandwich.

If the fry pan is heating up too quickly at this point you can turn the heat way down or even off. This is the point I turn the heat off for 3 to 4 minutes and let the heat from the cast iron frypan take over. This lets the cheese melt evenly while not burning either slice of bread.

Don't worry if you need to turn the sandwich a couple more times in order to get both slices of bread evenly toasted. Besides, when the bread is evenly toasted it also means the cheese is melted through if you use a low heat.

The finished product should look like this:
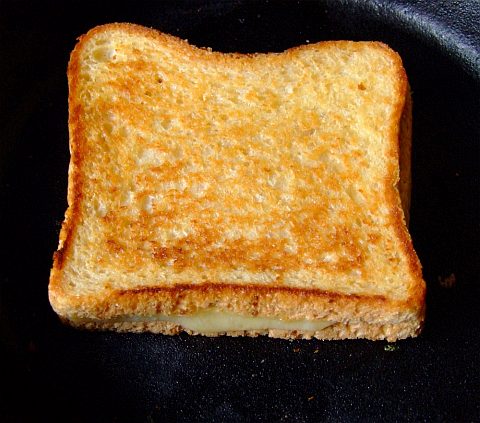
grilledcheese05


And if you are sharing the sandwich with someone and you slice it, you'll notice the cheese is melted evenly throughout.
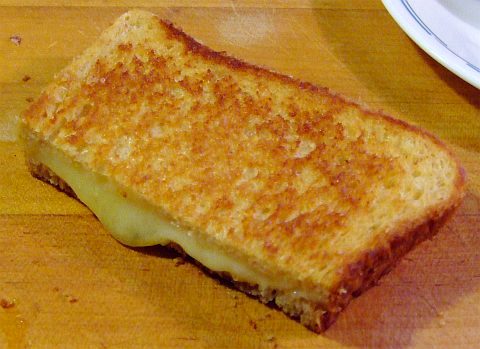
grilledcheese06


That's my basic Perfect Grilled Cheese Sandwich.

There are other things you can do. Some folks like to press the sandwich together. In fact, sandwich presses are very popular down here in Oz. Personally though, I don't like them pressed. But if you do want to press them you can, just don't let me catch you doing it with mine!

Additions:
salt
thin-sliced onion
minced garlic
thin-sliced tomato
shaved ham
various types of salami type meats
any type of pickled veggie

Salt: Some people sprinkle some salt on the buttered side of each bread slice before or after cooking. I've been know to do this, but mostly not.

Thin-sliced onion: And I do mean THIN! I don't like thick slabs of onion on the sandwich as it can (and will) slide apart as you eat it. Put the onion down before the cheese, that way the cheese will melt the onion onto the base slice so it doesn't slide apart as you flip it.

Minced garlic: You can spread it on the buttered side so the garlic toasts along with the bread, or on the inside if you really love that garlicky flavour!

Thin-sliced tomato: Again, very thin slices so the sandwich doesn't slide apart as you eat it. Use same as the onions.

Shaved ham: Same thing as the onion or the tomato.

Salami type meats. Cured meats are much denser than shaved ham so after slicing them I'll slice each slice into strips. That way when you bite into the sandwich you won't pull out a whole wedge of salami at once.

Pickled veggies. Ah yes. Pickled veggies. Obviously pickled cucumber leaps to mind, but pickled cabbage or pickled carrots go quite well. Pickled peppers too! Whatever pickled veg you choose to use, make sure it is drained well! Otherwise the pickle juices will seep into the bread and it won't be nice a crispy, toasty, grilled-like, crunchy texture. It'll be soggy instead and I don't like that --and neither will you I'd imagine.

I will get the seitan recipes up! I promise! I'm doing many different things with it so it'll be like 3 or 4 posts in one, lucky you!
Friday, January 7, 2011

Dabbling With Dumplings

My guess is that there are many different ways to make dumplings as there are food bloggers. And that's a lot. Is any one particular way the "right way" to make dumplings? No, of course not silly. It's whatever suits YOU!

This happens to be the way I like them. I like them soft, fluffy and simple. And they should pick up the flavour of the soup nicely.

The very first time I wrote this recipe down would be... oh, right about NOW! It's one of those ones that is so simple you really don't need exact measurements and the ingredients are pretty easy to remember. And this is one of the few times I use self-raising flour.

Dave's Dumplings

What you need:
A big pot of soup you've made that the dumplings will go into
1 to 1 1/2 cups self-raising flour
2 to 4 tbsp butter
dash of salt
1 or 2 tbsp sugar
some water

See? Isn't that an easy list? You'll find you can vary the amounts easily, very forgiving it is.

What you do:
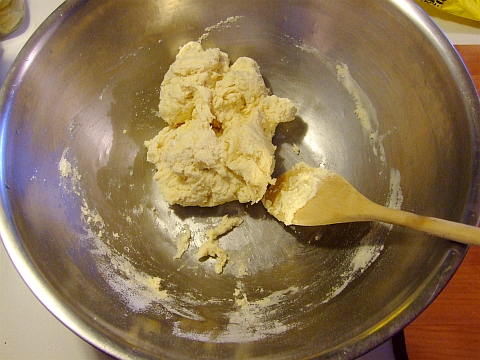
Mix all the dry ingredients together. Then add the butter and work the butter in using your fingers. Add water a few tablespoons at a time whilst mixing the dough --I use a wooden spoon for the mixing part. You want to end up with an almost sticky dough. Hopefully it'll look something like this:

dumpling dough


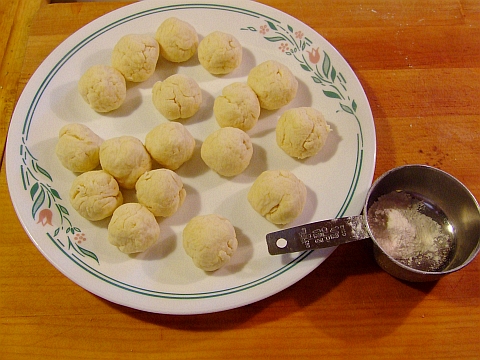
Now you want to tear off small pieces of the dough and quickly roll them into small balls. How small? Smaller than a ping pong ball. About the size of those small, bouncy, superballs you had when you were a kid.

Your plate should end up looking like this:
raw dumplings
I put a 1/2 cup measuring cup so you can see the size of the dumplings.

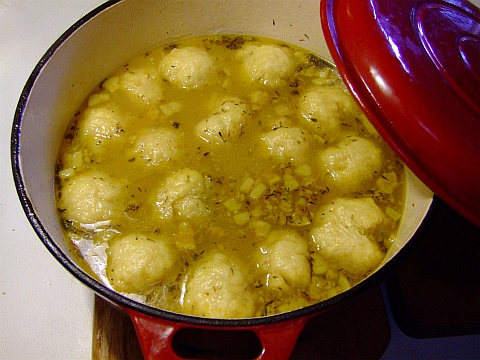
The last step is to put them in your lightly boiling soup. Don't crowd them as they'll more than double in size. Let them cook, covered for 20 to 25 minutes. Your soup pot should now look like this:
cooked dumplings


That cast iron dutch oven holds a lot of soup, more than enough for 2 days worth in fact. The plate you saw in the second picture fits inside it with room to spare. That should give you an idea at how large the dumplings get!

Dish it up, eat, and enjoy!

Sunday, September 26, 2010

Whipped Anchovy Butter

Hey! Where are you going? This is good, trust me.

A while back when I was at a doctor's office waiting for mum-in-law to be finished with her appointment I was skimming a magazine. Can't remember which one it was, could've been Gourmet Traveller but I truly don't remember.

Anyways, one of the recipes I skimmed was butter with anchovies and bunch of other stuff like tuna lots of seasonings. Since I couldn't remember all the ingredients I figured I'd try making some when we got home but that'd I'd "keep it simple".

Fast Forward almost a YEAR!

Totally, completely, forgotten about. But then when I was checking the pantry I noticed we were getting low on anchovies and that reminded me about the recipe I skimmed a year previous.

Not remembering anything that went into it besides anchovy and butter I pretty much started from scratch. But I did get the idea from the magazine --whichever magazine it was!

Dave's Whipped Anchovy Butter

What you need:

2 to 3 tbsp butter
2 or 3 anchovy fillets (1 per tbsp of butter)
1 tbsp cream
1/4 tsp freshly cracked pepper
1 tbsp finely minced onion
1 food processor


What you do:

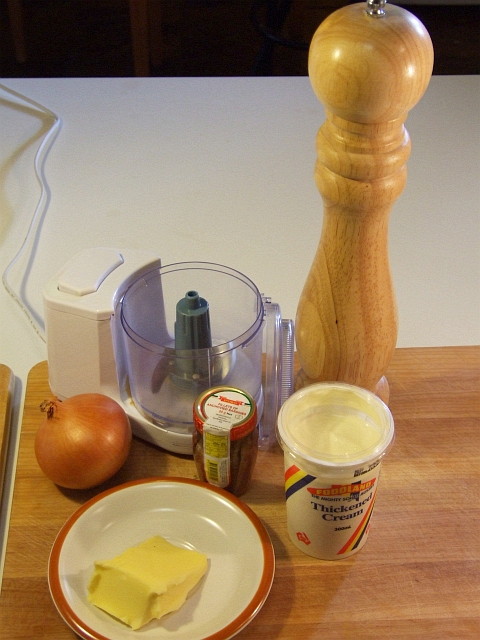
Firstly, assemble your ingredients. Note that I'm using a mini-food processor. If you make a lot of this at a time then a regular f-p will work but otherwise try to find a mini one. They're cheap.

anchovy butter 01


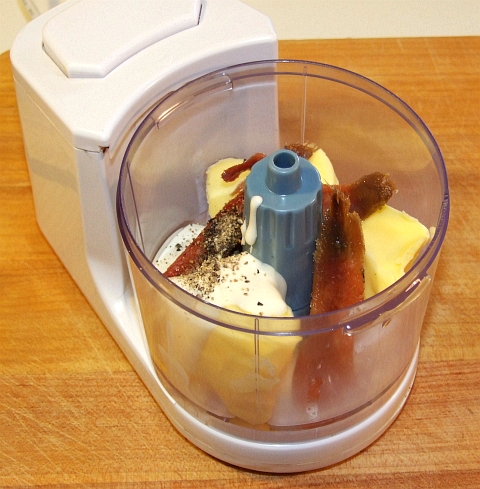
Put everything EXCEPT the minced onion into the food-pro.

anchovy butter 02


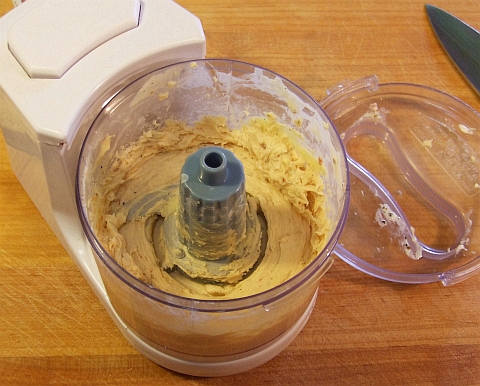
Process till it has a whipped look/consistency. Should take more than 30 seconds.

anchovy butter 03


Mix in the minced onion, and then artfully arrange it for taking purdy pictures!

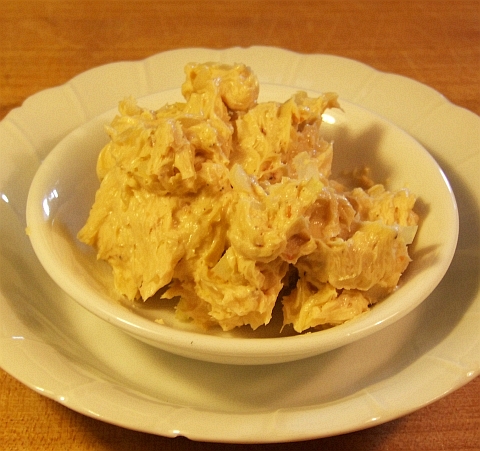
anchovy butter 04

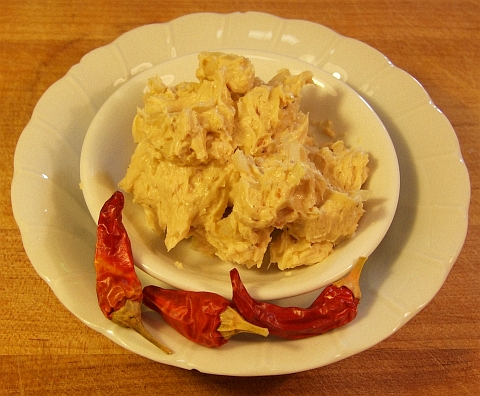
anchovy butter 05


Use it just like you would regular butter, no worries.

Sunday, August 15, 2010

Bacon Wrapped Bananas with Chocolate Sauce

And doesn't that just sound AWESOMELY delicious? I know it does "it" for me! Seriously, what dish can't be improved by adding bacon?

I got the idea for this from a yoga teacher in New Zealand who has a cool food blog called Couscous & Consciousness. In one of her posts she asked folks about what trio or trios of food combination go well together. One of the ones I mentioned was bacon wrapped chocolate that gets battered and deep-fried. She thought it sounded ok but suggested some with bananas to go along with the bacon and chocolate.

Hence, this beauty of a recipe was born!

I made it last night, we all loved it. And that includes BIL who has a very fussy palate. In fact, he licked the plate clean!

Dingo Dave's Original Bacon Wrapped Bananas with Chocolate sauce with thanks to Couscous & Consciousness for inspiration.

What you need:

For the bananas and bacon:
One banana per person
1 to 3 slices of bacon per banana depending on size of slice

For the chocolate sauce:
175 grams of dark chocolate --that's 6.141592654 or pi+3 ounces
2 heaping tbsp butter
1/3 cup cream
1/4 cup cream port (or regular port, or a sherry variety)
1/4 tsp cinnamon powder
1/8 tsp cayenne powder (I usually double or triple this, but that's for when it's just me)

What you do:

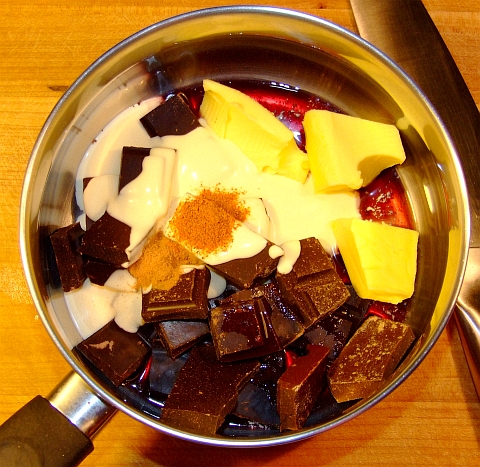
Put everything for the chocolate sauce in a small, thick-bottomed saucepan. Your saucepan should now look like this:
stuff for chocolate sauce


Put the saucepan on the lowest heat possible and stir or whisk it while it heats. Make sure nothing sticks to the bottom and that it's well mixed. This should only take a couple of minutes.

Turn the heat off and cover it.

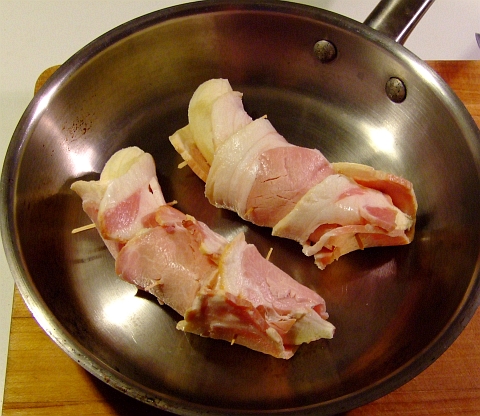
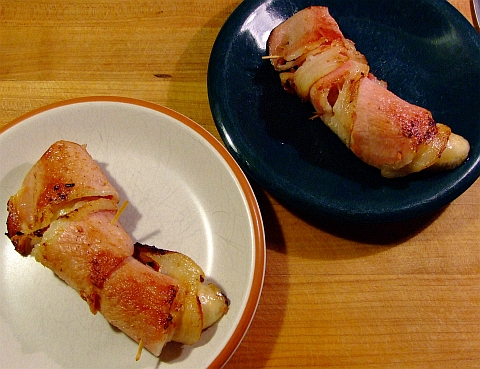
Now to assemble the bacon and bananas. Ummmmmm, this is pretty simple, just wrap the bacon around the bananas. If you need to secure the bacon with toothpicks the go for it.
bacon wrapped bananas raw


Then cook them till the bacon is done to your liking. Be gentle when turning them as you don't want to bananas to break apart.
bacon wrapped bananas cooked


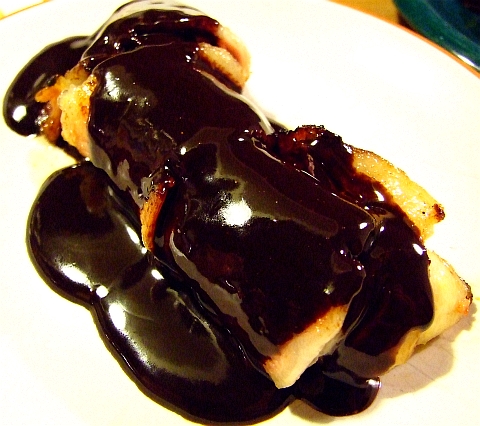
Remove the toothpicks if you used them and liberally ladle the sauce on top!
bacon wrapped bananas with chocolate sauce
Notice how I used one dark plate and one light plate so that the color balance in the photo is way off? Yeah, I did that on purpose. Maybe.

And the obligatory closeup:
bacon wrapped bananas with chocolate sauce closeup


Use a sharp knife and a fork for eating. Why a sharp knife? So that you don't mush down the banana as you cut a piece.

You'll have lots of leftover sauce, I'm sure you'll think of some use for it.

Oh, next time I'm going to roll the bananas in brown sugar before wrapping the bacon around them!

Monday, July 26, 2010

Cheese & Bacon Mini Muffins

And they are oh so tasty! A quick snack, they do make. Bake up a mess of 'em on Sunday and toss a few in your lunch box throughout the week. If they last that long... which I doubt.

I got the idea for these from an Aussie cookbook circa 1972 titled Cooking With Wine & Cheese. 50 cents at a garage sale. And with a title like that I certainly wasn't going to pass it by. No sirree!

The recipe from the book, with it's frail, aged pages, did not call for bacon and some of the amounts were not what I'd use. Especially since they didn't use nearly enough cheese. Also, mine are made in mini muffin tins so they are bite-sized. Very handy. I also use different techniques and different ingredients. But I did get the idea from the book.

But you gotta like any recipe book that says to not only to preheat the oven but to also preheat the "irons". Irons? Yes, "irons" is what any type of metal (always cast iron) baking implement used to be called. These days you'll rarely hear the term outside of grey-haired camping aficionados as some still refer to campfire cooking implements as "irons".

Anyways, just use a muffin tin, no worries. Make sure you use the smallest you can find. These aren't called mini muffins just cuz, you know?

On with the recipe!

Cheese & Bacon Mini Muffins this makes 36 mini muffins

What you need:

1 1/2 cups self raising flour
1 tsp salt
3 tbsp full cream milk powder

1 tbsp butter

3 slices of Aussie sized bacon slices; diced, cooked and drained. 6 if you are using US sized bacon slices.
125 grams diced cheddar (equal to 5.33 ounces or 1/3 of a pound)

1 egg
2/3 cup water (H2O)


What you do:

Put the first 3 ingredients in a mixing bowl. Stir em up so they are combined. Add the butter and cut it in with a fork --if your butter is really cold you can use your fingers if you do it quickly.

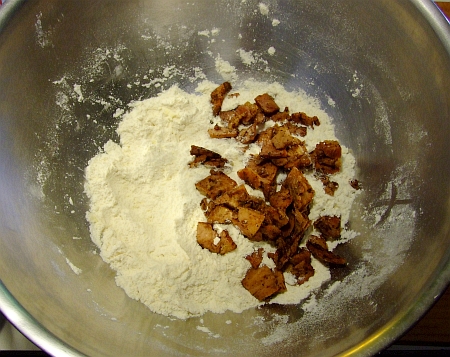
Toss in the cooked & drained bacon pieces:
muff01


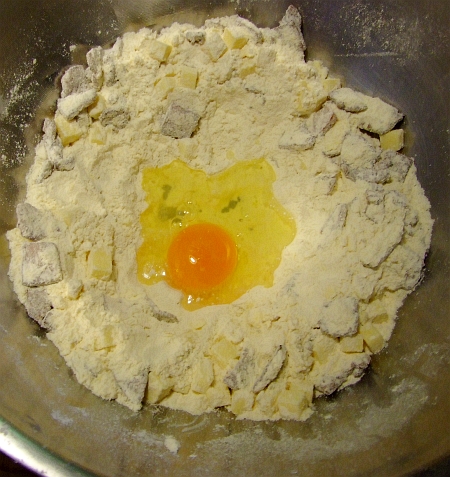
Mix it up so the bacon is coated. Then add the cheese:
muff02


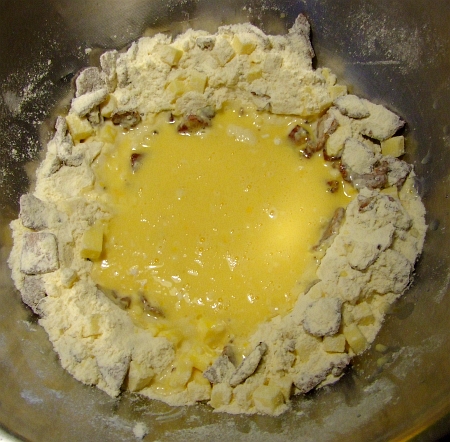
and mix it around so the cheese chunks are coated. Make a small well in the center of the mix and crack an egg into it.muff03


Add the water and beat the egg and water together.
muff04


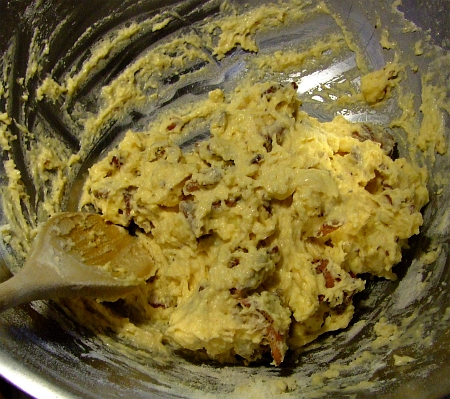
Grab a wooden spoon and mix the whole mess together!muff05


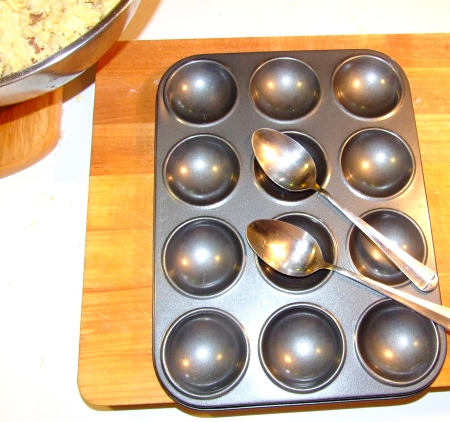
Grab your muffin tray and the spoons. I put a couple of table spoons on the tray so you'd get an idea just how small each muffin hole is.
muff06


Fill the tray with a decent sized spoonful of the mix in each muffin hole:
muff07
As I said earlier, you'll get 36 mini muffins or 3 tray fulls from this recipe.

You should have preheated your oven to 220 C (428 F) a while back. I'd recommend doing that first thing as the preparation doesn't take very long.

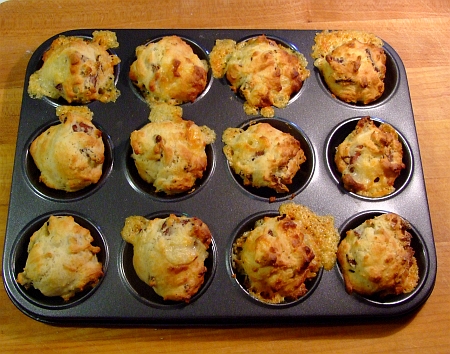
Bake them for 12 to 15 mins till they look something like this:
muff08


Pop em out and put em on a cooling rack. Load the tray up for the next round. After a while your cooling rack will look something like this:
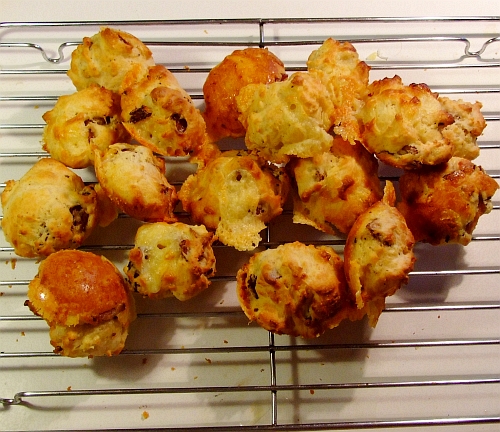
muff09


That picture was taken after 2 of the 3 rounds were done. You'll notice there is not 24 of the buggas on the rack. They are, ummmmmm, very tasty and very easy to eat as you make them, well at least that's what I've heard. Great hot and great cold.

Make these and you'll be happy. So will your taste buds. So will your tummy. Just try not to eat them all at once.

Monday, June 14, 2010

Easy chocolate sauce

Yes I know I've written quite a few posts that involve chocolate (food of the Gods) sauce, but I thought I'd sorta consolidate them. Maybe give some tips, tricks, what goes well in it, etc.

The basic chocolate sauce has just three things: dark chocolate, butter, and cream. The less cream and butter, the thicker the sauce will be and if you only use a tiny amount of each then it'll harden upon cooling --great for things like chocolate coated strawberries. Or pretty much ANYTHING you want to chocolate coat (^_^)!

And the best thing is that you DO NOT NEED A DOUBLE BOILER! And it's quick too. You will need a thick-bottomed saucepan though so if you don't have one then go run out to the shops right now and get one.

I'll start with the basic sauce, and then talk about the various additions you can, ummm, add.

The basic chocolate sauce (this makes A LOT):

What you need:
One bar (375 grams or 12 ounces) of dark cooking chocolate
3 tbsp butter
1 cup cream

This'll make a sauce that is liquid at room temp, but thicker than motor oil. If you want a thicker sauce, just use less cream and less butter.


What you do:

Break the chocolate bar into pieces and put them all into your saucepan. Add the butter and the cream. Turn on the heat to low. Give it a stir to mix things well. Once the chocolate starts to melt, then take out a whisk and start whisking it. Almost continuously, in fact.

Once all the chocolate is melted and everything is thoroughly incorporated together, turn the heat off and continue whisking for another 30 seconds or so. Make sure you get to the bottom of the saucepan during the whisking so nothing burns.

Ta-da! Done! The whole process should have taken 2 or 3 minutes.

Now comes the FUN part! What you can add and when you should add it.

Substitute half the cream with a dark red wine like shiraz. Add at the same time as the cream, of course.

1 tsp of cinnamon powder and a half tsp cayenne powder. Add while whisking. Taste it afterwards and add more of either if you wish, no worries.

Cumin powder and cardamom powder go well too!

If you want it slightly tart, add some ground sumac.

Hard to go past ginger powder too.

My point is, the possibilities for flavorings are endless. I can tell you for a fact that the cinnamon and cayenne combo is wonderful! I'm still experimenting with the others to find the best combos that suit my palette.

So have some fun and experiment! Heck, make a batch of standard sauce and then divvy it up into bowls and mix different spices into each. Just make sure you write down which spices went into which bowl. And be sure to let me know what combinations of spices you find that are really good!

Monday, May 24, 2010

Biggest Morning Tea

Each year, the Biology dept up at our local Flinders Uni hosts what they like to call "The Biggest Morning Tea". It only costs $4 to get in (that's just a couple of Aussie $2 coins). All the cooking is done on a volunteer basis.

My BIL works at the Paleo lab in the Bio dept so he's on their email list. Last week he received an urgent email asking for more cooking-type folks. So far only 4 people had volunteered, and none of them featured any savory dishes.

Mike (BIL) told them about my cooking prowess, and I got in email contact with the lady in charge. She is very thrilled with what I said I could make for them.

Here's the list of what I'll be making between now (monday arvo) and thurs morn:

Cheese and bacon muffins

soft pretzels w/ cheese sauce

mexican chocolate fondue

zucchini bread

cumin seed crackers

wholemeal chia seed bread w/sunflower and pumpkin seeds

morrocan seasoned pan bread w/ grana padana cheese

fresh homemade ricotta cheese (it's easier than you think) to go with the cumin crackers and whatever.


They are expecting 100 to 150 people... This will be challenging, especially as MIL has a couple of doctor appointments this week.

Wish me luck folks!

Oh, the proceeds from it go directly the Flinders Med Centre (right next to the U) for their cancer research.

Sunday, November 15, 2009

Creamy Red Wine Sauce

The other day we picked up some t-bone steaks from our local butcher for an awesomely great price. The consensus for cooking them was lightly salted, seared on the grill, then finished in the oven (actually "ovened" on the grill since it has enough burners and a lid that I can use it as an oven). Their's took 23 mins, whereas mine took 7 (1 min 30 sec a side on a hot grill to sear, then 4 mins in a hot oven --I like mine rare).

Both the rare and well done steaks were very tender and juicy, everybody was happy. They were especially happy with a sauce I decided to make in the wok for a topping for the steaks. You can make this very quickly and easily while the steaks are cooking, no worries. There's numerous substitutions you can use, I'll tell you about that at the end of the post.

Dingo Dave's Creamy Red Wine Sauce

What you need:
1/4 of an onion, finely minced
1 mushroom, minced
pinch of salt
dash black pepper
1 tbsp olive oil
1 tbsp butter

2 cloves crushed garlic

1 glass dry red wine (plus 1 glass for the cook)

2 tbsp dijon mustard
1/2 tsp dried tarragon

3 tbsp sour cream


What you do:

Add the first six ingredients (like how I grouped them for you?) to a hot wok. Stir and cook for about 2 mins. Add the garlic and cook for another minute whilst stirring frequently.

At this point there shouldn't be much of any liquid left in the wok. Now add the red wine to deglaze the wok. Keep the heat on till the liquid is reduced by half. Turn to your lowest heat and add the mustard and tarragon. Stir it through till everything is combined and then turn the heat off.

Now add the sour cream, stir everything thoroughly.

If you've timed it right, your steaks should be coming off the grill and onto plates right about now. Spoon the sauce over the top and ENJOY!


Substitutions:

I was wanting to use thick, double cream but I was out. Hence the sour cream. Next time I'll use the cream.

Use 2 tbsp butter with no olive oil in the initial step. And vice-versa, of course.

Jarred, prepared garlic can be used instead of fresh cloves, no worries.

Add a pinch of mint at the same time you add the tarragon.

Slice up a couple of fresh shrooms and sautee them for 2 mins in butter, salt, and tarragon. Drain the shrooms and then add them at the same time you add the cream. Use a couple of slices of crusty baguette to soak up the drained, flavourful butter.

Sunday, December 28, 2008

Dark Chocolate Sauce with Shiraz

This is a very good sauce. Very good. Seriously good.

Now, I'm not sure on the exact amounts of stuff as I do a lot of "eye-balling" in the kitchen. But this'll give you a good start.

The idea is you want the sauce to still be pourable when it cools, but still be tasty and chocolaty.

Here's what you need:

2 cups of dark cooking chocolate (melts or pieces from a bar)
1/2 glass shiraz wine (and the other half for the cook)
3 tbsp butter
1/2 whipping cream *update* 1/2 CUP whipping cream, darned typos

What do you do?

This is easy. Chuck it all into a thick bottomed saucepan. Lowest heat possible. Stir or whisk it as the chocolate melts. As soon as the chocolate is melted and everything is stirred together, turn the heat off.

You can use it hot, or use it as cold.

This year for the Christmas morning brunch everyone had a dish of this chocolate sauce for use. Most just dipped the fresh strawberries in the sauce. I, of course, dipped pretty much everything in the sauce including rolled up shaved prosciutto. It was very tasty! I even dipped chocolate sea shells in the chocolate sauce, mmmmmmm. I even poured a bit into my champagne glass and then filled the glass with a vanilla and cream flavoured sparkling wine (from Nurioopta). Yummy.

Friday, December 19, 2008

Bananas Flambe'

These are so easy and so tasty! You just need to make sure you've got good, solid bananas. If your 'nanners have gone too ripe, then make banana jam instead.

But, if you've got fresh, solid 'nanners, then try this:

Bananas Flambe --Dingo Dave style

What you knead:

Some firm bananas, pealed, and halved lengthwise
At least a half cup of butter
Half a cup (or so) of raw sugar
A splash of high quality rum

Before I start with the "what you due" section, there's a few points I'd like to write about regarding the above stuff.


Bananas vs plantains... Hey, anyone know Don King's phone number? Sounds like a good fight to me.

For those of you knot (not) in the know, a plantain IS a banana; just larger and starchier. musa paradisica is the latin term for a plantain. Since a plantain is much starchier (I love that word: STARCHIER) than a standard banana --musa sapientia-- you have to make sure it's cooked longer than a banana. So if you are using plantains in this recipe, make sure you slice them thinly and cook them longer.

Trivia: You've all scene (seen) seens (scenes) of a jungle on the Telly (TV) where banana trees abound --Oh Puuuuuh-leeeeaaaassssseeee try to say that fast! But it may interest you to know (and then again, maybe not) to learn that a banana plant is botanically classified as an HERB. Gotta love them big herbs. Yo, Herb! Is that you dude?

Next topic: sugar... raw sugar is what used to be known as brown sugar yonks ago (a long time ago). Brown sugar now means ugly refined sugar with ultra-processed molasses added --YUCK! So... Raw Sugar Is Cool.

High Quality Rum: I don't think I need to talk about the fact that 151 from the Windies is best, eh?

Oh crap, almost forgot: what do you get when you heat butter and sugar in a saucepan? You get butterscotch (duh). Guess what? It orginates from the same area as Scotch! You know: Scotland. Traditional butterscotch is a hard candy-like treat; the mixture is allowed to cool, then it hardens, then you eat it. The wonderful butterscotch topping that you are all familiar with that is put upon your ice cream has lemon juice and cream added to it while cooking the mix in a double boiler. Let me know if you want to know how to make your own, no worries.

Ok, back to the recipe:

What you due

Melt the butter and sugar in a fry pan. When it's melted, put the bananas in. Turn them after a few mins so that they are browned on both sides (hey, it's just sugar). Then toss in the splash of 151 dark rum (reserving enough for the cook), then light it (if you have a gas cooker you don't need to light it, it should light itself).

When the flames die down (die flames, DIE), serve it up over vanilla ice cream, making sure you pour lots of the flambe'ed butterscotch topping over it.

Enjoy!


BTW, I have gathered all the fixin's for this year's Holiday Feast. Well, except the fresh stuff, I'll be getting that daily. Anywho, starting Monday the Twenty-Oneth I'll start posting holiday recipes complete with pictures. I'll even give you detailed details on how to make WP's infamous Charlotte Rouse.