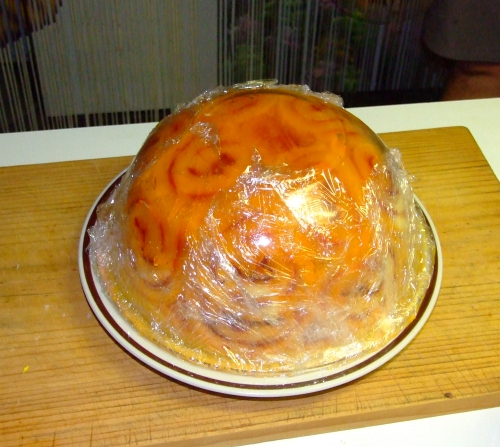
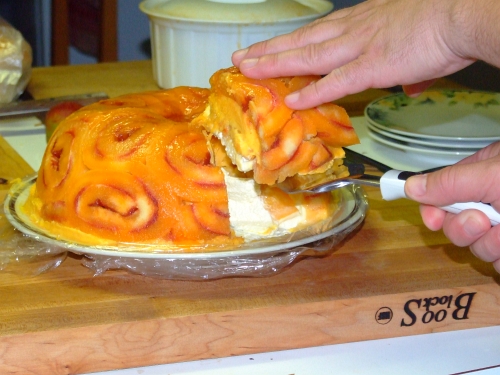
Showing posts with label Vegetarian. Show all posts

Saturday, January 7, 2012

Maggie's Creamy Vegetarian Pepper Pot Soup

DSCF7784

I have fun trading recipes, cooking tips n tricks, ingredients substitution, etc on twitter. One of my most wonderfullest twitter mates is named Maggie. She's a vegetabletarian but she also puts my meatiness recipes on her daily paper.

The other day (month!) we were chatting about soups and she said she'd send me her pepper pot soup recipe.

Of course I had to make it!

And of course I had to change it around a bit! Why? Cuz I didn't have all the ingredients at hand so I subbed a couple of items. I also changed the amounts a bit as I was only making it for myself.

She later told me that she herself had modified the original recipe from the person she received it from! Hey, all's fair in the kitchen mates!

Here is her original ingredient list plus directions:

PEPPER POT SOUP

2 Cups Water
2 Cups Veggie Stock
2 Good Sized Potatoes, Shredded
2 Medium Carrots, Shredded
2 Celery Stalks, Chopped fine
2 Medium Onions, Chopped fine
1 Green Pepper, Chopped fine
½ Cup All-Purpose Four
2 tsp Salt
½ tsp Pepper, fresh hand milled
1 Cup Water
6 Cups Milk

Mix first 7 ingredients together in a large saucepan. Bring to boil. Cover and simmer for 20 minutes. Mix flour, salt, pepper, and 1 Cup Water together in a small container until no lumps remain. Stir into the simmering soup to thicken it slightly. Add milk. Heat through. Check for seasoning.

Makes 12 ½ Cups

Not being one to take directions too well, I decided to make a few changes based upon why I had on hand. And remember, I was only wanting to end up with 6 to 8 cups. Here's what I came up with:

Maggie's Modified Vegetarian Pepper Pot Soup


1 Cup Water
2 Cups Veggie Stock
1 Good Sized Potato, Shredded
1 Medium Carrot, Shredded
1 Bok Choy, rough chopped, leaves included
1 Medium Onion, Chopped fine
1 Red Bell Pepper, Chopped fine
1 Handfull of fresh Rocket (the peppery kind)
A few fresh basil leaves, rough chopped.
A few fresh coriander leaves (cilantro to North Americans)
½ Cup All-Purpose Four
2 tsp Salt
½ tsp Pepper, fresh hand milled
1 Cup Water
2 Cups Milk
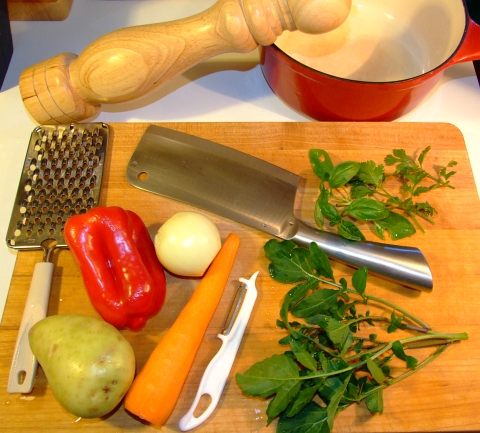
DSCF7774

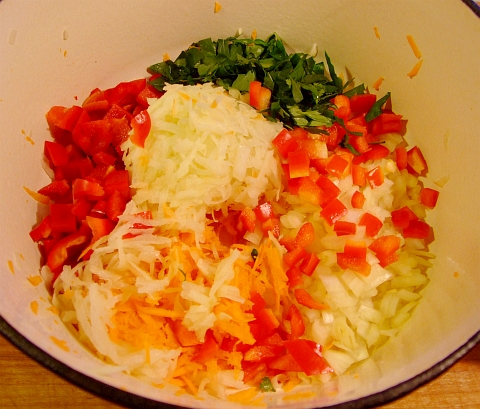
DSCF7777

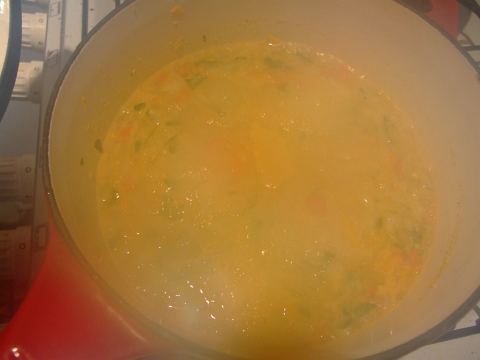
I mixed first 10 ingredients together in a large saucepan and brought it to a boil.

It was then covered and simmered for 30 minutes.
DSCF7780

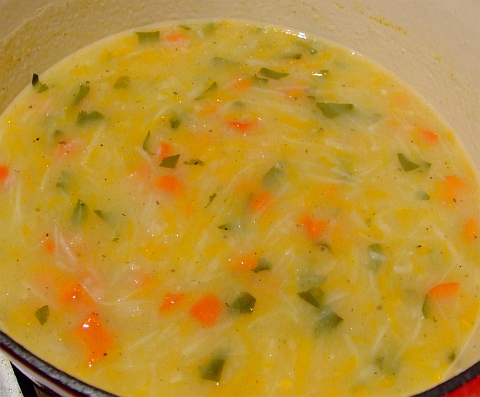
Then the flour, salt, pepper, and 1 Cup Water were whisked together and that slurry was stirred into the simmering soup as a thickener and a spicy-er.
DSCF7782

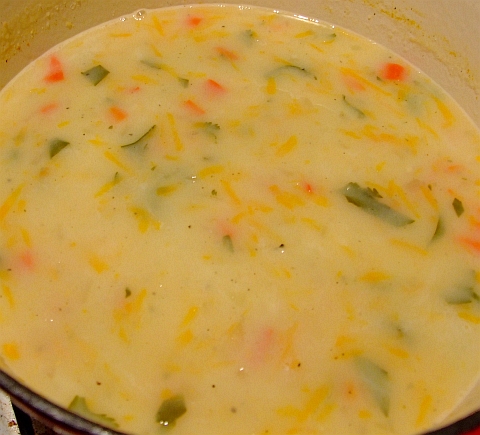
The milk was added and the soup was brought back up to temperature.
DSCF7783

I checked to see if it needed any more seasonings (like salt) and I added a pinch of sea salt.

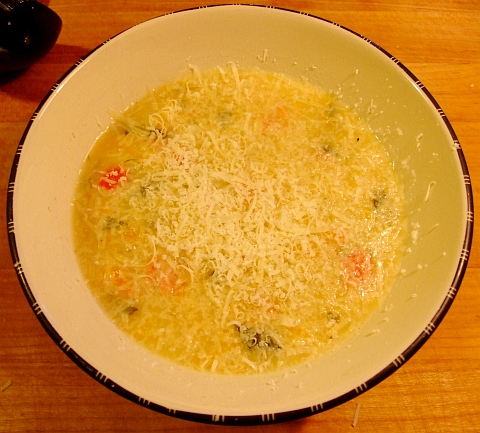
And it of course looks great in a bowl!
DSCF7784

I of course just had to make one little, itsy, bitsy, teeny, tiny final adjustment...


Fresh grated Parmesan!
DSCF7785

The soup was very very tasty, I thoroughly enjoyed it. And you can all thank Maggie up in Canada for sending me the recipe!
Monday, December 12, 2011

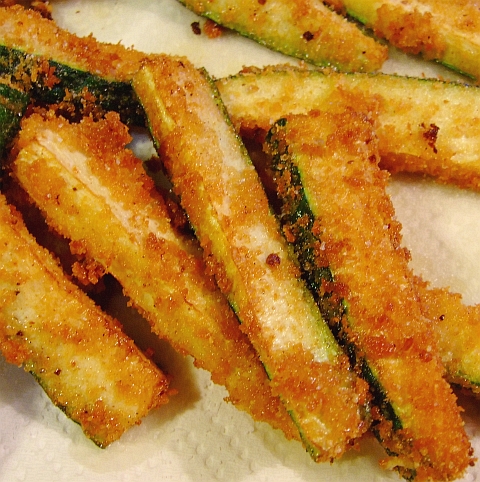
Deep Fried Zucchini Fingers

DSCF7787


These are so easy to make and oh so tasty! Don't worry if you don't normally like zucchini, you'll LOVE these!

AND you don't have to worry about salting n "sweating" the zucchini fingers. Why? Since they are deep fried any bitterness that may be in the zucchini (if it's not fresh) is gone during the cooking, woo-hoo!

These are breaded, not battered. The battered ones come out a bit on the soggy side I've found. However if you do have soggy battered deep fried treats, you can chuck 'em in a hot oven for a few minutes to crispy them up, no worries mates.

Alrighty then, let's get to the breaded zucc's.

What you need:

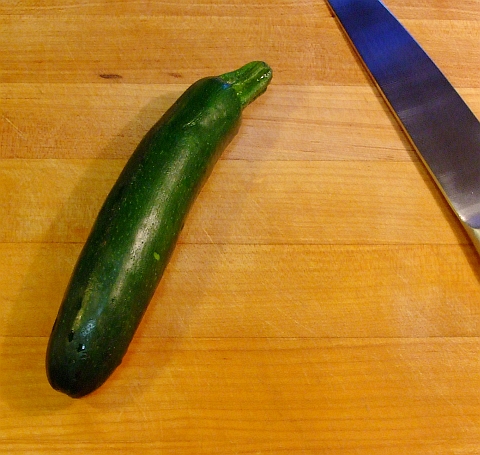
one zucchini
bread crumbs (around a cup should do)
1 tsp cumin powder (cuz I LOVE cumin)
1 tbsp (or so) of freshly grated Parmesan (cuz I LOVE Parmesan)
sprinkle of sea salt
one beaten egg

The oil you want to use for deep frying is something that'll take a good hot temp of around 400 to 425F. The two best for deep frying, in my opinion, are peanut oil and rice bran oil. Both are very healthy, have a very high smoke point, and aren't GMO.

What you do:

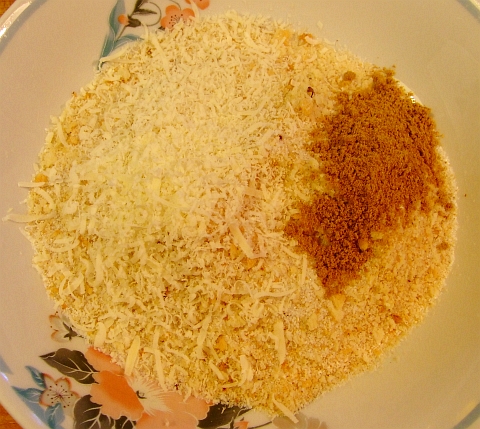
Add the bread crumbs, cumin powder, Parmesan, and a pinch of sea salt to a bowl
DSCF7788
and mix it all together!

Next, prepare your zucchini. Just cut each end off and rinse it, no need to peel it. Cut it in half, then halve each half lengthwise. Slice each halved half into finger sized pieces.

You should now have a bowl of seasoned bread crumbs, a bowl with a beaten egg (do I really need to tell you how to beat an egg? Thought naught) in it, and a small plate of zucchini fingers.
DSCF7790


Hopefully you remembered to light a fire under your oil before you started all this so you should have a wok with an inch of hot oil in it.

Put one fourth of the zucchini fingers into the egg, move around to thoroughly coat, put them in the bread crumbs and make sure they are well coated in the seasoned crumbs.

Carefully plop the breaded zucchini fingers into the oil without splashing any oil on you. Cuz, well, like, you know, that kinda like HURTS!

After around 45 seconds or so, give em a stir and turn. I suggest using tongs instead of your fingers BTW.

Once they are nicely browned, take them out of the oil and drain on paper towels. Continue deep frying in batches till they are all cooked.

A little sprinkle of sea salt and they'll be perfect! No dips are needed for these, trust me.

And don't they look delicious?
DSCF7794

Sunday, October 2, 2011

Fried Parsnip Slices

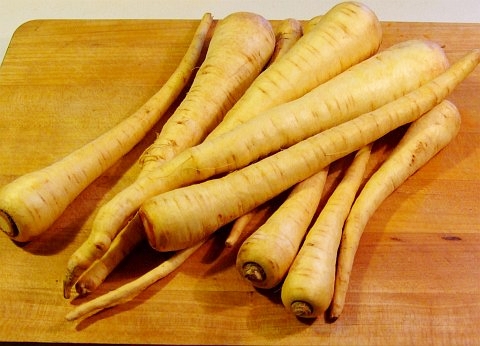
Ah yes, the humble and venerable parsnip!

DSCF6117


This veggie has been known and eaten since antiquity. The ancient Romans considered the ones from what is now Germany but was then called Germanica to be the best. They were also a staple diet of the poor in the Middle Ages --that means prit-near everyone in Europe back then ate 'em! Parsnips were also used as a side dish to salted cod or smoked herrings as they complimented the strong fish flavours nicely.

They fell out of fancy as the ole humble spud from the New World gradually replaced them. Even to this day there are many that hate parsnips, probably from ingrained thinking over the last few hundred years.

There's one Aussie TV chef/personality who caused quite a stir (Ha! "A stir" get it?) a couple of years ago when he went on a bit of a rant against parsnips as they are starting to come into fashion down here in Oz. Says he wouldn't even feed 'em to a pig!

Believe or not Ripley, but until recently I'd never had a parsnip nor even knew what they looked like! I got a few kilos of them at a ridiculously low price a coupla months ago and asked via twitter what I should do with them.

Quite a lot of great suggestions I did receive. Curry was one of the suggestions but I didn't want to make that first as I wanted something that let the parsnip flavour speak for itself. So I went with the by far #1 suggestion of parsnip chips (fries)!

I even baked one batch and deep fried another to find out the taste difference. Not surprisingly, the deep fried ones tasted better. Well, at least to us! I made the baked ones the first day and we all thought they were tasty, even BIL who is a very fussy eater and doesn't eat many veggies. But the deep fried ones the next day were waaaaay better! The whole platter of them disappeared in under a minute.

Not that I was timing it though, too busy eating!

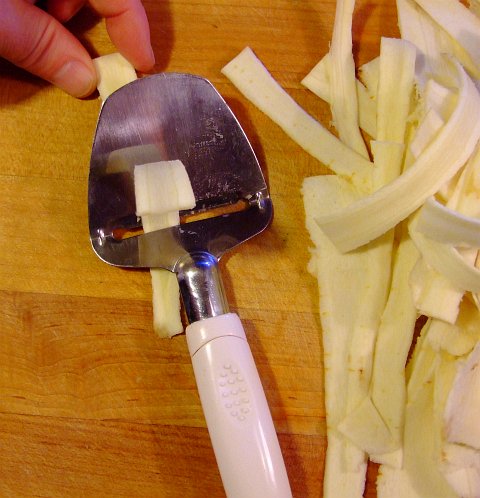
The key to baking or frying the parsnips is to slice them lengthwise making sure all slices have the same thickness. Otherwise thin strips will be burnt before the thick strips are done. After peeling the parnsips I contemplated how to do this.

"Duh," my brain said, "use a cheese slicer you moron!"

Wouldn't you know it worked great? Yes, my brain can be smart at times. Here's proof (of the procedure working, not my brain being smart)
DSCF6123


To bake them, toss the strips in olive oil, lightly salt them, and put them in a hot oven till they're crispy. They come out lookin', smellin' and tastin' good!
DSCF6128


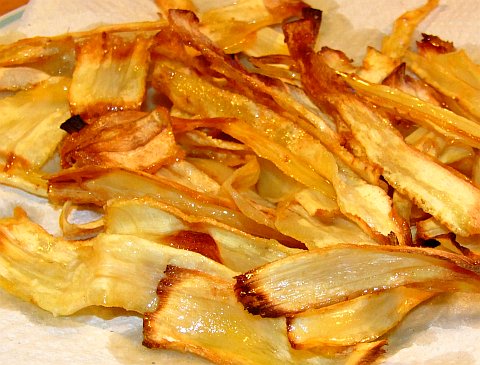
For even better ones: deep fry them thar strips! Use the same temperature of oil as you would for fries, no worries. I recommend rice bran oil as it has a very high smoke point of 495 F and the fried food comes out light and crisp.

The strips fry up very quickly so keep a close eye on them else you'll end up with burnt strips of crud. So don't go tweeting while deep frying!

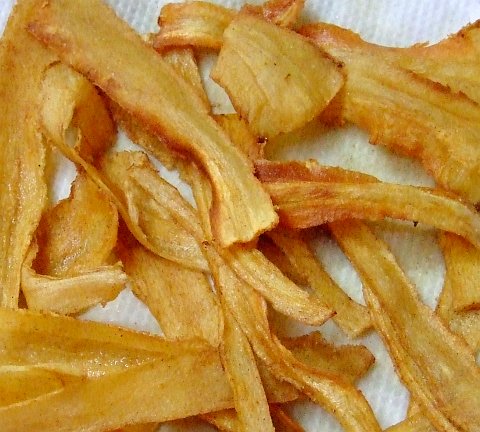
Here's what the first round out of the wok (my deep fryer) looked like:
DSCF6188

Just a quick sprinkle with salt and then EAT THEM!

Monday, July 11, 2011

Roasted Brussel Sprouts

I've been trying for a month now to get this post up! It's been rather difficult as most of my daytime activities since July 2nd have been seen through a sleep-deprived haze.

"Why?" I hear you ask.

It is because the French decided to have a big ole bike race in the middle of the night. You'd think they could have the decency to have it at normal hours, but no, it's on live in the middle of the night here down unda.

Now that it has been 5 days since the end and I've caught up on a month's worth of sleep, I can now devote time to this here food bloggie thingy.

BTW, Cadel Evans won the Tour de France. Just in case you didn't know.

Back to brussel sprouts.

Brussel sprouts are in season down here now so I've been eating lots of them. I used to just steam them, butter em up, and then eat them. Someone suggested that I bake em with olive oil and garlic. Hey, that works for me! Thanks Arvay!

They were very good, I quite like them that way. I then tried baking them with some other veggies at the same time and found that onions make a nice accompaniment.

I also used them in a couple of stir fries; again success!

But why not combine the two, thought I? Guess what? It WORKED!

ROASTED BRUSSEL SPROUTS

What you need for one serving as a side dish:

4 raw brussel sprouts, halved
1 thick slab of raw onion
2 cloves garlic (I used some that I stored in olive oil), thick sliced
olive oil
sea salt
splash of white wine
freshly grated parmesan
A fry pan that is oven safe (I recommend cast iron)

What you do:

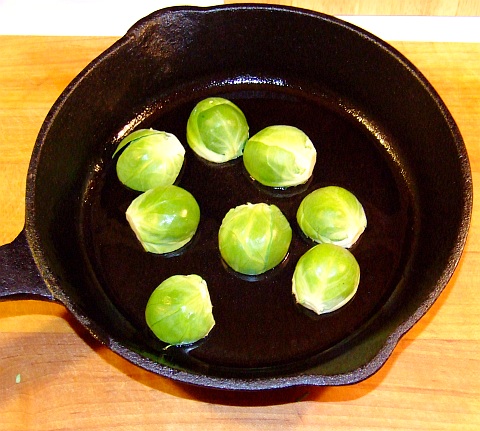
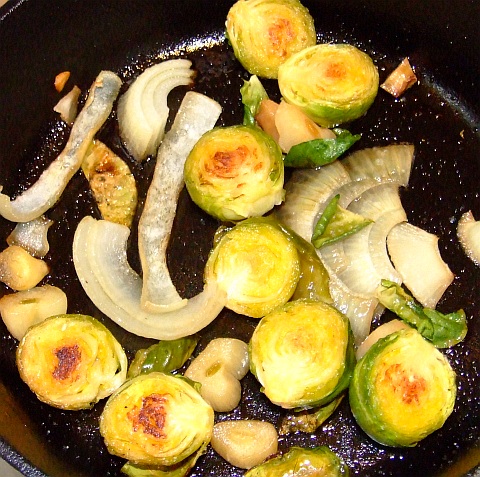
Drizzle a bit of olive oil in your pan, heat it up, then add the brussel sprouts, cut side down. It should look something like this:
DSCF5702
No, these aren't giant brussel sprouts, it's just a small cast iron pan!


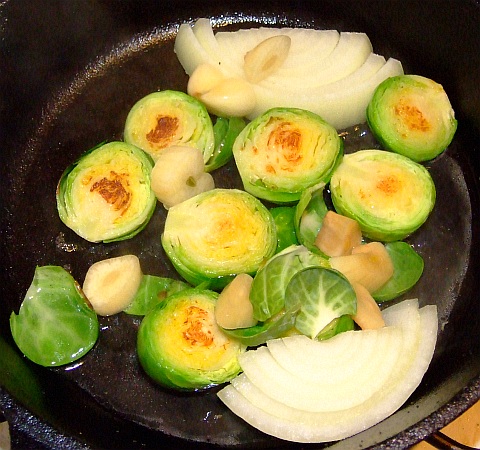
When the flat side has browned, turn 'em over and add the onion and garlic. Like this, see?
DSCF5703


Go ahead and give it a sprinkle of sea salt now. Or later, no worries either way.

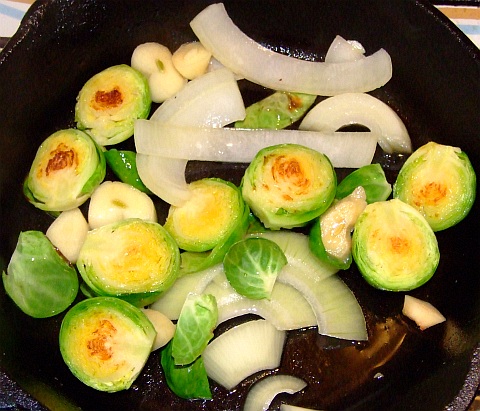
Once the onions are just starting to cook
DSCF5705


add a splash of white wine --around half a glass-- to deglaze the fry pan. Simmer till the wine cooks down.

Once the wine cooks down put the pan in a medium oven and cook till the garlic is just soft. This should only take 12 to 15 mins. When you take the pan out of the oven it should look something similar to this:
DSCF5708


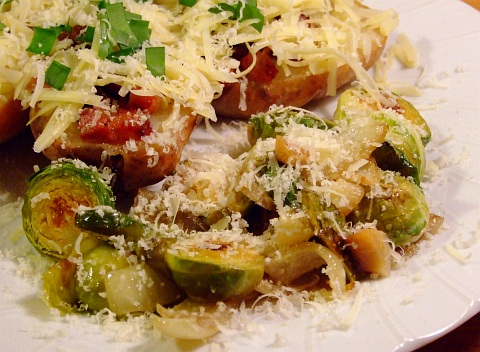
After plating, grate some high quality Parmesan over the top and enjoy!

Here it is as a side dish to Twice-Baked Potatoes:
DSCF5713


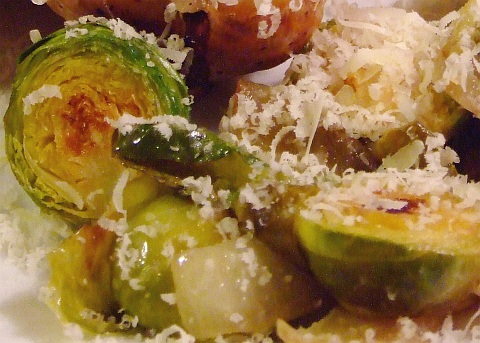
And here is the obligatory closeup:
DSCF5712


Don't forget that brussel sprouts are very healthy! In fact this entire side dish is just oozing with healthy goodness!

Saturday, April 9, 2011

What would you make with...

The other day I came back from the shops with a load of really good, fresh veggies. I had a fair few ideas of what I was going to do with them too.

And then I thought, "Hangabout mate! P'haps some of me tweeterers may wanna give it a go?" So I put the list up on twitter and also mentioned a well stocked pantry plus herb garden, and asked what folks would make!

Unfortunately, I don't have many foodies following my tweets, so only 2 people gave it a go. One was braise some of the veggies then through it all into a quiche. Ummmmmm, not exactly what I had in mind. The other was stuffing the bell peppers with the chilli, put them and the rest of the veggies in a casserole dish, cover with cheese and bake. Not bad. But again, not exactly what I had in mind.

Remember, it's hard to get the meaning through in only 140 characters via twitter!

So how's about we try it here!

You may assume a very very very well stocked pantry and good garden goodies. This means things like garlic greens, wild onions, fresh herbs, potatoes, spuds etc can be used. Pretty much any kind of dried spice, dried herb, or herb mix you can think of can also be used. As far as cheese goes, just make sure you use ones that I've heard of as I usually have 7 to 10 different kinds of cheeses on hand at any one time.

And lastly, let's keep this meat free. Just cuz I feel like it.

And try not to go overboard on the pantry items. Fettuccine with a creamy cheese sauce and a few of the fronds from the fennel bulb sprinkled over the top ain't gonna make the cut! The idea is to see what you would make from this list that features the ingredients, not the accessories.

And here is the list of goodies you get to work with:

Brussel sprouts, red n green n yellow bell peppers, green beans, large fennel bulb w/stalks and fronds, button mushrooms, fresh juicy just-off-the-vine tomatoes, fresh thai chillis, 3 bok choys.

I came up with a dozen dishes I'd make off the top of my head, and then pared it down to 6 simple, tasty ones.

If you feel the need to help your knowledge a bit (cheat) by using cookbooks or the internets then you may, but you'll have to live with your guilty conscience. (I'm just joking of course!)

Obviously, there's no need to go out and get all this stuff, I'm just curious to see what other folks would make. Use the comments, it'd be nice to get into double digit comments so spread the url for this post around!

Sunday, December 5, 2010

Beer Batter Waffles

Alight, confession time... This is another post from my other blog before this here food blog was hived off. So you'll have to put up with my silliness.

But trust me, these are ultra delicious! Serve em with butter, dollop of freshly whipped cream, and maple syrup, side of bacon and you've got some seriously happy campers.

And here for your reading pleasure is THE recipe for Dingo Dave's Extra Special Beer Batter Waffles!

Special Beer Batter Waff-lees

You may notice something here as time goes on (ummm, besides the ticking of the clock), and that something is the fact that you'll see quite a few beer battered goodies from yours truly (or at least from me).

Remember, the founding fathers of the US of A were home brewers (we'll just go along with modern revisionist history about ignoring them pretty much all being slave owning folk too, eh) and I believe it was one of those dudes (I can't remember which, my memory is hazy from that long ago) who said in reply to a tax on beer "But sirrah, it is liquid bread!"

Alrighty, enough waffling already: here's what you need for some really great waffles:

One waffle iron --well, DUH! However, I am soooo glad that I brought my waffle iron down here from Alaska as I have yet to see a single waffle iron of ANY kind for sale here in the land down under... SHEEESH, the Belgian immigrants must be furious.

Alrighty, no dramas, here we go...


What you need:

2 1/4 cups (533 mls) flour --note, not self-rising!
3 (45 mls) tablespoons sugar --I use raw sugar for everything (well, almost, snicker snicker)
1/2 tsp (1/2 teaspoon) salt (NON-iodised sea salt --see a previous rant of mine somewhere)
6 tbsp (6 tablespoons or 90 mls) melted butter (not clarified... ah, perhaps I should clarify that term...)
2 eggs (chicken eggs, not platypus eggs) lightly beaten --don't forget to crack them outta their shells before beating them suckers
1 tsp (5 mls) vanilla essence --imitation or real, don't matter except for the price
1 tbsp (15 mls or 1 tablespoon) orange juice --if you don't have an orange tree out front (snicker, I gots a lemon tree out front too), then try to
use the freshest you can obtain (orange, not tree)
1 can of brewskie --a light pilsner works best, but hey, to each his/her own


Here's what you do:

Mix flour, sugar, and salt. Ummmm, I'd suggest using a large bowl to mix it in...

Melt the butter and let it cool --How to melt butter: microwave for 20 seconds (1/3 minutes), then stir, then nuke another 1/3 of a minute (20 seconds)... repeat till it's all melted (the butter you fool).

Chuck everything (including melted, cooled butter) into the bowl with the flour, sugar, and salt. Beat the heck out of it with a wooden spoon until the batter is smooth.

Let the batter sit at room temp* for at least an hour (overnight works too).

Give the batter a quick stir before using it in your waffle iron. If I have to tell you how to use and clean your waffle iron then I think you are on the wrong blog.


*room temp... Damn how I LOVE that term!!! The room temp here when the a/c is off is around 100 F (38 C). In the mornings room temp in the back can be 5 C (41 F).

So, like, try it, you'll like it!

Tuesday, August 17, 2010

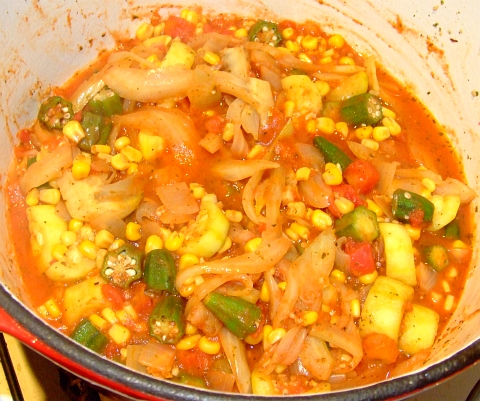
Ratatouille with Fennel and Okra

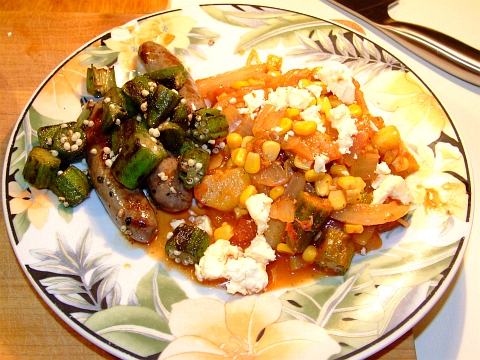
And I served it with feta crumbled over the top and some grilled venison sausages w/okra on the side.

Plates were emptied! Quickly! Very very tasty.

Full disclosure: I've never made ratatouille until I made this. My first try I knocked out of the park!

I got the idea for making ratatouille from a great post at a wonderful food blog. She's a professional chef and teaches cooking classes full-time. Friendly and she answers comments and questions. You can find Helen at:

Beyond Salmon

and her ratatouille is here:

Beyond Salmon's Ratatouille

Go have a quick look and you'll see where I got the inspiration for my Ratatouille. I know that fennel isn't a common ingredient in Ratatouille but it's in season down here in South Oz and very inexpensive. Okra is in season here too, and it IS a staple veggie in Cajun cooking commonly used in gumbos.

And I do apologize for using canned corn. Fresh corn cobs are very pricey down here due to the 10 year ongoing drought. When you use canned corn make sure the ingredients are corn, water, salt. Nothing else. No chemical crap!

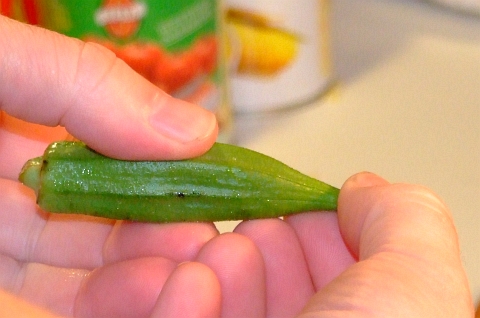
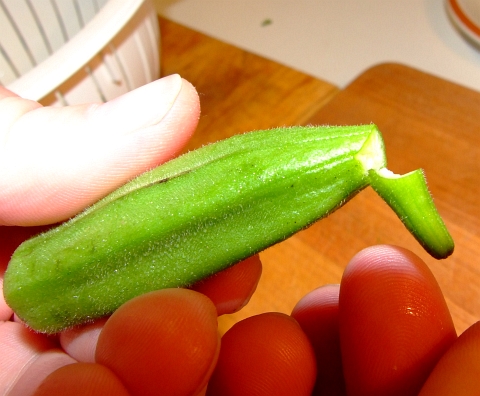
A quick word about fresh okra. When you are selecting okra to buy, you want to buy smaller rather than larger. The larger ones can have a "woody" texture. You also want to test a tip or two. If the tip snaps off then they are fresh. If it bends completely over, then that bin of okra is not very fresh. Here's what I mean:

Give the tip a little bend like this:
testing okra 01


And the tip should snap off thusly if it is fresh:
testing okra 02


Anyways, on with the recipe:


Fennel and Okra Ratatouille with Venison & Okra on the side

What you need:
One large fennel bulb
12 to 16 small, fresh okras
1 large onion, rough chopped
One 12 ounce can of corn kernels
2 or 3 cloves crushed garlic
1 large zucchini
1 can crushed tomatoes
1/2 tbsp dried rosemary
1/2 tbsp dried oregano
sea salt
olive oil
a bit of crumbled feta

4 mini venison sausages (2 per person)
12 to 16 small, fresh okras --in addition to the ones going into the ratatouille
olive oil
sea salt
small handful fresh coriander (cilantro) leaves


What you do:

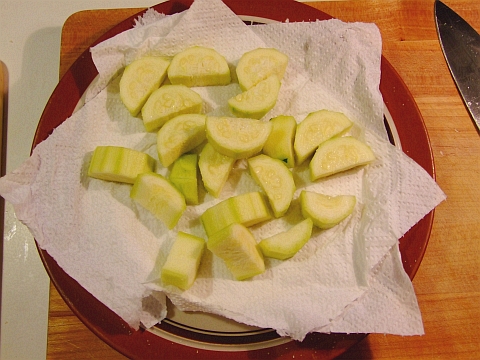
First, peel and slice the zucchini. Try to aim for 1/2 inch thick slices. Sprinkle the slices with sea salt, toss to coat, and let them set on paper towels for 15 minutes or so --this is to draw moisture out of the zucchini. I do this with eggplant, but it was the first time I'd done it with zucchini. Worked like a charm.

See? Have a look:
prepared zucchini


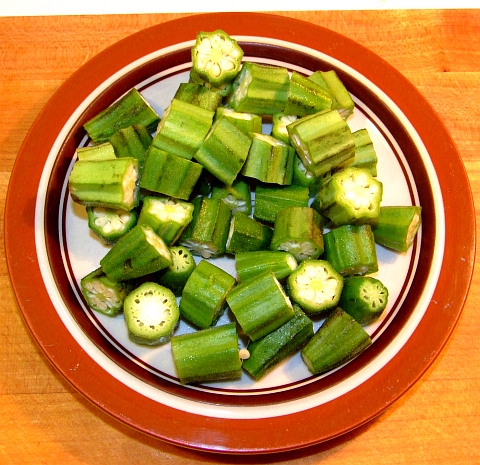
Prepare the okra: cut the tips and stems off, then cut each okra into 3 pieces. Don't worry about the sticky stuff as that is normal. Fry them up with a bit of olive oil for a minute or two so they are just browned. Set aside to drain and cool. This is what they look like before lightly frying:
chopped okra


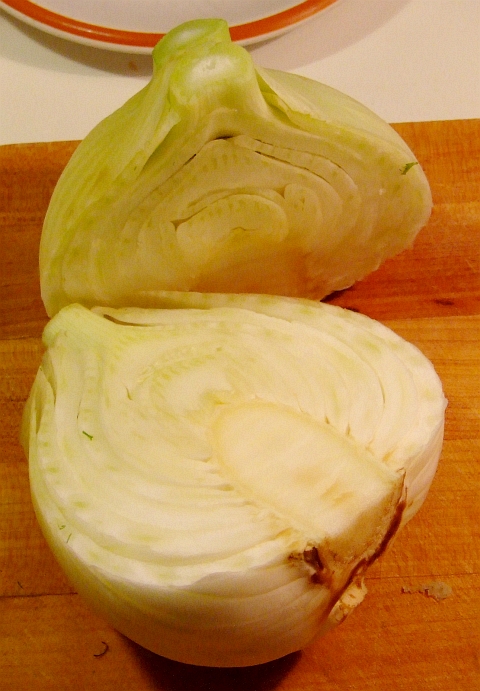
Slice your fennel bulb into 1/4 inch thick slices. If you need to halve or even quarter it to facilitate the slicing then be all means go ahead and do that, no worries.

fennel cut in half


fennel sliced


Now give your onion a rough chopping. Don't make the pieces small otherwise they'll be lost in the ratatouille.

By now the zucchini slices should have lost enough moisture. Give them a quick pat with paper towels and fry them in a bit of olive oil till the just start to brown. A minute or two each side should do the trick. Set them aside to drain.

In the same pot you'll be cooking the ratatouille (I recommend an enameled dutch oven) put the sliced fennel and chopped onion. A bit of olive oil and fry em up. You want the fennel and onion to just caramelize. Once they've caramelized then add the garlic, basil and rosemary; continue to fry for another 30 seconds.

Now you get to de-glaze the pot. Add the liquid from the can of corn to the pot and stir it around so the fennel and onion aren't stuck at all. Put the lid on and simmer on low for 5 minutes.

Add the can of tomatoes and the corn. Simmer for another ten minutes. Now add the zucchini and okra. Put the lid on and simmer for 10 to 15 minutes. Turn the heat off and let it sit in the dutch oven while you get the sausages and the rest of the okra cooked.

If you want this dish totally vegetarian, then just don't use sausages at this point, no worries.

Hopefully your dutch oven should now look something similar to this:
ratatouille in pot


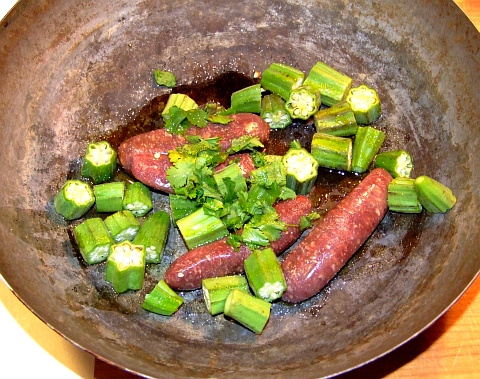
Cut the rest of the okra into thirds, as you did for the ratatouille. Put the cut okra and the venison sausages into a wok with a bit of olive oil, sprinkle a bit of sea salt, and toss in the coriander leaves:
venison and veg


Fry it up till the sausages are done. Toss/stir regularly so nothing sticks. Once they are done you can plate it up!

Spoon the ratatouille onto a plate, sprinkle with crumbled feta, and put two sausages plus some fried okra onto the plate:
plated


It's easier to make than it sounds and OH SO TASTY!

Again, a big thanks to Beyond Salmon for posting her wonderful ratatouille recipe and guidelines for making it! Thanks Helen!

Sunday, August 8, 2010

Vegetable Soup Stock with Fennel

Fennel is in season down here in South Oz --probably most other parts of Oz too. You can get a full sized fennel bulb for $1.99 at the shops now.

fennel bulb


Needless to say, I've been doing a lot with fennel bulbs lately.

But what about those stalks that you trim off?
fennel stalks


SOUP STOCK! But this won't be a regular soup stock cus the fennel stalks impart a very mild licorice flavour to the stock so you need to season the stock appropriately.

Here's what I did for a very wonderfully flavoured soup stock.

What you need:

stalks from one fennel bulb --rough chopped
1 small onion --chopped
1 tbsp dried basil
1 large sprig fresh rosemary
2 cloves of crushed garlic
6 to 8 dried curry leaves
2 dried bay leaves
1/2 inch grated ginger root
1 gallon water (H2O)
sea salt to taste --you'll only want a tiny bit


What you do:

Chuck everything except the sea salt into a large pot. Bring to a boil, cover and low boil/high simmer for an hour. You don't want to lose more than an inch of water in the pot, so keep it covered and adjust the heat accordingly.

Let it cool a bit and then strain out all the chunky stuff. Give it a taste and salt to your taste. Only use a bit of salt at a time cus you do not want too much salt in this stock or you'll ruin it.

Let it cool completely and refrigerate till use. Or use it that day. I wouldn't keep it longer than a few days before using it though. I used mine the next day to make a fennel, prawn, and prosciutto risotto. Obviously, the stock was the liquid that the rice and other stuff was cooked in. Look for that recipe next as it was delish.

You can also separate the stock into smaller containers and freeze them till you need some, no worries.

Saturday, July 17, 2010

Hong Kong Steamed Sponge Cake

I collect recipe books. The more obscure, the better. This recipe is from a cookbook that I found for 50 cents at a local thrift shop (down here they call them op shops) a few years back.

Hong Kong's 'Chinese Flavours' is the title and it was published in 1975 in Hong Kong. No author, just an editor named Kenneth Mitchell. He had the help of several major Hong Kong restaurants and hotels along with the Hong Kong Tourist Association. Any recipe that had pictures was prepared by the restaurant or hotel that volunteered the recipe for inclusion.

To say that this is book contains authentic Hong Kong restaurant fare from the mid 1970's would be a serious understatement.

It's also old enough that many ingredients (like flour, corn starch, etc) are listed by weight. The only thing I did to this recipe was find out that 100 grams of flour is 3/4 cup, and that 75 grams of sugar is 1/2 cup. You are welcome.

This recipe also specifies for the cake to be served hot. And they ain't kidding! I left a bit of one out to cool to find out what it tastes like cold... Like chewing on a wet, cold, clammy, tasteless sponge. Don't ask me how I know what a sponge like that tastes like!

Hong Kong Steamed Sponge Cake

What you need:
2 eggs --I used free range, of course
75 gr (1/2 cup!) castor sugar --I used raw sugar
100 gr (3/4 cup!) flour --I used unbleached baker's flour
1/4 tsp baking powder --I used baking powder

Now who can argue with that for a simple ingredient list! And it was ohhhh so good.


What you do:
Separate the eggs and beat the whites till they just start to stiffen. Mix in the sugar and beat till sugar is dissolved. Add the egg yolks and beat them in too. No, you won't have stiff peaks anymore, but you aren't supposed to.

Add the flour and the baking powder and mix till you have a smooth batter.

At this point the recipe called for pouring the batter into a small, greased, cake tin and steaming for 20 mins or until done. I don't know about you, but none of my steamers are large enough to fit a cake pan in, that's for sure.

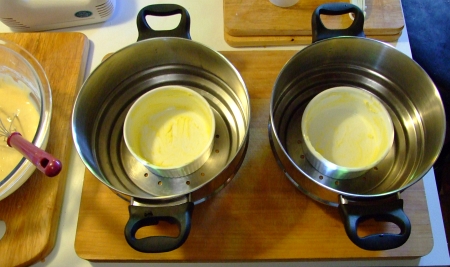
However, I found that a 4.33" diameter ramikin dish fits nicely into home-sized steamers!

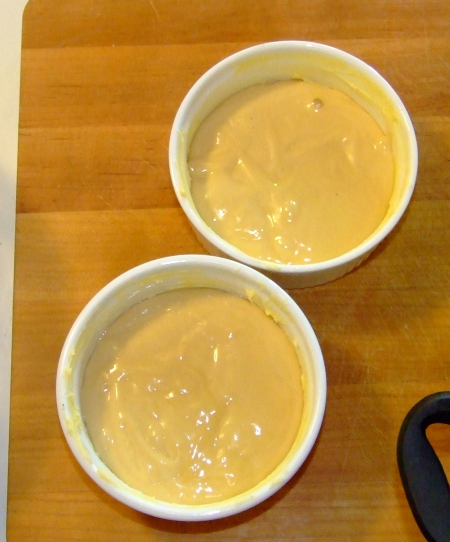
I buttered up 2 of them, see?
readying ramikin


The batter was evenly divided betwixt the two ramikins. Each one filled up halfway, perfect!
ramikins loaded


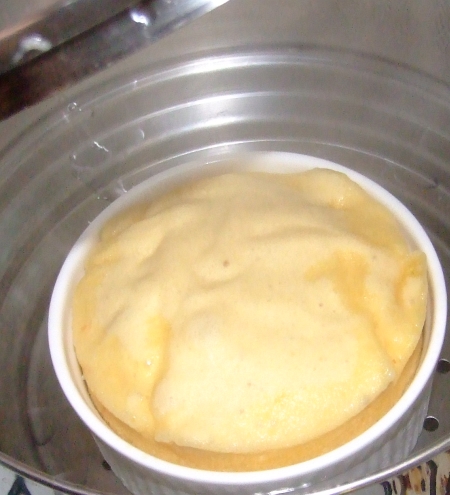
I checked the steamer after 15 minutes, and them cakes had risen to over double the original size!
steaming cake
At this point the cake didn't "test" done (bamboo skewer test), but it did after another five minutes.

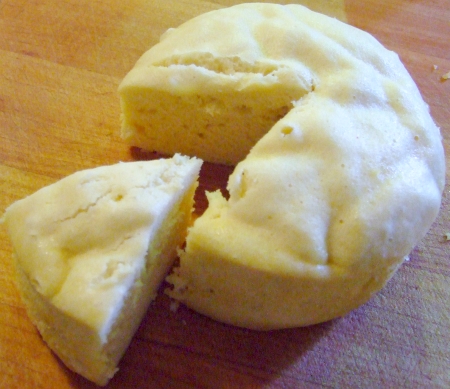
A wonderfully light, fluffy texture!
steamed cake finished


And it was sooooooo good when ate HOT! Mmmmmmmm, delicious.

As it cooled, the flavour and texture really changed into the cold, clammy, bland, sponge. So make sure you serve it (and eat it) piping hot, right out of the steamer!

Next time I make it I'll add a bit of vanilla and grated orange peel to the batter, and sprinkle ground cinnamon, powdered sugar, and cocoa powder over the top just before steaming. Should be tasty.

Tuesday, June 15, 2010

Cumin Seed and Cayenne Crackers *updated*

Making your own crackers is not all that difficult. If you are a person who does your own baking all the time *cough, cough Rachel* then these'll be very easy.

And you can change around the seasonings too! Nothing wrong with experimenting around with flavours as Naturelady certainly knows all about that.

I got the idea for these from a cookbook (I have a whole bookshelf of those darned things), but I'm not going to tell you which one as not only were there numerous typos throughout all the recipes, but the crackers (which didn't include cumin seeds or chili or SALT or turmeric) tasted HORRIBLE! I also had to change around the amounts of dry stuff.

Kinda tells you about the editing prowess of the folks at Newscorp, eh?

Anyways, here's a fairly simple recipe for making your own crackers and not having to worry about pronouncing all the unpronounceable chemicals in the commercial crackers.

What you need:

1 cup of flour
1 tbsp cumin seeds
1/8 tsp turmeric powder
1/2 tsp baking powder (I know it seems low, but we are making crackers, not bread)
1/2 tsp raw sugar
3/4 tsp sea salt
1/8 tsp cayenne powder OR 1/4 tsp chili flakes (double it if you really like spicy stuff)

1/4 cup of milk
2 tbsp olive oil


What you do:

Mix all the dry ingredients together --that'd be the first 7 of the above list. Add the milk and olive oil and stir lightly, then knead a few times.

THIS DOUGH WILL BE CRUMBLY! But that's OK.

Now let's roll this out! Grab off about half or a third of the dough, plop it on your counter, and start rolling! You want to get it to betwixt 1mm and 2mm thick. I like to err on the thin side personally.

Once you have it rolled out, you then get to cut the dough into cracker sized pieces. Before you do that though, you can prick the thin rolled dough with a fork if you so desire. Cookie cutter, kitchen knife, pizza cutter... whatever you want to use to cut the dough into whatever sized crackers you prefer. Your choice!

Then, of course, roll out and cut the rest of the dough.

Sprinkle some sea salt on a baking tray, put the crackers on it (you can crowd them, no worries) and sprinkle a bit of salt on the top.

Bake for about 10 minutes in a 350-400 F oven. Once the bottoms are slightly browned, then turn em over and bake for about 3 or 4 more minutes.

LET THEM COOL! They are *ok* when hot, but soooooo very tasty once they've cooled. They're also strong enough to scoop up any amount (or type) of dip you care to use.

Making your own crackers is an easy thing to do, and you get to stay away from all the chemical crud in the store-bought crackers.

*update*

Feel free to play around with the flavourings, please let me know if you find a really great spice/herb/seed combo, thanks for that.

Monday, June 14, 2010

Easy chocolate sauce

Yes I know I've written quite a few posts that involve chocolate (food of the Gods) sauce, but I thought I'd sorta consolidate them. Maybe give some tips, tricks, what goes well in it, etc.

The basic chocolate sauce has just three things: dark chocolate, butter, and cream. The less cream and butter, the thicker the sauce will be and if you only use a tiny amount of each then it'll harden upon cooling --great for things like chocolate coated strawberries. Or pretty much ANYTHING you want to chocolate coat (^_^)!

And the best thing is that you DO NOT NEED A DOUBLE BOILER! And it's quick too. You will need a thick-bottomed saucepan though so if you don't have one then go run out to the shops right now and get one.

I'll start with the basic sauce, and then talk about the various additions you can, ummm, add.

The basic chocolate sauce (this makes A LOT):

What you need:
One bar (375 grams or 12 ounces) of dark cooking chocolate
3 tbsp butter
1 cup cream

This'll make a sauce that is liquid at room temp, but thicker than motor oil. If you want a thicker sauce, just use less cream and less butter.


What you do:

Break the chocolate bar into pieces and put them all into your saucepan. Add the butter and the cream. Turn on the heat to low. Give it a stir to mix things well. Once the chocolate starts to melt, then take out a whisk and start whisking it. Almost continuously, in fact.

Once all the chocolate is melted and everything is thoroughly incorporated together, turn the heat off and continue whisking for another 30 seconds or so. Make sure you get to the bottom of the saucepan during the whisking so nothing burns.

Ta-da! Done! The whole process should have taken 2 or 3 minutes.

Now comes the FUN part! What you can add and when you should add it.

Substitute half the cream with a dark red wine like shiraz. Add at the same time as the cream, of course.

1 tsp of cinnamon powder and a half tsp cayenne powder. Add while whisking. Taste it afterwards and add more of either if you wish, no worries.

Cumin powder and cardamom powder go well too!

If you want it slightly tart, add some ground sumac.

Hard to go past ginger powder too.

My point is, the possibilities for flavorings are endless. I can tell you for a fact that the cinnamon and cayenne combo is wonderful! I'm still experimenting with the others to find the best combos that suit my palette.

So have some fun and experiment! Heck, make a batch of standard sauce and then divvy it up into bowls and mix different spices into each. Just make sure you write down which spices went into which bowl. And be sure to let me know what combinations of spices you find that are really good!

Monday, May 31, 2010

Sautéed Onions with Chili and Garlic

This is a simple, wonderful topping for many things. They can, obviously, be put on a hot dog or burger, no worries. They make a great addition or topping to any omelet. Pile them on top of your nacho platter! Heck, I'm sure I could even incorporate them into sushi rolls!

The possibilities of uses are limitless. Provided, of course, you like onions, garlic and chillis.

A note about the chilli paste you'll be wanting to get: make sure that it is at least 90% chilli (and they should at least be as hot as Thai or African Bird's Eye) and the only other ingredients are water and salt. Well, there might be a preservative and a thickener in it... But nothing else!

What you need:

1 small onion, either rough chopped or cut into half rings
1 tbsp of chilli paste (or less if you are a wuss)
1 garlic clove, crushed
dash of sea salt
1 glass of chardonnay, or any white wine
a bit of olive oil


What you do:

Heat up a wok on medium/mediumhigh heat. Add a splash (like 1 tbsp) of olive oil to it. Just before the olive oil starts to smoke (like after around 45 seconds) toss in the onion, chilli paste, garlic and salt. Toss or stir constantly till the garlic juuuuuuust starts to brown and things start to think about sticking --this should only take 2 minutes at most. At that point, add a half glass of the chardonnay (the other half is for the cook) and give a quick stir to de-glaze the wok.

Cook it down till there's no liquid left BUT that the onions have not started to fry again.

Turn the heat off. Splat the onions over or in whatever you'll be having them over or in and ENJOY!

Sunday, May 16, 2010

Creamy Potato and Pea Soup

And it is best served with a crusty, fresh, loaf of french bread for dunkers.

No pics of this as the batteries died when I turned the camera on (ooh baby, what big lenses you have!) and I didn't have time to charge another set --of batteries.

But trust me, it is delicious! If you'd like I can take a pic of an empty bowl and you can sorta imagine the soup in it... maybe not.

I shall now try to remember what went into the soup and the procedure I used...

What you need:

8 to 10 medium potatoes, peeled and diced
1 onion, chopped
2 cloves garlic, crushed
1 litre of water (4 cups)

1 cup cream
2 glasses chardonnay (and a 3rd one for the cook)
1 can garden peas (should only have 3 ingredients: peas, water, salt)
3 or 4 wild onion greens, minced (or garlic greens)
1 tsp dillweed

sea salt
white pepper

2 thai chili peppers, minced (optional)
1/2 small onion, finely minced (optional)
1 wild onion green, minced (optional)
1/2 tsp mint (optional)
1/4 tsp turmeric (optional)

What you do:

Take the first 4 ingredients and chuck em into a big ole dutch oven. Put the lid on it and simmer till the spuds are soft --around 45 mins. Remove from heat and remove the lid.

Take a spud masher and mash the heck out of the contents. You'll end up with a slurry-type liquid. Now add the next 5 ingredients and give a a good stirring to thoroughly combine everything.

Put the lid on and bring it back up to a simmer. Give it a taste test and season with sea salt and white pepper till it suits your palette.

Serve it up with a crusty bread for dunking!

Optional stuff:

Add the mint at the same time you add the dill. Ditto for the turmeric. The onion greens and chili are for garnish; just sprinkle over the top of the soup. I also sautéed some minced onion in a bit of olive oil and a bit of salt, then deglazed the wok with a splash of chardonnay and cooked the liquid down (that whole procedure took all of about 2 minutes). Those onions were then sprinkled over the top of my soup, along with the chili and greens.

Be creative with this, just try not to overpower the subtle taste and creamy texture of the soup with too many additions.

Tuesday, April 20, 2010

Wholewheat Seed Bread with Chia, Sunflower & Pepita

This is quite possibly the healthiest bread you'll ever make or eat. I'm not kidding! It is also very easy to make.

Have any of you heard of chia seeds? No, not those silly chia pets, sheesh. To find out just how healthy chia seeds are for you, I'd suggest letting Ma Google lead the way. I throw a handful of chia seeds in all my curries now, btw.

Back to the recipe. Easy, very easy.

Just start with my standard, easy, white bread recipe.

Instead of 4 cups of unbleached bakers flour, use 2 cups of the bakers flour and 2 cups of wholewheat flour (called wholemeal flour down here in Oz). So that means half white, half whole wheat flours.

When you add the dry stuff (sugar, seasalt, yeast, etc) you also add 1 TBSP chia seeds, 2 TBSP shelled sunflower seeds, and 3 TBSP pepitas.

Pepitas are raw, shelled, pumpkin seeds.

Then just follow along with the rest of the how-to and then you'll be eating some very healthy and TASTY bread.

Monday, March 1, 2010

Char-Grilled Eggplant

Eggplant is one of the most under-rated veggies (it's actually a berry) around. Very nutritious if you eat the skin too.

Aaaaaaannnnnnnnddddddd if you do one simple trick there won't be any perceived bitterness nor will the eggplant soak up loads of oil --this means if you are making eggplant parmesan then you are forgiven for frying the breaded slices of eggplant instead of baking them.

But we aren't making eggplant parmesan today, we are just going to simply grill the slices. First though, we'll "treat" them so they aren't bitter (even if they aren't fresh) and so they don't absorb the olive oil and go mushy.

What you need:
1 eggplant
1 or 2 tsp sea salt
olive oil

What you do:

Slice the eggplant into slices 1 to 2 cm thick. I try to slice them around 1.5 cm which is 3/5 of an inch. Make sure you get the last slice or two under the "hat" of the eggplant as that's the most succulent part. Lightly salt all the slices and let them set for 30 minutes. You'll notice the slices start to sweat a yellowish liquid, that's ok cus they are supposed to.

After 30 minutes, go crank your gas barby on high (if you are using charcoal, then you had better've started the coals 30 minutes ago!). Next, rinse the eggplant slices and pat them dry.

Drizzle olive oil over the slices and gently toss them in a bowl to lightly coat the slices with olive oil.

Grill them slices! 2 or 3 minutes a side is enough. You'll only turn them once so check after 2 minutes that you've got a nice grill pattern on the bottom of a slice before turning them.

After both sides are char-grilled, serve them up as a side dish to pretty much anything. You'll find the skin has a pleasant, nutty flavour and is very tender. The flesh won't be "heavy" or "greasy" since the eggplant didn't absorb the oil!

You can use various spices when you are oiling the slices. I'll be using a combo of turmeric, cumin, and coriander along with the oil next time.

Enjoy!

Sunday, February 21, 2010

Dingo Dave's Dangerously Hot Chili Sauce

Yes folks, I like chillis. I also spell chilli with two l's as that's how we spell it down here in Oz.

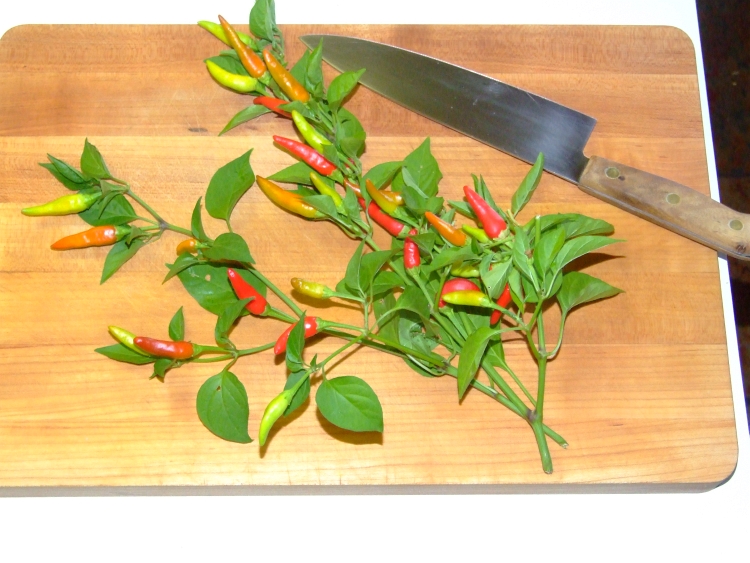
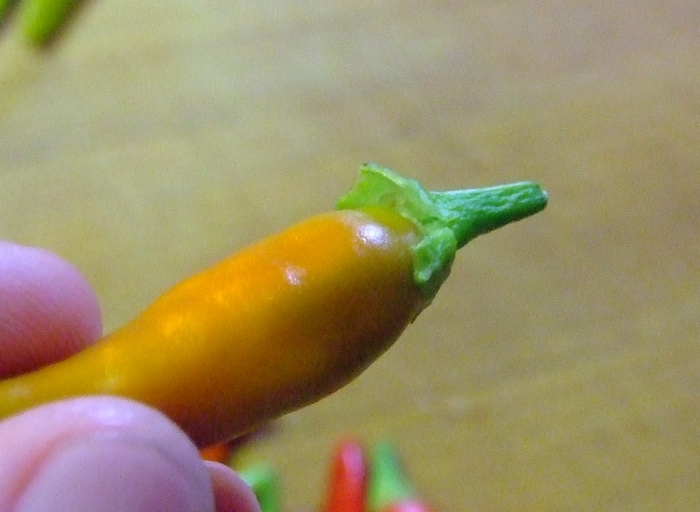
Have I mentioned I grow my own chillis? Well, I do grow them. I currently have 8 plants of an African Bird's Eye variety growing and I should have no problems keeping them through the winter (I haven't seen frost in Adelaide for 8 years now).

Normal Bird's Eye top out at around 200,000 scoville heat units (SHU) but I'm pretty sure these are in the 300,000 to 350,000 scu range. Why do I think that? Because I know how to properly grow chillis in pots so that you get maximum fruit and maximum amounts of capsaicin. And I've eaten a regular Habanero which tops out at 350,000 and these puppies are as hot as them.

Not as hot as the Red Savina Habanero and not near the famous Bhut Jolokia that tops out at over 1,000,000 SHU, but still pretty damned hot. BTW, I'll be getting some Bhut Jolokia seeds for next season... Wife thinks I'm crazy.

These chillis and this recipe is NOT for you if you think a Jalapeno is hot, my chillis are 70 times hotter.

These chillis and this recipe is NOT for you if you think Tabasco sauce is hot, my chillis are 70 times hotter than the original Tabasco sauce and 43 times hotter than their hottest sauce.

These chillis and this recipe is NOT for you if a Cayenne chilli is toxic to your taste buds, my chillis are 7 times hotter.

These chillis and this recipe is NOT for you if you a Thai chilli means instant death to your taste buds, my chillis are 3 and 1/2 times hotter.

For those of you with the guts (in every sense of the word) to read on, then please, by all means, READ ON!


Dingo Dave's Dangerously Hot Chili Sauce

I was going to wait to make this sauce till more of the chillis are completely red and half dried, but we had a big windstorm last night and two branches broke on one of the plants. Keep in mind that even in their green state these puppies are as hot as a Thai chilli.

What you need (besides a great love of chillis):

30 Habanero chillis --this is about the SHU equivalent of the variety of African Bird's Eye I grow
1/2 an onion, minced
5 cloves garlic, crushed and minced
1 tsp of each of the following powders: Cardamom, Ginger, Sumac, Coriander, Cumin
1 tbsp tamarind paste
1 tbsp wasabi paste (the really hot green paste you get with sushi)
1 tsp sea salt
2 tbsp olive oil

1 to 2 cups red wine (I used a shiraz-cabernet)
1 cup water (the wet type, not the dehydrated type)

1/2 cup apple cider vinegar


What you do:

Firstly, you need to snip the chilli fruit off your plants, or go to a shop and buy 30 Habaneros. If the wind broke some of your branches then it should go from this:
chillis on stalks

to this:
chillis with stems


Please notice I left the "hats" on the chillis. Why? Because under the hat on chillis (eggplant too) is where the most tenderest, succulent part of the fruit is. That's also the area with lots of capsaicin in chilli fruit.
under the chilli hat


You'll notice I'm not wearing rubber gloves whilst handling the chillis. That is because I'm not a wuss. Although my wife thinks/knows it's cus I'm crazy.

Anyways, remove the hats from the chilli keeping as much fruit as possible:
chillis destemed


And then rough chop them:
chillis rough chopped


Now add all the ingredients EXCEPT the wine, water, vinegar to a saucepan. You'll notice I grouped those at the top of the ingredient list for your convenience; you're welcome. Make sure you add the seeds too!

Mix it well and then crank the heat up. Cook for around 5 mins while stirring often. The idea is to sear stuff without burning it. It should look something like this:
searing chillis

The above pic is after 2 mins. After 5 mins you'll notice some of the mix getting stuck to the pan. Once it starts to stick you should also notice the chillis, onion, and garlic are well-seared. Time to add the wine and the water!

So, add the wine and the water, stir well making sure you scrape the pot so everything is incorporated into the liquid. Simmer the pot till the liquid is reduced by at least 3/4 and then add the vinegar. Turn the heat off and let it cool.

Add the whole mix to a blender and blend for a few mins so that every little bit of chilli, onion, and garlic are pureed. Put the mix back in the pot and simmer to reduce the liquid by 1/4.

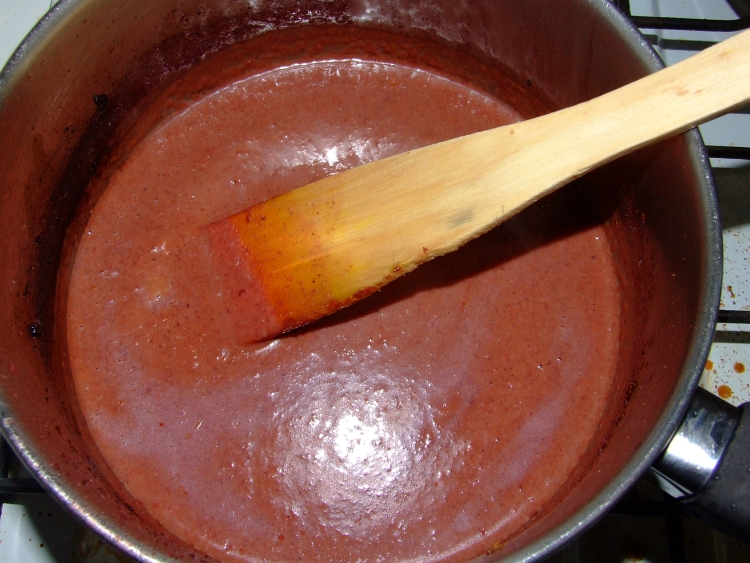
Your saucepan should now look like this:
chilli sauce simmered


TADA! Done! Now just pour it into a jar you've disinfected, cap it, and refridgerate. Use when needed. It ages quite well and gets smoother over a couple of weeks. No preservatives are needed, I seriously doubt anything has the temerity to grow in it.

Enjoy!

Oh, btw... chilli enthusiasts (snobs) are constantly debating the heat and taxonomy of various chillis so if you think that African Bird's Eye can't get as hot as a regular Habanero then I say you are mistaken. My opinion, and I'm sticking to it.

Sunday, January 3, 2010

How To Make A Charlotte Russe

It's not that there's anything particularly difficult about making a charlotte russe, nor is it very expensive. It has more to do with the time --there's a lot of fridge time while parts of it "set", and the actual construction of it.

It's worth the time though. Drool...

All you need is a bit of jello mix, some whipping cream, custard powder mix, and a swiss roll (commonly called a jam sponge roll).

This is all you need:
charlotte rouse 01


The first thing you do is mix your jello according to the package instructions. And then let it cool. DO NOT LET IT COOL SO LONG THAT IT SETS!

Then line a really large glass bowl with cling wrap. It doesn't have to be pretty or neat:
charlotte rouse 02


Slice the swiss roll into 1 cm thick pieces:
charlotte rouse 03


and then line the bowl with the pieces.
charlotte rouse 04


Cut up the last two pieces to fill in the gaps:
charlotte rouse 05

charlotte rouse 06


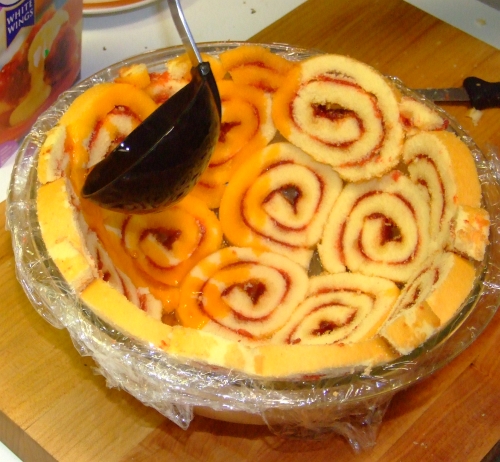
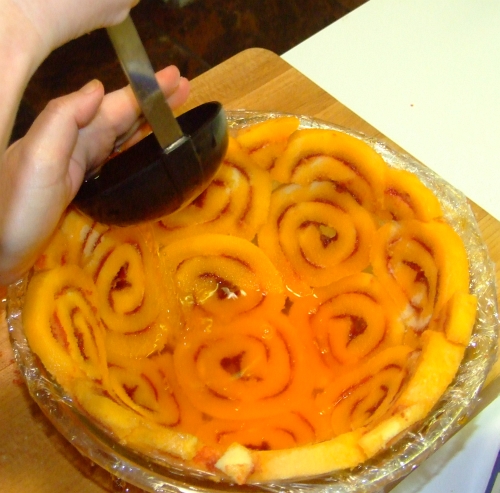
Now you ladle your cooled but not set jello over the roll:
charlotte rouse 07


Make sure the sponge rolls are completely soaked in jello!
charlotte rouse 08


Now put it in the fridge overnight (or all day) to really set the jello.

Let's make the custard --it too goes in the fridge all day.

Add three times as much custard powder as the directions call for. Yes, it will be lumpy even after heating and stirring thoroughly. Remove from the heat and let it cool for 15 mins or so. It will look like you ruined the custard, don't worry.

Put the lumpy, ugly custard into a mixing bowl, pour in scant 1/2 cup of whipping cream and then beat the heck out of it with your electric mixer. See, all nice and purdy and really tasty now!

Put that bowl in the fridge overnight too.

The next morning...

The custard should be thick enough to paste to the inside of the jello-set spongecake:
charlotte rouse 09


Don't be afraid to use lots of custard!
charlotte rouse 10


Now put it back in the fridge for a few hours.

At around lunchtime open your can of peach slices and drain them really really really well.

Arrange them nicely in the custard thusly:
charlotte rouse 11


It's now time to whip the whipping cream! Once it's whipped so it's really thick then pile the whipped cream on!
charlotte rouse 12


Place a piece of cling wrap over the top, and set a large plate on top:
charlotte rouse 14


Turn it over so the plate is now on the bottom:
charlotte rouse 15


Put it in the fridge till dessert time. It's own weight will pack it down nicely after a few hours.

When you are ready to serve it, take it out of the fridge. Take the bowl off:
charlotte rouse 16


Remove the cling wrap too.
charlotte rouse 17


Get ready to slice and serve!
charlotte rouse 18


It holds together quite well:
charlotte rouse 19


Mmmmmmmmmmmm...
charlotte rouse 20


This piece is MINE! You can't have it so go make your own!
charlotte rouse 21


And don't forget to run an extra 20 miles the next day...