Showing posts with label herbs. Show all posts

Saturday, January 7, 2012

Maggie's Creamy Vegetarian Pepper Pot Soup

DSCF7784

I have fun trading recipes, cooking tips n tricks, ingredients substitution, etc on twitter. One of my most wonderfullest twitter mates is named Maggie. She's a vegetabletarian but she also puts my meatiness recipes on her daily paper.

The other day (month!) we were chatting about soups and she said she'd send me her pepper pot soup recipe.

Of course I had to make it!

And of course I had to change it around a bit! Why? Cuz I didn't have all the ingredients at hand so I subbed a couple of items. I also changed the amounts a bit as I was only making it for myself.

She later told me that she herself had modified the original recipe from the person she received it from! Hey, all's fair in the kitchen mates!

Here is her original ingredient list plus directions:

PEPPER POT SOUP

2 Cups Water
2 Cups Veggie Stock
2 Good Sized Potatoes, Shredded
2 Medium Carrots, Shredded
2 Celery Stalks, Chopped fine
2 Medium Onions, Chopped fine
1 Green Pepper, Chopped fine
½ Cup All-Purpose Four
2 tsp Salt
½ tsp Pepper, fresh hand milled
1 Cup Water
6 Cups Milk

Mix first 7 ingredients together in a large saucepan. Bring to boil. Cover and simmer for 20 minutes. Mix flour, salt, pepper, and 1 Cup Water together in a small container until no lumps remain. Stir into the simmering soup to thicken it slightly. Add milk. Heat through. Check for seasoning.

Makes 12 ½ Cups

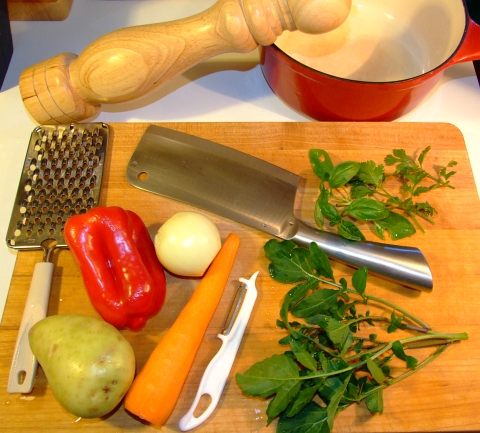
Not being one to take directions too well, I decided to make a few changes based upon why I had on hand. And remember, I was only wanting to end up with 6 to 8 cups. Here's what I came up with:

Maggie's Modified Vegetarian Pepper Pot Soup


1 Cup Water
2 Cups Veggie Stock
1 Good Sized Potato, Shredded
1 Medium Carrot, Shredded
1 Bok Choy, rough chopped, leaves included
1 Medium Onion, Chopped fine
1 Red Bell Pepper, Chopped fine
1 Handfull of fresh Rocket (the peppery kind)
A few fresh basil leaves, rough chopped.
A few fresh coriander leaves (cilantro to North Americans)
½ Cup All-Purpose Four
2 tsp Salt
½ tsp Pepper, fresh hand milled
1 Cup Water
2 Cups Milk
DSCF7774

DSCF7777

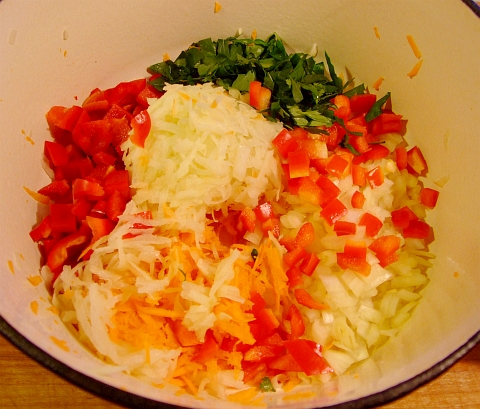
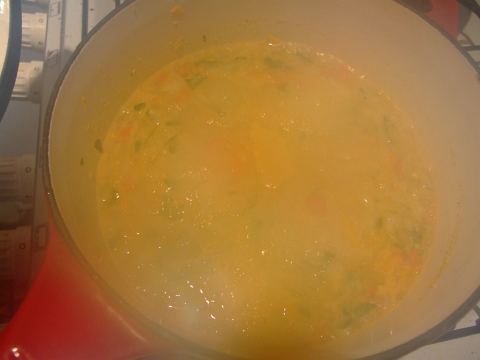
I mixed first 10 ingredients together in a large saucepan and brought it to a boil.

It was then covered and simmered for 30 minutes.
DSCF7780

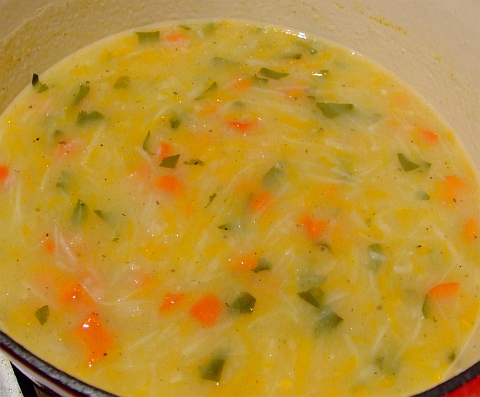
Then the flour, salt, pepper, and 1 Cup Water were whisked together and that slurry was stirred into the simmering soup as a thickener and a spicy-er.
DSCF7782

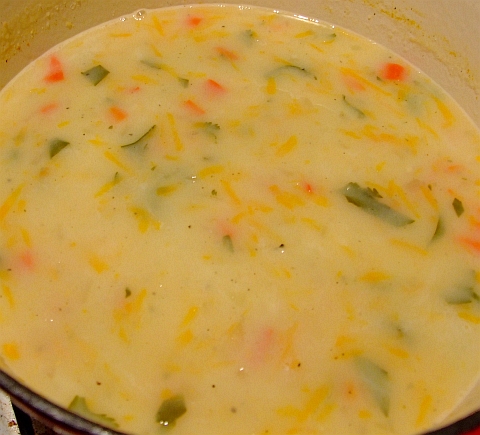
The milk was added and the soup was brought back up to temperature.
DSCF7783

I checked to see if it needed any more seasonings (like salt) and I added a pinch of sea salt.

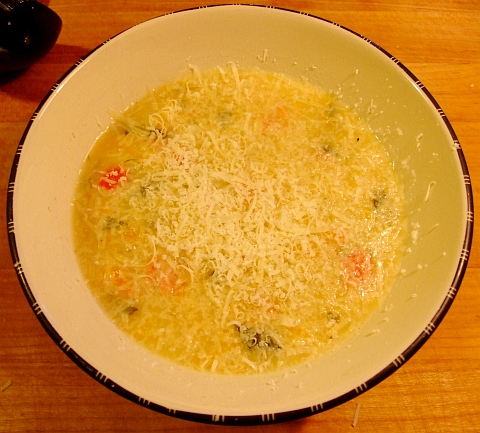
And it of course looks great in a bowl!
DSCF7784

I of course just had to make one little, itsy, bitsy, teeny, tiny final adjustment...


Fresh grated Parmesan!
DSCF7785

The soup was very very tasty, I thoroughly enjoyed it. And you can all thank Maggie up in Canada for sending me the recipe!
Friday, February 18, 2011

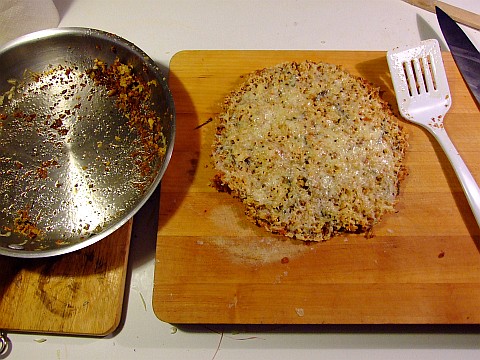
Cheesy Garlic Crumble

Yes, you read that right. No, it has nothing to do with the Aussie candy bar called Violet Crumble. But I thought the name sounded cool when I came up with it so you're stuck with it!

What do you do when it's 10 minutes before your spaghetti dinner and you realize you have no french bread with which to make garlic bread -with cheese, of course? Simple! Come up with something using breadcrumbs, fresh basil, garlic, olive oil, and cheese!

There's no measurements for this as I really did make it up as I went along, but I did take plenty of pics which really illustrate the process.

Garlic crumble

What you need:
some breadcrumbs
fresh basil leaves
garlic (I used the jarred stuff for this)
olive oil
cheese

The cheese I used was cheddar which down here is called Tasty. Cheddar is only called cheddar in Oz if it comes from the Cheddar Gorge which is just outside of Cheddar.


What you do:

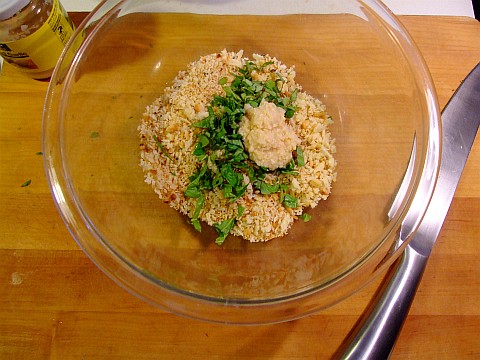
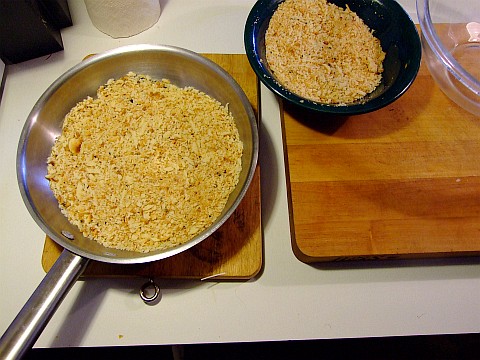
First, you'll need to find out the amount of bread crumbs you need. Use whatever oven-proof saucepan you need for making this and cover the bottom with 1 cm of breadcrumbs.
gc01


Then chuck that in a mixing bowl. See? Easy way to measure, isn't it?

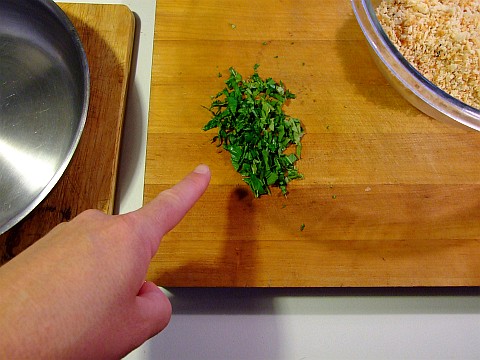
Go outside and snip some fresh basil, then chop it up. How much basil? About this much:
gc02


Now add a good sized splat of garlic. How much is a splat? This much:
gc03


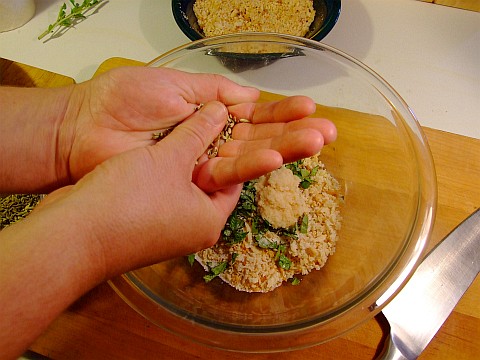
Put some fennel seeds in the palm of your hand. Run the thumb of the other hand over the seeds to partially crunch them, then add to the bowl. Here's what I mean:
gc04

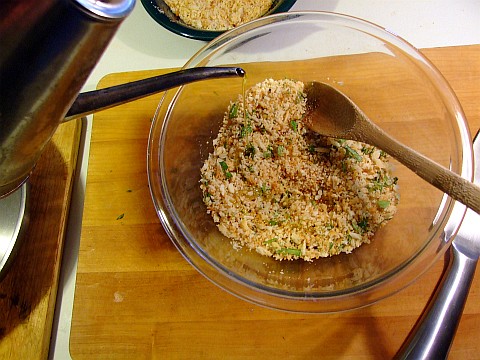
Mix it all together and then add some olive oil. Like my olive oil can? It's from India.
gc05


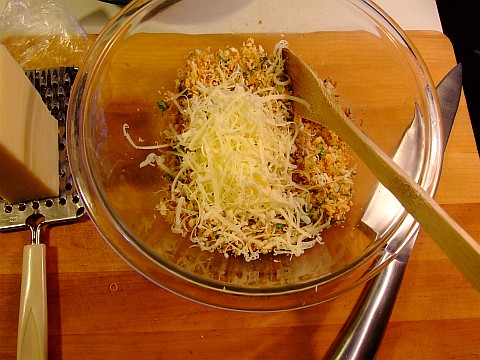
Stir it all together then add some grated cheese. I used around 1 cup's worth of cheddar (tasty).
gc06


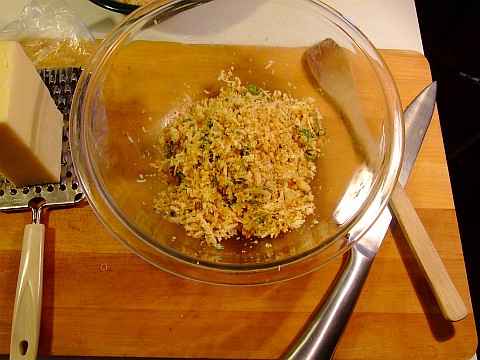
Mix it together using your fingers. Make sure you don't let the grate cheese clump together. Your bowl should now look something like this:
gc07


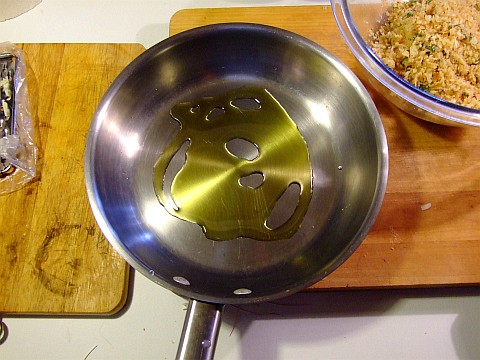
Add a bit of olive oil to whatever ovenable frypan you'll be using:gc08
This is my small Gabrial Gate (tm) small frypan from a set of two. The ONLY reason I have the set is that I got them on an 80% off sale at Harris Scarfe. Otherwise there wouldn't have been no way I could afford those two wonderful frypans.

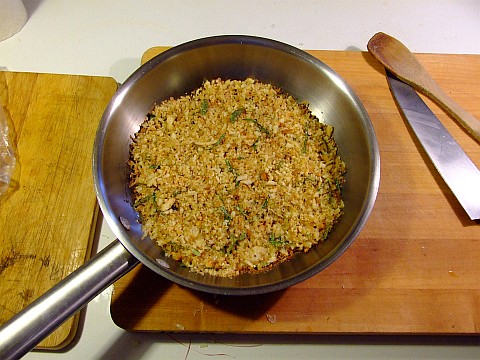
Now spread the mixture evenly over the bottom of the saucepan and cook on low heat on the stovetop till the bottom crumbs JUST start to brown. Do NOT leave the frypan unattended for any length of time as it can go from slightly browned to BURNT in the blink of an eye.

This was actually the second batch I made as I did turn my back on the first batch. Oops.

Now that the bottom is browned, it should look something like this:
gc09


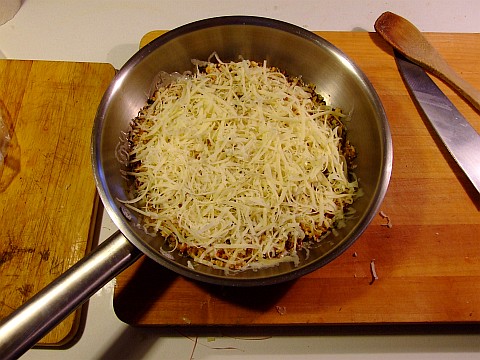
Grate some more cheese over the top:
gc10


And then bake it in a hot oven till the cheese melts (only a few minutes). Slid it onto a cutting board
gc11


and then cut it up into pieces, serve on the side of your spaghetti in place of garlic bread.

Tada! Garlic Crumble!

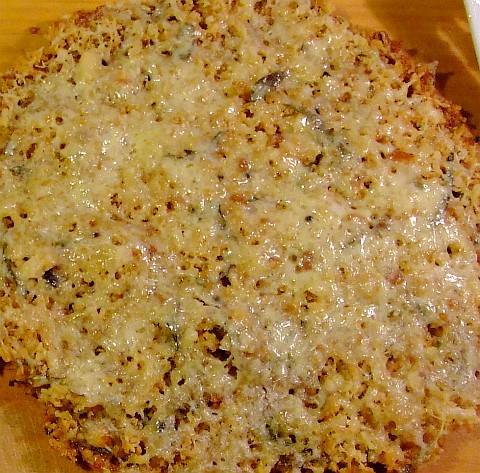
Here's a closeup
gc12


Mmmmm, it was tasty.

Saturday, December 19, 2009

Quick and Easy Creamy Cheese Sauce

Have you ever needed to make a really quick cheese sauce to go on something? Then this is for you!

Cheap, easy, simple. I think anyone, and I mean anyone, can make this.

It all started the other day when I had to spin out 2 basa fillets to make a meal for 5 adults. I cubed the fish to about dice size, tossed them in some seasoned breadcrumbs (salt, white pepper, cumin) and then put the tray in the oven. They were to be served over a rice dish --something like a risotto but with way different seasonings.

As the rice was almost done and the fish ready to come out of the oven, I realised that this dish needed a sauce to drizzle over the top! I didn't panic, just took a quick look at what I had on hand so I could make a quick sauce, which would go well with the crumbed whitefish with rice, and decided upon a creamy cheese sauce.


Here's what you need:

1 cup cream
1 tsp crushed garlic
pinch of salt
pinch of ground black pepper
1/2 cup grated colby cheese
1 pinch of dried mint
1 pinch of dillweed


And here's what you do:

Toss everything EXCEPT the cheese into a small saucepan. Light a fire under it and heat till it simmers (DON'T LET IT BOIL OR BUBBLE, else there'll be trouble). Stir it a bit as it heats up. Once it's simmering, add the grated cheese, stir till the cheese is melted and then serve it up!

See? Couldn't be easier. This should also go well over poultry, any non-oily fish, pork or beef roast (drizzle over the slices of beef when you are serving). If you have other thoughts about what this would go well with, just lemme know in the comments.

Oh, if you make this with bleu cheese it'll work great, but the flavour is much stronger so the meat needs to be cooked differently --like fried pork chops with the sauce drizzled over.

Saturday, November 28, 2009

Cheesy Baked Croquettes with Smoked Trout & Prawn Sauce

Yeah, that's quite the title isn't it? The prawn sauce is optional, BTW. One night I served them as a main course without the prawn sauce but with a side salad, and the next night as a side dish with the prawn sauce.

Personally, I like them better with the prawn sauce.

The amounts of each ingredient aren't listed --with one or two exceptions-- you'll see why, no worries.


Cheesy Baked Croquettes with Smoked Trout & Prawn Sauce


What you need:

For the croquettes:

4 to 6 cups of leftover mashed potato --do I REALLY need to explain how to make mashed spuds?
handful of fresh basil leaves
diced cheddar cheese --somewhere around 1.5 cm but please don't be exact
salt
pepper
couple of handfuls of bread crumbs
cumin powder
turmeric powder
thin-sliced smoked trout (or smoked salmon)

For the prawn sauce:

Handful of prawn shells (I ALWAYS keep prawn shells after shelling the prawns, they freeze well and you just break off a hunk whenever you want to make a sauce or stock)
1 crushed garlic clove
1 or 2 tsp dijon mustard
1 tbsp lambrusco wine
1 tbsp cream fraiche OR sour cream OR double cream
dash of sea salt
dash of ground white pepper
4 cups H2O (water)


Whut U Due:


Cube some cheddar cheese to around 1.5 cm (3/5 of an inch) --or somewhere thereabouts. Mince up some fresh basil leaves (rinse them first, could be caterpillars hiding).

Your cutting board should now look thusly:
DSCF6555


Mix the basil into the mashed spuds. Place some of the spuds into your hand --each croquette should be between golfball and tennis ball size.
DSCF6558


Flatten the mashed potato in your palm and place a piece of cheese in the middle.
DSCF6566


Carefully mold the potato around the cheese
DSCF6567


Ta-da!
DSCF6569


Make up as many or as few as you'd like, no worries. I used three per person as a main and one per person as a side dish. Put them on a plate and then refridgerate for an hour. This way they'll be easier to crumb.

So, like, what to do for an hour while the croquettes chill in the fridge? How about make some prawn sauce!

Add your empty prawn shells and the garlic and 4 cups of water into a saucepan. Crank the heat up and simmer for an hour. If the water gets too low, then just add some more water. You want to end up with around 2 cups of liquid.

Turn off the heat. Take a potato masher and mash the shells flat to extract every last bit of prawny goodness. Strain and return the strained liquid to the pan. Cover the saucepan and set aside. Let's return to the croquettes.

Spread your plain bread crumbs on a tray or plate. The sprinkle on a bit of salt and two of my favourite spices; cumin powder and turmeric powder.
DSCF6572


Mix the breadcrumbs around so the crumbs are full of the spices.

After the potato balls have chilled, take them out of the fridge and make up an egg wash: one egg plus equal amount water. And put a bit of flour in a bowl too.
DSCF6576


Roll each bowl in the flour (lightly shake off excess), roll it in the egg wash, and then roll in the breadcrumbs.

This is what they look like before baking:
DSCF6578


Bake them at around 375 F. Long enough to brown the breading, but not so long that the cheese leaks out. 15 mins should do it --I wasn't timing these but I'd check every few minutes to make sure the cheese wasn't running out.

While they bake, shall we finish the sauce?

Turn the heat on the liquid as low as possible and add the mustard, wine, salt and pepper. Whisk it well, let the sauce come up to a simmer (don't boil it) and taste for seasonings. You might want to add a bit more salt or pepper, but don't make it spicy as this isn't a spicy sauce.

Turn the heat off and cover to keep warm. Just before serving whisk in the cream fraiche (or sour cream or double cream). If you need to heat it back up do so, but it'll only take a minute at most --don't let it boil after you've added the cream.

Spoon it over the baked croquettes BEFORE you top with the smoked trout and basil sprig.

This is what the croquettes look like after baking:
DSCF6579


The first night they were a main course without sauce. 3 per plate and a thin slice of smoked trout curled on top. This was my plate:
DSCF6585
No, that's not gunky, fatty dressing. It's my own homemade tzatziki


The next night they were a side dish to baked basa and I made the prawn sauce to drizzle over the top. After the sauce is drizzled over the croquettes, then artfully arrange a slice of smoked trout on top and fresh basil to top it. This plate was MIL's just before I added the side salad.
DSCF6615


This plate was mine:
DSCF6621


I've been told that I can make these ANY time I want, everyone loved them. Enjoy!

Sunday, November 15, 2009

Creamy Red Wine Sauce

The other day we picked up some t-bone steaks from our local butcher for an awesomely great price. The consensus for cooking them was lightly salted, seared on the grill, then finished in the oven (actually "ovened" on the grill since it has enough burners and a lid that I can use it as an oven). Their's took 23 mins, whereas mine took 7 (1 min 30 sec a side on a hot grill to sear, then 4 mins in a hot oven --I like mine rare).

Both the rare and well done steaks were very tender and juicy, everybody was happy. They were especially happy with a sauce I decided to make in the wok for a topping for the steaks. You can make this very quickly and easily while the steaks are cooking, no worries. There's numerous substitutions you can use, I'll tell you about that at the end of the post.

Dingo Dave's Creamy Red Wine Sauce

What you need:
1/4 of an onion, finely minced
1 mushroom, minced
pinch of salt
dash black pepper
1 tbsp olive oil
1 tbsp butter

2 cloves crushed garlic

1 glass dry red wine (plus 1 glass for the cook)

2 tbsp dijon mustard
1/2 tsp dried tarragon

3 tbsp sour cream


What you do:

Add the first six ingredients (like how I grouped them for you?) to a hot wok. Stir and cook for about 2 mins. Add the garlic and cook for another minute whilst stirring frequently.

At this point there shouldn't be much of any liquid left in the wok. Now add the red wine to deglaze the wok. Keep the heat on till the liquid is reduced by half. Turn to your lowest heat and add the mustard and tarragon. Stir it through till everything is combined and then turn the heat off.

Now add the sour cream, stir everything thoroughly.

If you've timed it right, your steaks should be coming off the grill and onto plates right about now. Spoon the sauce over the top and ENJOY!


Substitutions:

I was wanting to use thick, double cream but I was out. Hence the sour cream. Next time I'll use the cream.

Use 2 tbsp butter with no olive oil in the initial step. And vice-versa, of course.

Jarred, prepared garlic can be used instead of fresh cloves, no worries.

Add a pinch of mint at the same time you add the tarragon.

Slice up a couple of fresh shrooms and sautee them for 2 mins in butter, salt, and tarragon. Drain the shrooms and then add them at the same time you add the cream. Use a couple of slices of crusty baguette to soak up the drained, flavourful butter.

Monday, May 18, 2009

Lemon Cheese

This is going to be one of the easiest cheeses you'll ever make, guaranteed. Not much in the way of special equipment needed either.

I make my lemon cheese slightly differently than other recipes I've found as I like mine firmer. No, you don't need a cheese press!

And no rennet.

And no starter.

And if you don't have any cheesecloth you can use chux cloth (cleaned and sterilised, of course). And if that fails you can even use an old, small pillow case --REALLY cleaned and sterilised!

And you can use powdered milk! Actually I always use full cream milk powder cus that whey I don't have to pastuerise the milk first.

And you get a lot of cheese. 4 litres of milk (about a gallon) will yield almost a kilo (around 2 pounds) of cheese.

And there's no aging time!

Sounds good, eh?

Here we go:

Dingo Dave's Especially Easy Lemon Cheese

Here's what you need

1 gallon (about 4 litres) of pastuerised milk (just get a bag of full cream milk powder, mix up four litres of it and use it)
Juice of 4 lemons
2 tsp sea salt

extras you may want to try:
carraway seeds
dill weed
cumin seeds
chilli flakes
parsley
coriander (cilantro) leaves
lemon zest

I wouldn't suggest all in the same batch though...


Here's what you do:

Any utensil that will touch the cheese gets sterilised. I prefer the ole boiling water method. In a large, stainless steel pot put in your long-handled, stainless-steel skimmer, your cooking thermometer, your chux cloth, your cheese mat (a sushi mat works just as well) and your cheese hoop (I hoop this cheese even though no one else does as I like mine firmer) in the pot once the water that you should have put into the pot is boiling.

Do I need to tell you to be careful? No, of course not. I'm sure you can figure that out.

After two minutes everything is sterilised, no worries. Carefully pour the boiled water into a large pot. Why are you keeping the boiled water? You ARE going to make a batch of beer, aren't you?

Sorry, I just don't like to waste water or food.

Back to the Lemon Cheese...

Carefully lay out the utensils on a clean countertop.

Pour your milk into the stainless steel pot. Use the cooking thermometer to slowly bring it up to 100 F (or 38 C). If you are using goat's milk, then make it 145 F (62 C).

Turn the heat off, add your lemon juice, and stir slowly for 10 or 20 seconds with your stainless steel skimmer.

You'll notice little tiny white curds have already started to form. Neato! Let it sit for 15 or 20 minutes and you'll have a nice amount of little stringer type curds (not the kind you'd get from using rennet and starter).

Put a chux (or cheesecloth) lined colander over whatever saucepan you want to cook the whey (that's the greenish-tinged liquid that tastes ohhhhhhh so good) down to make mysost cheese.

Bring up all four corners of the cheesecloth that has the drained curds in it and tie em together --make it tight as the idea is you are not just draining the curd but helping to form them together. Then hang it up over the sink for an hour (tied to the kitchen faucet works fine --just don't use the faucet for an hour). This would be a good time to start the mysost, BTW.

After about an hour the curd should be well drained and clumped together into a semi-solid mass. This is where most people call it done and put it into a container in the fridge or to eat it straight away.

But what I do is carefully turn the curd out into a large mixing bowl, lightly sprinkle with sea salt and then with whatever herbs or spices I'll be putting into this particular batch. Carefully mix it together and then spoon the mixture into a cheesecloth lined cheese hoop that is sitting on top of a cheese mat. Fold the cloth over the top of the curd and the press it down slightly. Put a weight on the top (like a couple of big ole cans of peaches or a small weight from your dumbell set) and then forget about it till morning.

Don't worry, I'll be putting pictures up of all the goodies and procedures next time.


*********************************************
If you don't have a cheese hoop you can make one from a coffee can. Just take off the top and bottom, drill a few holes in the sides (smooth down the inside after drilling) and there you are. Also the top or bottem from the can should fit quite nicely over the top of the curd and give the cans a nice base to rest on.
*********************************************

The next day remove the weights and slide the cheese out. Carefully unwrap your glorious cylinder of homemade lemon cheese (seasoned exactly how YOU want it) and start eating. It'll keep for a week in the fridge, but I doubt it'll last that long cus it's very tasty.

I'll be putting pics up of all the utensils and some of the procedures next time, but I wanted to kinda get y'all excited about making your own cheeses first.

Wednesday, October 22, 2008

Grilled Tomatoes

As the summer approaches down here in the land of Oz, you may notice something about this food blog. What may you notice, pray tell? You just might notice a lot of recipes using tomatoes.

Why tomatoes? Well, we have 9 tomato(e) plants growing in pots on the bricked patio overlooking the pool. It gets nice and roasty toasty warm there, loads of daylight too, and I give 'em plenty of water and fertilizer (cow poop; in fact they started growing in a mix of half potting soil and half cow manure --makes the plants smell really good).

One of the plants is a truss tomato(e) and that sucker's first flush is gonna be 20 to 30 tomatoes! Mmmmmmmmmm... Last year we got over 100 from just 3 plants (no trusses) so this year I'd be expecting over 300.

That's a lot of tomatoes.

Lots

Of

Tomatoes

I still have a few jars of semi-sun-dried tomatoes packed in olive oil and fresh basil from last season. I also still have a jar of the end of season green tomatoes that I pickled.

I think we'll be eating a lot of tomatoes over the next 8 months :)

OT 95 F in the shade Friday... A little bit warm for middle of spring...


The sauce for this is the same as I use for my fish recipe that everyone down here loves, or at least those who've tried it.

The sauce is basically half olive oil and half lemon juice (or lime juice), a bit of salt, some ground white pepper, and some tarragon. Whisk the heck out of it and a nice emulsion forms.

The other day I was grilling up some basa with the above marinade, and I realised I had made too much marinade. I then noticed that we had 3 big, fresh, juicy tomatoes just sitting there on the kitchen table begging to be eaten.

Hmmmmm, thought I... perhaps I can thick slice them and grill them and drizzle the excess marinade on them? Oh, wait a sec! How's abouts I cut em in half and let the sauce soak into them before grilling? Yeah, that'll work!

They were a HIT! I mean a huge hit! The cool thing is that they kinda make there own little bowls of tomatoey goodness. Gobble, smack, slurp!

Here the recipe:

Whut Yoo Knead:
3 tomatoes
1/4 cup olive oil
1/4 cup lemon juice (or half lemon/half lime juice)
1 tsp sea salt
1/2 tsp ground white pepper (or black, no worries)
1 to 2 tsp dried tarragon leaves


Whut Yoo Doo:

Toss everything except the tomatoes in a bowl. Then whisk like crazy. The sauce will form an emulsion. Very very very tasty.

Slice each tomato(e) in half. Latitudinally, not longitudinally (that means if the stem is the north pole, then slice along the equator). Put the halved tomatoes on a plate with the cut side UP. Spoon the sauce over each half (that'd be six halves) and let them sit for an hour (while you go prepare whatever else you are having for dinner).

Crank up your grill (I have a six burner gas barbie) to high. Let the grill get really hot, then turn off the gas. Place the tomato(e) halves on the grill with the cut side DOWN. Close the lid.

In about 10 to 15 mins, open the lid, and plate them suckers up! Serve them with the cut side UP, and they'll each become their own little bowl of tomatoey goodness.

Yummers!

I'm sure you can do the same thing under a broiler (on the lowest temp possible) in the kitchen. I wouldn't suggest making them in an oven cus I think they'd soften up way too much. But hey, you can always try! But if you have a gas grill, it's easily done. Charcoal, no worries; just move the coals to one side after getting the part of the grill where you are putting the tomatoes nice and really hot.

Saturday, September 20, 2008

Seafood Chowder

This may seem to be a fairly simple menu item, but no matter how you make your chowder and whatever you put into it (clams, prawns (shrimp), crab, fish chunks, mussels, etc) there are a couple of very important techniques to getting it right.

For those of you in the US who make your own New England Clam Chowder, you'll feel right at home with this.

There are also many many different ingredients you can use. I'm going to give you the recipe as I made it two nights ago, and then give you a bunch of different things you can use/substitute. That way no matter where in the world you are and no matter what local ingredients you can lay your hands on, you'll always be able to make Dingo Dave's Seafood Chowder!

Oh, I tend to make it slightly different each time, depending on what I have in the pantry and the freezer that day or what was fresh at the fish shop that morning. So there's no real hard and fast rule, except for a couple of techniques.

On with the show!

Dingo Dave's Seafood Chowder

What you need:
2 or 3 rashers of bacon cut into small pieces
bacon fat from the above bacon (this is IMPORTANT)
1 can (400 mls or about 14 oz) coconut cream
200 gms small whole prawns (1/2 pound small shrimp) with the shells on
1 litre seafood stock (made from the above prawn shells)
1 whitefish fillet cut into small chunks (I used hoki)
small can of crab meat (or fresh if you've got it)
1/2 to 1 litre milk (2 to 4 cups)
a small minced (or diced) onion
2 cloves crushed garlic
2 tsp minced ginger
2 tbsp olive oil
1 tsp sesame oil
3 or 4 small diced potatoes
sea salt
ground black pepper
ground white pepper
1 tbsp dried basil
1/4 cup flour
a couple of litres of H-TWO-OH(water)

What you due:

Firstly, make the seafood stock (start this a few hours before you want to make the chowder). To make it you'll need to peel and devein the prawns. Toss the veins (alimentary tract, ahem...) but keep the heads, shells, legs etc and throw them in a big ole saucepan. Add a litre (4 cups) of water and boil the heck out of it. Once it's almost boiled down, add another litre of water and boil for a short time. Let cool. Take a potato masher and mash down the shells --this is to extract every bit of flavourful prawny goodness from the shells. Strain the stock (this is IMPORTANT). Save the stock, dump the shells.

Ok, your seafood stock is made, no worries.

Now for the nuts and bolts.

Cook the bacon pieces in the pot you plan to make the chowder in (use a low flame). Once the bacon is done to your liking (crispy or not, your call), remove the bacon but LEAVE THE BACON FAT IN THE POT. Add the diced potatoes to the pot, and cook in the bacon fat for a few mins; stir regularly. After a couple of mins, add the minced onion, some salt, some ground black (or white) pepper and a bit of dried basil. Stir it around. You should have some very nice aromas by now; just keep the heat low so nothing burns. Add the flour and mix well.

Yes, you'll have some browned on gunky looking stuff in the pot along with the spuds and onions. Don't worry, you're about to take care of that.

Now add the seafood stock you made earlier in the day. Give everything a good stir and use your wooden spoon to scrap the bottom and sides of the pot. Ain't deglazing pots great? Very flavourful. Oh, and, ummmmm, it's a FRENCH cooking technique!

Now add the coconut cream and about 1/2 litre of milk (2 cups). Let it simmer for a few mins.

While that's simmering, you get to sear the spices and seafood.

I use a wok, but feel free to use a saucepan if you'd like.

To the wok add the olive oil, sesame oil, garlic, ginger, fish chunks, crab meat, prawn (shrimp) meat. Crank the heat to HIGH and sear that stuff while tossing/stirring regularly. It'll only take 2 to 3 mins.

Dump the entire contents of the wok into the chowder pot. Also add the bacon pieces. This is the point where you can add more milk if you think the chowder is too thick. I, however, feel that chowder can never be too thick --but that's just me.

Let it simmer for a couple of mins, then serve it up! Have a fresh made loaf of bread or a fresh cobb or a fresh baguette around for dunkers.

This is seriously good!

And now for the substitutions and garnishes!

Well, most of you may not want to make your own fish stock. I can respect that, really! So get a bottle of clam juice instead. Oi! Can't find clam juice, use white wine! Don't drink? Don't worry, the alcohol will cook off.

Fake crab can be subbed for crab meat, no worries.

If you sub clams for the prawns, then DON'T sear them and only add them to the chowder in the last couple of minutes --otherwise they'll be really tough and chewy.

Don't like coconut (heathen scum)? No worries, just use milk cream instead.

Allergic to lactose? Well... this really isn't the recipe for you, sorry.

Garnish with any herbs you want, just make sure they are fresh; chives, basil, parsley, coriander (cilantro if you are in N.A.) etc.

Want it spicy? Add a tbsp or two of vindaloo paste to the wok when you sear the seafood and spices. Oh YEAH! That'll get them capillaries dilated!

Sunday, September 14, 2008

Ham and Egg and Cheese Cupcakes!

???? Like, Ummmm... ham, eggs, cheese and cupcakes? What the hell are you thinking this time dave?

Gosh, I get asked questions like that daily, hourly, minutely!

Now to be fair to me, I did NOT come up with this. I read it in a magazine at the grocery store checkout counter. I thought it sounded really good. I even thought it should taste really good too.

Can I lay claim to this? Well, I did use different herbs (mainly cus I didn't have the ones they used) and I would've loved to use some different cheeses... But it just so happened that I had everything needed in stock (except the fresh herbs they used, so I used ones I had). I also used shaved ham instead of proscuitto (how the heck do you spell that???)...

THEY ARE GREAT!!!!!!!!!!!!!!!!! Like seriously tasty!!! I'm making these whenever I have the fixin's for them. One of the great things about them is you can make one or a dozen so that if someone in the house don't like 'em, then you can still make them as a side dish for yourself!

And they are simple and easy to make. You can also modify them to your taste buds as I'm sure your taste buds are much different from mine (I hope).

On with the show:

Ham, Egg and Cheese Cupcakes:

What you knead:
one muffin tin that'll make six muffins or cupcakes
6 to 12 slices of shaved ham
butter
6 eggs
1 or 2 tbsp crumbled feta cheese
1/2 cup grated cheddar cheese
2 tbsp minced scallion
2 or 3 tbsp fresh coriander (cilantro) leaves
Pinch of chili powder

What you due:

First, preheat your oven to high heat. While it's preheating, do the following:

In a bowl, mix the feta, cheddar, coriander leaves, scallion and chilli powder together. Then use the butter to grease your muffin/cupcake dish. Line each cupcake hole with shaved ham so that the ham forms a "cup". Put a tbsp or two of the cheese mixture into the ham holes. Then carefully crack an egg over each "cupcake" --don't break the yolk! Top each "cupcake" with the rest of the cheese mix.

Put that sucker in your hot oven for about 12 to 15 mins. When the egg is done to your liking ( I like the yolk slightly runny for this) then it's done.

The ham and whatever cheese and egg leaked through will form a nice cupcake, with savory, herbed, egged goodness in the middle. Pop them suckers out and serve 'em on the side with whatever you are having for dinner.

I made breaded fish fillets with a fresh salad along with these puppies last night. Plates were licked clean by all.

I'm terrible at food pics, but here's what the whole spread looked like. Ah, the two ham, egg and cheese cupcakes are on the upper right of the plate.
ham and cheese cupcakes

Now, if you'll excuse me, I have to go make a 3 cheese sauce to go over a steamed cauliflower. Adieu amigos!

Sunday, March 30, 2008

Roasted Leg o' Lamb

Ahhhhh, lamb... Anyone remember that sock puppet character that Shari Lewis (lady ventriliquist) did back in the 50's and 60's called Lambchop? It was on a childrens show, I do believe.

For those of you who are Lambchop fans, you may shudder as you read this: LAMB TASTES GOOD! I don't think I had ever eaten lamb till I arrived down unda, but I can understand why folks like it.

Lamb has a very delicate flavour compared to other meats. Very tender and it takes seasonings very well. Obviously, a strong, bold marinade or seasoning will overpower the lamb taste, so only use something like that if the lamb you are using is either a lesser cut, or you just happen to really like that flavour. BTW, teriyaki lamb chops on the grill are really good!

But, we aren't doing teriyaki lamb chops today. Neither are we doing the english minted lamb either. Oh, if you have lamb chops in certain parts of the UK it WILL be served with mint sauce.

No, today we are doing a leg of lamb roast with rosemary (drool)!

Rosemary is a great herb and it seems to be made for lamb. It's also one of the main herbs for chicken too (thyme and sage being a couple of others for them thar chooks). It'll grow wild down here with pretty much ZERO maintenance. If you'd like to grow it yourself you can. It propogates very well from cuttings, so if your neighbour has some, then you can have some too. If you live in an area that has winter *shudder*, then you better grow it in a pot cus you'll have to take it indoors when it's cold. It likes lots of sun and well drained soil. Don't let your indoor rosemary plant get too humid! Did you know that rosemary is part of the mint family? Well, know you do.

Quick aside: I was inspired to write this recipe down cus rachel did a grill lamb recipe on her blog and that reminded me of my steam roasted lamb. So thanks go to her, otherwise I might not of even thought of typing this in! BTW, hers sounds really really good.

Back to the food...

Roasted Leg o' Lamb

Whut u knead:

One leg of lamb on da bone
5 or 6 sprigs of rosemary, each one 8 to 10 inches long
a bit of sea salt
a bit of ground white pepper
a bit of dried mint leaves
one or two bamboo (or metal) skewers about the same diameter of the woody part of the rosemary sprigs
water
one big roasting dish with lid (it'll need to be big enough for the lamb leg)


Whut u due:

You might be able to see where I'm going with this, but for those of you who haven't figured it out... Here ya go:

Take a skewer and skewer the leg (of the lamb, not your own). Make sure you ream the hole out a few times, then follow the skewer with a rosemary sprig (the woody part of the sprig *should* push the skewer all the way through). If you can get the rosemary sprig all the way through (so that a bit of it sticks out on each side) then great. If not, no worries; just try to get it in a far as possible. Oh, push the thicker end of the sprig through first so you aren't "going against the grain" of the rosemary needles.

Same thing for the rest of the rosemary. Depending on the leg size and how far in you get the rosemary you'll use probably 4 to 8 sprigs.

Mix the bit of salt, pepper and dried mint in a bowl. Then give the leg (the one with the rosemary sticking out of it) a good rubdown with the seasonings. Place the leg in the roasting dish and pour about an inch of water around the leg. Cover that sucker and chuck it in a low oven for a couple of hours.

After 1.5 to 2 hours, turn the oven off, take lamb out, and pour the juices into a saucepan. At this point you have two was to go: cover the lamb and put it back in the oven for 15 mins while you do stuff with the juices, or leave it uncovered to "rest" while you make gravy from the juices.

I'll go through both!

1) Put the lid back on the lamb and return it to the oven (remember you turned the oven off already). To the saucepan that has pan juices, add a splash of red wine and then boil it till it's reduced by at least half.

After the sauce has been reduced, take lamb out of oven and carve it. You'll find it's very easy to carve; very very tender. Serve with roasted or boiled spuds and garden peas (cooked). Drizzle the sauce over everything.

2) Ok, so you've decided to do gravy, no worries. Gravy doesn't take long at all, so the lamb can set on you cutting board to rest for 5 mins while you make the gravy. It's easy: mix a tbsp or two of cornstarch (it's called corn flour down here) in some cold water. Bring the pan juices to a boil, turn the heat off, and whisk while pouring in the dissolved cornstarch. See? EASY!

Carve up the lamb, serve with spuds and peas; don't forget to put lashings of gravy on everything!


Hmmmmmm, what to do with the bone and all the offcuts... Well, there'll be some meat, gristle, cartilege etc hanging on it. Chuck it all in a big pot with lots of water and boil the heck out of it for a few hours! All the tasty marrow and great flavourings will be added to that water! TaDa: instant soup stock! Just make sure you strain it before storing it. You'll also want to defat the stock. I know of several ways to do that so just ask if you are interested, no worries.