Showing posts with label veggies. Show all posts

Monday, December 12, 2011

Deep Fried Zucchini Fingers

DSCF7787


These are so easy to make and oh so tasty! Don't worry if you don't normally like zucchini, you'll LOVE these!

AND you don't have to worry about salting n "sweating" the zucchini fingers. Why? Since they are deep fried any bitterness that may be in the zucchini (if it's not fresh) is gone during the cooking, woo-hoo!

These are breaded, not battered. The battered ones come out a bit on the soggy side I've found. However if you do have soggy battered deep fried treats, you can chuck 'em in a hot oven for a few minutes to crispy them up, no worries mates.

Alrighty then, let's get to the breaded zucc's.

What you need:

one zucchini
bread crumbs (around a cup should do)
1 tsp cumin powder (cuz I LOVE cumin)
1 tbsp (or so) of freshly grated Parmesan (cuz I LOVE Parmesan)
sprinkle of sea salt
one beaten egg

The oil you want to use for deep frying is something that'll take a good hot temp of around 400 to 425F. The two best for deep frying, in my opinion, are peanut oil and rice bran oil. Both are very healthy, have a very high smoke point, and aren't GMO.

What you do:

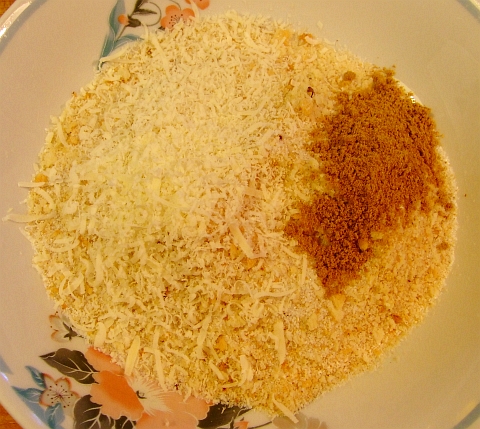
Add the bread crumbs, cumin powder, Parmesan, and a pinch of sea salt to a bowl
DSCF7788
and mix it all together!

Next, prepare your zucchini. Just cut each end off and rinse it, no need to peel it. Cut it in half, then halve each half lengthwise. Slice each halved half into finger sized pieces.

You should now have a bowl of seasoned bread crumbs, a bowl with a beaten egg (do I really need to tell you how to beat an egg? Thought naught) in it, and a small plate of zucchini fingers.
DSCF7790


Hopefully you remembered to light a fire under your oil before you started all this so you should have a wok with an inch of hot oil in it.

Put one fourth of the zucchini fingers into the egg, move around to thoroughly coat, put them in the bread crumbs and make sure they are well coated in the seasoned crumbs.

Carefully plop the breaded zucchini fingers into the oil without splashing any oil on you. Cuz, well, like, you know, that kinda like HURTS!

After around 45 seconds or so, give em a stir and turn. I suggest using tongs instead of your fingers BTW.

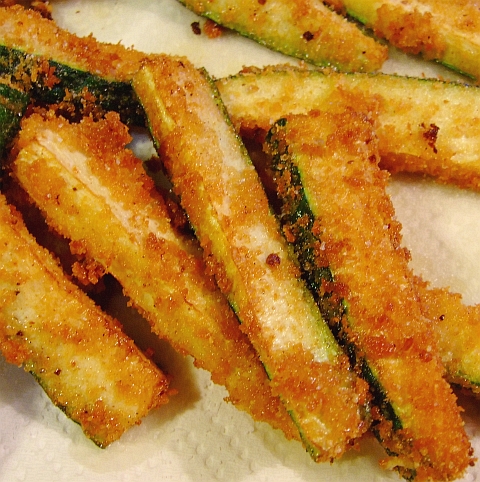
Once they are nicely browned, take them out of the oil and drain on paper towels. Continue deep frying in batches till they are all cooked.

A little sprinkle of sea salt and they'll be perfect! No dips are needed for these, trust me.

And don't they look delicious?
DSCF7794

Sunday, October 2, 2011

Fried Parsnip Slices

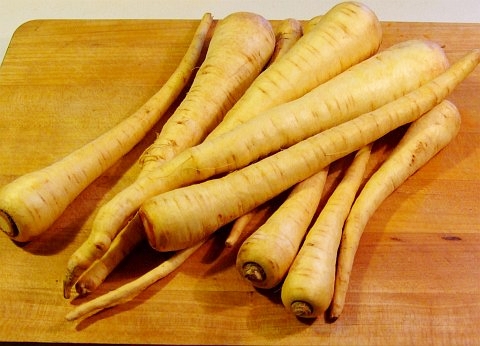
Ah yes, the humble and venerable parsnip!

DSCF6117


This veggie has been known and eaten since antiquity. The ancient Romans considered the ones from what is now Germany but was then called Germanica to be the best. They were also a staple diet of the poor in the Middle Ages --that means prit-near everyone in Europe back then ate 'em! Parsnips were also used as a side dish to salted cod or smoked herrings as they complimented the strong fish flavours nicely.

They fell out of fancy as the ole humble spud from the New World gradually replaced them. Even to this day there are many that hate parsnips, probably from ingrained thinking over the last few hundred years.

There's one Aussie TV chef/personality who caused quite a stir (Ha! "A stir" get it?) a couple of years ago when he went on a bit of a rant against parsnips as they are starting to come into fashion down here in Oz. Says he wouldn't even feed 'em to a pig!

Believe or not Ripley, but until recently I'd never had a parsnip nor even knew what they looked like! I got a few kilos of them at a ridiculously low price a coupla months ago and asked via twitter what I should do with them.

Quite a lot of great suggestions I did receive. Curry was one of the suggestions but I didn't want to make that first as I wanted something that let the parsnip flavour speak for itself. So I went with the by far #1 suggestion of parsnip chips (fries)!

I even baked one batch and deep fried another to find out the taste difference. Not surprisingly, the deep fried ones tasted better. Well, at least to us! I made the baked ones the first day and we all thought they were tasty, even BIL who is a very fussy eater and doesn't eat many veggies. But the deep fried ones the next day were waaaaay better! The whole platter of them disappeared in under a minute.

Not that I was timing it though, too busy eating!

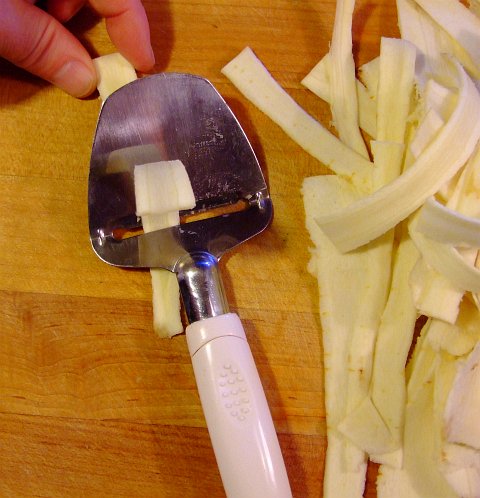
The key to baking or frying the parsnips is to slice them lengthwise making sure all slices have the same thickness. Otherwise thin strips will be burnt before the thick strips are done. After peeling the parnsips I contemplated how to do this.

"Duh," my brain said, "use a cheese slicer you moron!"

Wouldn't you know it worked great? Yes, my brain can be smart at times. Here's proof (of the procedure working, not my brain being smart)
DSCF6123


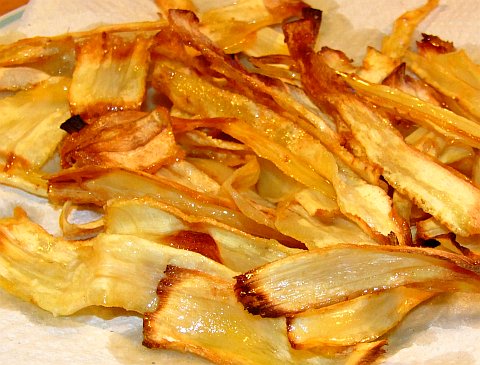
To bake them, toss the strips in olive oil, lightly salt them, and put them in a hot oven till they're crispy. They come out lookin', smellin' and tastin' good!
DSCF6128


For even better ones: deep fry them thar strips! Use the same temperature of oil as you would for fries, no worries. I recommend rice bran oil as it has a very high smoke point of 495 F and the fried food comes out light and crisp.

The strips fry up very quickly so keep a close eye on them else you'll end up with burnt strips of crud. So don't go tweeting while deep frying!

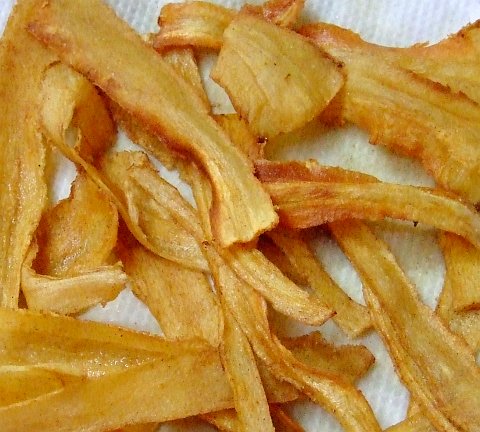
Here's what the first round out of the wok (my deep fryer) looked like:
DSCF6188

Just a quick sprinkle with salt and then EAT THEM!

Monday, July 11, 2011

Roasted Brussel Sprouts

I've been trying for a month now to get this post up! It's been rather difficult as most of my daytime activities since July 2nd have been seen through a sleep-deprived haze.

"Why?" I hear you ask.

It is because the French decided to have a big ole bike race in the middle of the night. You'd think they could have the decency to have it at normal hours, but no, it's on live in the middle of the night here down unda.

Now that it has been 5 days since the end and I've caught up on a month's worth of sleep, I can now devote time to this here food bloggie thingy.

BTW, Cadel Evans won the Tour de France. Just in case you didn't know.

Back to brussel sprouts.

Brussel sprouts are in season down here now so I've been eating lots of them. I used to just steam them, butter em up, and then eat them. Someone suggested that I bake em with olive oil and garlic. Hey, that works for me! Thanks Arvay!

They were very good, I quite like them that way. I then tried baking them with some other veggies at the same time and found that onions make a nice accompaniment.

I also used them in a couple of stir fries; again success!

But why not combine the two, thought I? Guess what? It WORKED!

ROASTED BRUSSEL SPROUTS

What you need for one serving as a side dish:

4 raw brussel sprouts, halved
1 thick slab of raw onion
2 cloves garlic (I used some that I stored in olive oil), thick sliced
olive oil
sea salt
splash of white wine
freshly grated parmesan
A fry pan that is oven safe (I recommend cast iron)

What you do:

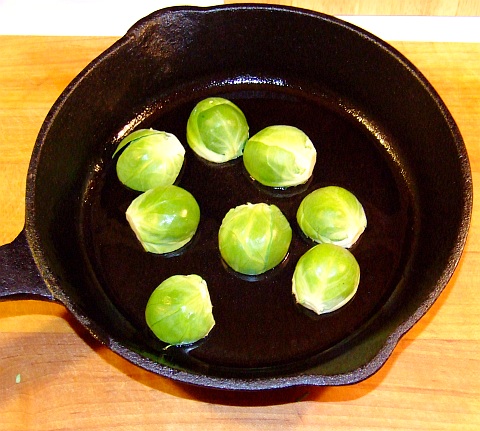
Drizzle a bit of olive oil in your pan, heat it up, then add the brussel sprouts, cut side down. It should look something like this:
DSCF5702
No, these aren't giant brussel sprouts, it's just a small cast iron pan!


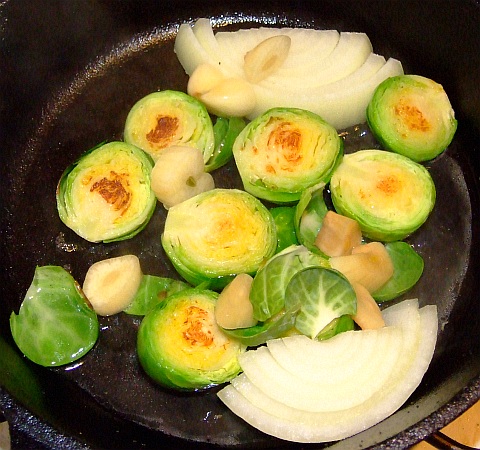
When the flat side has browned, turn 'em over and add the onion and garlic. Like this, see?
DSCF5703


Go ahead and give it a sprinkle of sea salt now. Or later, no worries either way.

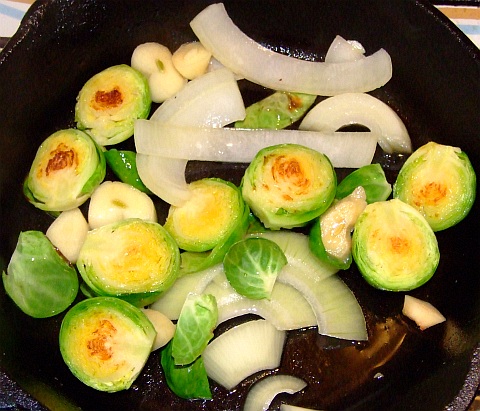
Once the onions are just starting to cook
DSCF5705


add a splash of white wine --around half a glass-- to deglaze the fry pan. Simmer till the wine cooks down.

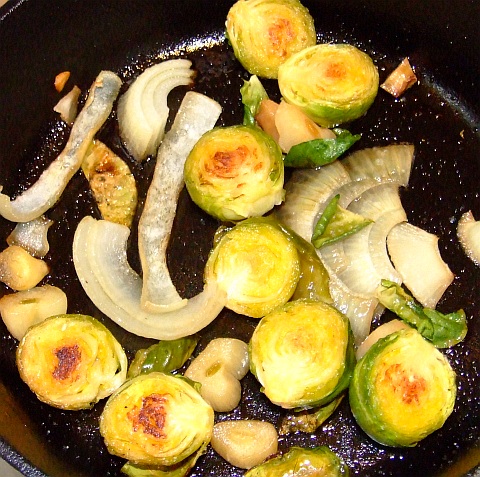
Once the wine cooks down put the pan in a medium oven and cook till the garlic is just soft. This should only take 12 to 15 mins. When you take the pan out of the oven it should look something similar to this:
DSCF5708


After plating, grate some high quality Parmesan over the top and enjoy!

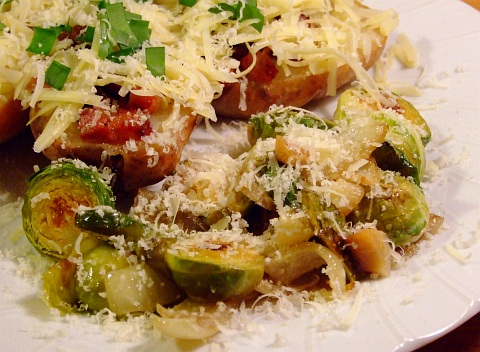
Here it is as a side dish to Twice-Baked Potatoes:
DSCF5713


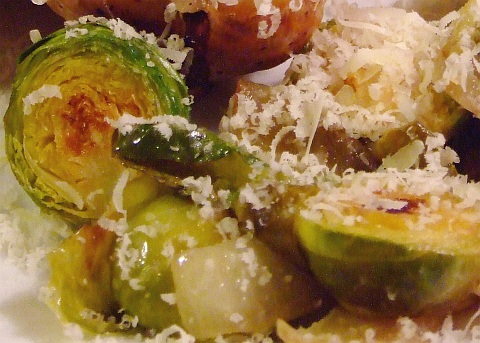
And here is the obligatory closeup:
DSCF5712


Don't forget that brussel sprouts are very healthy! In fact this entire side dish is just oozing with healthy goodness!

Saturday, April 9, 2011

What would you make with...

The other day I came back from the shops with a load of really good, fresh veggies. I had a fair few ideas of what I was going to do with them too.

And then I thought, "Hangabout mate! P'haps some of me tweeterers may wanna give it a go?" So I put the list up on twitter and also mentioned a well stocked pantry plus herb garden, and asked what folks would make!

Unfortunately, I don't have many foodies following my tweets, so only 2 people gave it a go. One was braise some of the veggies then through it all into a quiche. Ummmmmm, not exactly what I had in mind. The other was stuffing the bell peppers with the chilli, put them and the rest of the veggies in a casserole dish, cover with cheese and bake. Not bad. But again, not exactly what I had in mind.

Remember, it's hard to get the meaning through in only 140 characters via twitter!

So how's about we try it here!

You may assume a very very very well stocked pantry and good garden goodies. This means things like garlic greens, wild onions, fresh herbs, potatoes, spuds etc can be used. Pretty much any kind of dried spice, dried herb, or herb mix you can think of can also be used. As far as cheese goes, just make sure you use ones that I've heard of as I usually have 7 to 10 different kinds of cheeses on hand at any one time.

And lastly, let's keep this meat free. Just cuz I feel like it.

And try not to go overboard on the pantry items. Fettuccine with a creamy cheese sauce and a few of the fronds from the fennel bulb sprinkled over the top ain't gonna make the cut! The idea is to see what you would make from this list that features the ingredients, not the accessories.

And here is the list of goodies you get to work with:

Brussel sprouts, red n green n yellow bell peppers, green beans, large fennel bulb w/stalks and fronds, button mushrooms, fresh juicy just-off-the-vine tomatoes, fresh thai chillis, 3 bok choys.

I came up with a dozen dishes I'd make off the top of my head, and then pared it down to 6 simple, tasty ones.

If you feel the need to help your knowledge a bit (cheat) by using cookbooks or the internets then you may, but you'll have to live with your guilty conscience. (I'm just joking of course!)

Obviously, there's no need to go out and get all this stuff, I'm just curious to see what other folks would make. Use the comments, it'd be nice to get into double digit comments so spread the url for this post around!

Sunday, September 5, 2010

Easy Vegetable Stock AND Easy Cheese Sauce

You get 2 recipes today! Mainly cus I've been negligent in my posting lately, my bad.

These really aren't "recipes" as I think they are just too simple for ingredient lists and the like. Besides, I make each one different each time. Don't worry, I'll write all about various substitutions and methods.

We'll start with the veggie stock. Why make your own? Have you ever looked at the list of ingredients on powdered or liquid stock you buy at the shops? GAAACK! The rule is if you either can't pronounce it or don't know what it is then DON'T buy it. I happen to be able to do both and it scares me just what people put into their bodies.

*dave climbs off soapbox now*

Simple to make you own veggie stock. And you don't even need a bunch of high priced perfect-looking veggies. Cheap ratty-tatty ones on quick sale work great. So do scraps from your meal prep!

Potato peelings? Toss em in the pot. Corn husks? Ditto! Same goes for that corn cobb you just ate. Shriveled garlic or dried out onion? Wee-hoo! Skanky looking outer cabbage leaves? The more the merrier! Shriveled carrot? No worries!

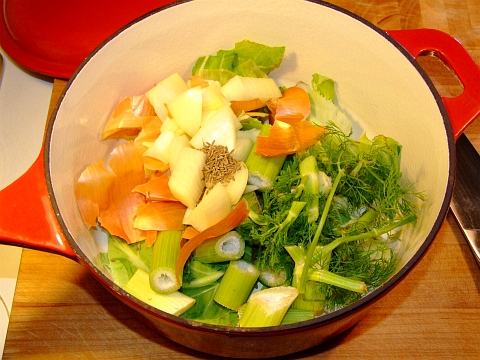
Here's what mine looked like:
veggie stock raw

The pot contains half a dried onion plus it's brown skin and roots, a mashed up garlic clove, fennel stalks and fronds, outer leaves from a cauliflower, and a small handful of cumin seeds.

Added just enough water to cover things as I didn't need too much stock. I was going to use this stock to start the cheese sauce so I didn't need much. If you are making enough for soup then use a larger pot and more water.

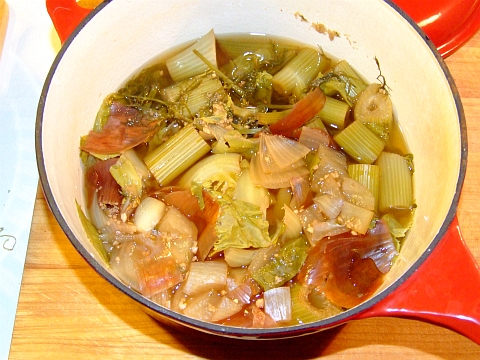
After simmering, covered, on the stovetop for an hour, this is what it looked like:
veggie stock cooked


Just strain it and put it into a small saucepan to make the cheese sauce.

Sometimes I use beer to start the cheese sauce, other times white wine. This time I wanted to use the stock I just made. Which, after all, was the whole reason for making the stock in the first place.

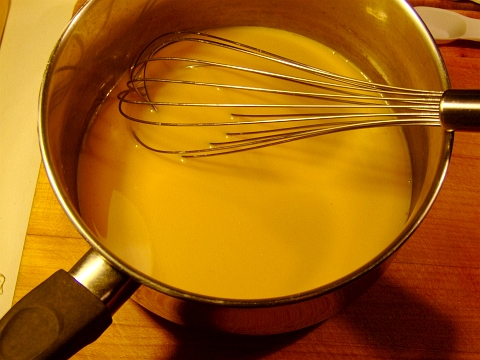
I had around 3 cups of stock and to that I added 1/2 cup cream and a pinch of turmeric (just enough to turn it yellow about 1/8 tsp). Heated it up and whisked till it was all combined.

The saucepan should now look something like this:
cheese sauce01


At this point you can also grate in some chedder; you won't get as creamy a texture though.

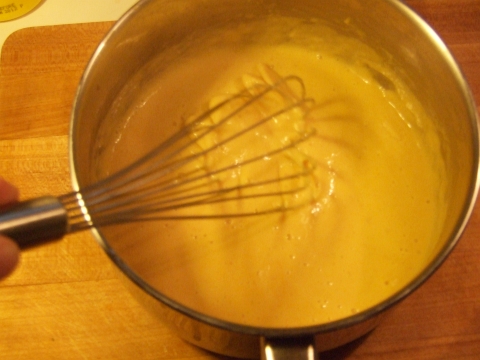
Next I removed it from the heat (thick bottomed saucepan so it held the heat nicely) and whisked in cornflour (cornstarch in the US) 1/4 tsp at a time. It's important to REALLY whisk the sauce at this point as you actually want to aerate the sauce. Once the sauce is just less than your desired consistency (while constantly whisking) then return the pan to the heat for about a minute. Now add 4 or 5 tbsp cream cheese and stir/whisk till cream cheese in incorporated into the nice, fluffy sauce.

Here I am whisking away after the 6th 1/4 tsp of cornflour was added.
cheese sauce02
Notice the aeration already? That'll keep it from "gellifying" when it cools.

Whisk CONSTANTLY. This whole process will take 5 to 8 minutes to get the sauce thickened but airy.

Those cramps in your hand are worth it, trust me. Or you could just use an electric mixer the whole time if you so desire.

Once you've heated it back up for a minute or two (while whisking constantly) and added the cream cheese, then remove the saucepan from the heat and pour it into a bowl.

Now's when you get to add goodies! Chilli flakes? No worries. Cumin powder? Oh yeah! Fresh coriander (cilantro in North America) leaves? You betcha! You are only limited by your imagination.

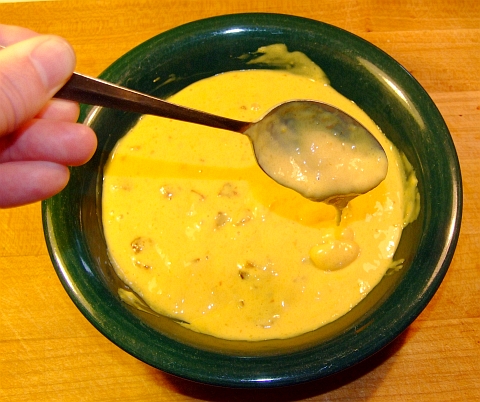
For this sauce I chose bacon. Seriously, doesn't EVERYTHING taste better with bacon?
cheese sauce03


Then just gently stir it in!
cheese sauce04


Notice the creaminess of the sauce? This last photo was taken AFTER the sauce had cooled. Neat huh? So you can make a creamy cheese sauce using cornflour --cornstarch-- provided you whisk or mix well for a bit of time to really aerate the mix so it doesn't congeal as it cools.

Enjoy!

Tuesday, August 17, 2010

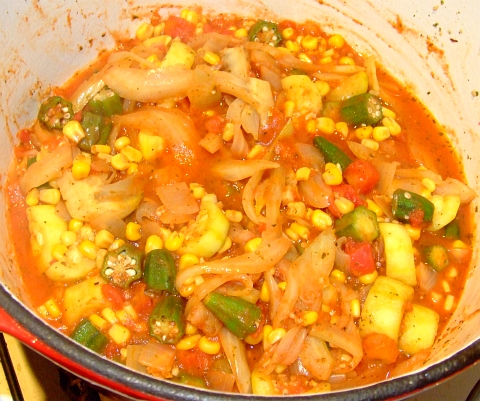
Ratatouille with Fennel and Okra

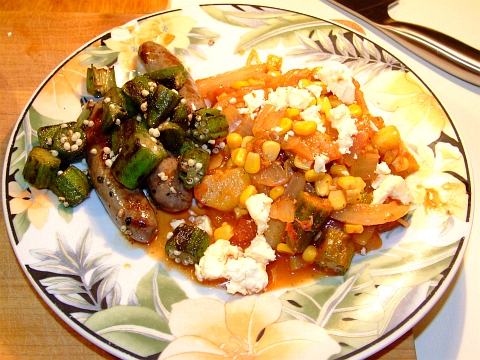
And I served it with feta crumbled over the top and some grilled venison sausages w/okra on the side.

Plates were emptied! Quickly! Very very tasty.

Full disclosure: I've never made ratatouille until I made this. My first try I knocked out of the park!

I got the idea for making ratatouille from a great post at a wonderful food blog. She's a professional chef and teaches cooking classes full-time. Friendly and she answers comments and questions. You can find Helen at:

Beyond Salmon

and her ratatouille is here:

Beyond Salmon's Ratatouille

Go have a quick look and you'll see where I got the inspiration for my Ratatouille. I know that fennel isn't a common ingredient in Ratatouille but it's in season down here in South Oz and very inexpensive. Okra is in season here too, and it IS a staple veggie in Cajun cooking commonly used in gumbos.

And I do apologize for using canned corn. Fresh corn cobs are very pricey down here due to the 10 year ongoing drought. When you use canned corn make sure the ingredients are corn, water, salt. Nothing else. No chemical crap!

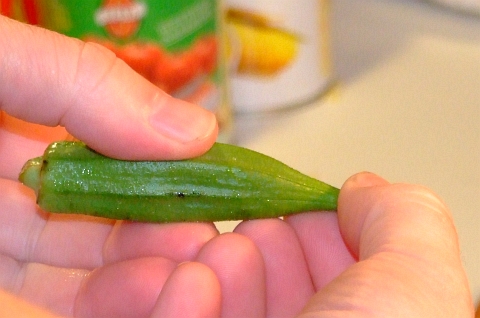
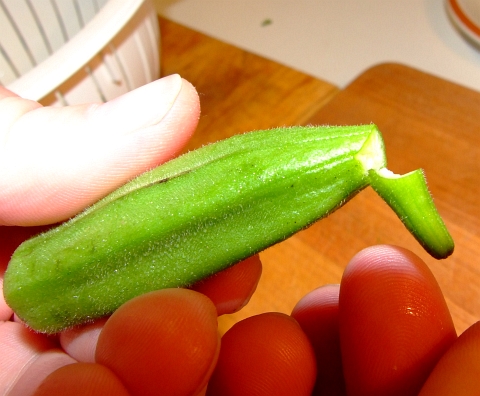
A quick word about fresh okra. When you are selecting okra to buy, you want to buy smaller rather than larger. The larger ones can have a "woody" texture. You also want to test a tip or two. If the tip snaps off then they are fresh. If it bends completely over, then that bin of okra is not very fresh. Here's what I mean:

Give the tip a little bend like this:
testing okra 01


And the tip should snap off thusly if it is fresh:
testing okra 02


Anyways, on with the recipe:


Fennel and Okra Ratatouille with Venison & Okra on the side

What you need:
One large fennel bulb
12 to 16 small, fresh okras
1 large onion, rough chopped
One 12 ounce can of corn kernels
2 or 3 cloves crushed garlic
1 large zucchini
1 can crushed tomatoes
1/2 tbsp dried rosemary
1/2 tbsp dried oregano
sea salt
olive oil
a bit of crumbled feta

4 mini venison sausages (2 per person)
12 to 16 small, fresh okras --in addition to the ones going into the ratatouille
olive oil
sea salt
small handful fresh coriander (cilantro) leaves


What you do:

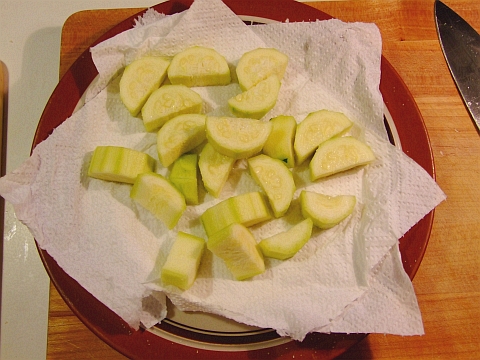
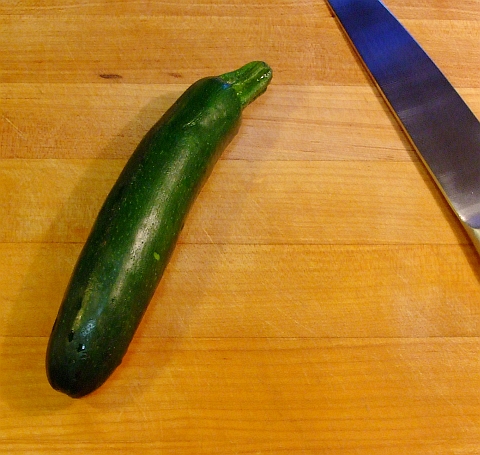
First, peel and slice the zucchini. Try to aim for 1/2 inch thick slices. Sprinkle the slices with sea salt, toss to coat, and let them set on paper towels for 15 minutes or so --this is to draw moisture out of the zucchini. I do this with eggplant, but it was the first time I'd done it with zucchini. Worked like a charm.

See? Have a look:
prepared zucchini


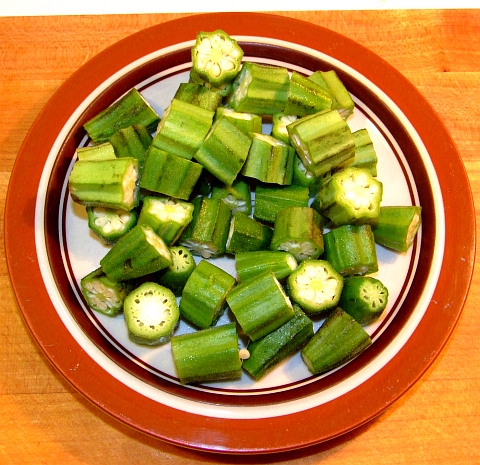
Prepare the okra: cut the tips and stems off, then cut each okra into 3 pieces. Don't worry about the sticky stuff as that is normal. Fry them up with a bit of olive oil for a minute or two so they are just browned. Set aside to drain and cool. This is what they look like before lightly frying:
chopped okra


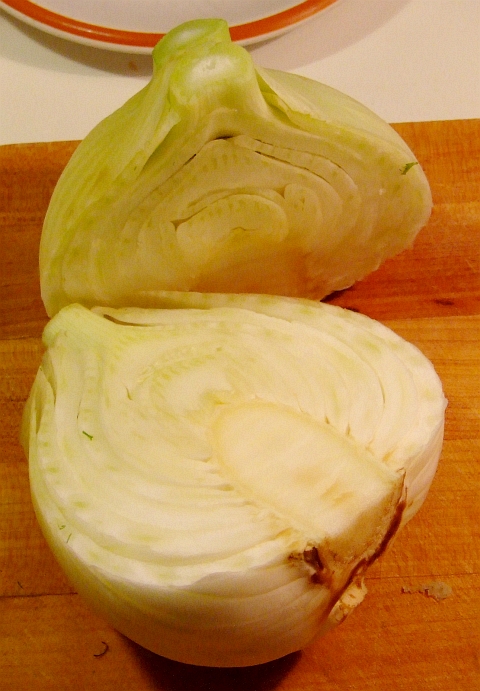
Slice your fennel bulb into 1/4 inch thick slices. If you need to halve or even quarter it to facilitate the slicing then be all means go ahead and do that, no worries.

fennel cut in half


fennel sliced


Now give your onion a rough chopping. Don't make the pieces small otherwise they'll be lost in the ratatouille.

By now the zucchini slices should have lost enough moisture. Give them a quick pat with paper towels and fry them in a bit of olive oil till the just start to brown. A minute or two each side should do the trick. Set them aside to drain.

In the same pot you'll be cooking the ratatouille (I recommend an enameled dutch oven) put the sliced fennel and chopped onion. A bit of olive oil and fry em up. You want the fennel and onion to just caramelize. Once they've caramelized then add the garlic, basil and rosemary; continue to fry for another 30 seconds.

Now you get to de-glaze the pot. Add the liquid from the can of corn to the pot and stir it around so the fennel and onion aren't stuck at all. Put the lid on and simmer on low for 5 minutes.

Add the can of tomatoes and the corn. Simmer for another ten minutes. Now add the zucchini and okra. Put the lid on and simmer for 10 to 15 minutes. Turn the heat off and let it sit in the dutch oven while you get the sausages and the rest of the okra cooked.

If you want this dish totally vegetarian, then just don't use sausages at this point, no worries.

Hopefully your dutch oven should now look something similar to this:
ratatouille in pot


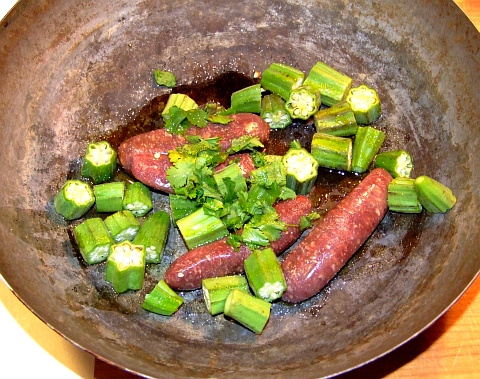
Cut the rest of the okra into thirds, as you did for the ratatouille. Put the cut okra and the venison sausages into a wok with a bit of olive oil, sprinkle a bit of sea salt, and toss in the coriander leaves:
venison and veg


Fry it up till the sausages are done. Toss/stir regularly so nothing sticks. Once they are done you can plate it up!

Spoon the ratatouille onto a plate, sprinkle with crumbled feta, and put two sausages plus some fried okra onto the plate:
plated


It's easier to make than it sounds and OH SO TASTY!

Again, a big thanks to Beyond Salmon for posting her wonderful ratatouille recipe and guidelines for making it! Thanks Helen!

Sunday, August 8, 2010

Vegetable Soup Stock with Fennel

Fennel is in season down here in South Oz --probably most other parts of Oz too. You can get a full sized fennel bulb for $1.99 at the shops now.

fennel bulb


Needless to say, I've been doing a lot with fennel bulbs lately.

But what about those stalks that you trim off?
fennel stalks


SOUP STOCK! But this won't be a regular soup stock cus the fennel stalks impart a very mild licorice flavour to the stock so you need to season the stock appropriately.

Here's what I did for a very wonderfully flavoured soup stock.

What you need:

stalks from one fennel bulb --rough chopped
1 small onion --chopped
1 tbsp dried basil
1 large sprig fresh rosemary
2 cloves of crushed garlic
6 to 8 dried curry leaves
2 dried bay leaves
1/2 inch grated ginger root
1 gallon water (H2O)
sea salt to taste --you'll only want a tiny bit


What you do:

Chuck everything except the sea salt into a large pot. Bring to a boil, cover and low boil/high simmer for an hour. You don't want to lose more than an inch of water in the pot, so keep it covered and adjust the heat accordingly.

Let it cool a bit and then strain out all the chunky stuff. Give it a taste and salt to your taste. Only use a bit of salt at a time cus you do not want too much salt in this stock or you'll ruin it.

Let it cool completely and refrigerate till use. Or use it that day. I wouldn't keep it longer than a few days before using it though. I used mine the next day to make a fennel, prawn, and prosciutto risotto. Obviously, the stock was the liquid that the rice and other stuff was cooked in. Look for that recipe next as it was delish.

You can also separate the stock into smaller containers and freeze them till you need some, no worries.

Monday, May 24, 2010

Biggest Morning Tea

Each year, the Biology dept up at our local Flinders Uni hosts what they like to call "The Biggest Morning Tea". It only costs $4 to get in (that's just a couple of Aussie $2 coins). All the cooking is done on a volunteer basis.

My BIL works at the Paleo lab in the Bio dept so he's on their email list. Last week he received an urgent email asking for more cooking-type folks. So far only 4 people had volunteered, and none of them featured any savory dishes.

Mike (BIL) told them about my cooking prowess, and I got in email contact with the lady in charge. She is very thrilled with what I said I could make for them.

Here's the list of what I'll be making between now (monday arvo) and thurs morn:

Cheese and bacon muffins

soft pretzels w/ cheese sauce

mexican chocolate fondue

zucchini bread

cumin seed crackers

wholemeal chia seed bread w/sunflower and pumpkin seeds

morrocan seasoned pan bread w/ grana padana cheese

fresh homemade ricotta cheese (it's easier than you think) to go with the cumin crackers and whatever.


They are expecting 100 to 150 people... This will be challenging, especially as MIL has a couple of doctor appointments this week.

Wish me luck folks!

Oh, the proceeds from it go directly the Flinders Med Centre (right next to the U) for their cancer research.

Monday, March 1, 2010

Char-Grilled Eggplant

Eggplant is one of the most under-rated veggies (it's actually a berry) around. Very nutritious if you eat the skin too.

Aaaaaaannnnnnnnddddddd if you do one simple trick there won't be any perceived bitterness nor will the eggplant soak up loads of oil --this means if you are making eggplant parmesan then you are forgiven for frying the breaded slices of eggplant instead of baking them.

But we aren't making eggplant parmesan today, we are just going to simply grill the slices. First though, we'll "treat" them so they aren't bitter (even if they aren't fresh) and so they don't absorb the olive oil and go mushy.

What you need:
1 eggplant
1 or 2 tsp sea salt
olive oil

What you do:

Slice the eggplant into slices 1 to 2 cm thick. I try to slice them around 1.5 cm which is 3/5 of an inch. Make sure you get the last slice or two under the "hat" of the eggplant as that's the most succulent part. Lightly salt all the slices and let them set for 30 minutes. You'll notice the slices start to sweat a yellowish liquid, that's ok cus they are supposed to.

After 30 minutes, go crank your gas barby on high (if you are using charcoal, then you had better've started the coals 30 minutes ago!). Next, rinse the eggplant slices and pat them dry.

Drizzle olive oil over the slices and gently toss them in a bowl to lightly coat the slices with olive oil.

Grill them slices! 2 or 3 minutes a side is enough. You'll only turn them once so check after 2 minutes that you've got a nice grill pattern on the bottom of a slice before turning them.

After both sides are char-grilled, serve them up as a side dish to pretty much anything. You'll find the skin has a pleasant, nutty flavour and is very tender. The flesh won't be "heavy" or "greasy" since the eggplant didn't absorb the oil!

You can use various spices when you are oiling the slices. I'll be using a combo of turmeric, cumin, and coriander along with the oil next time.

Enjoy!

Wednesday, October 22, 2008

Grilled Tomatoes

As the summer approaches down here in the land of Oz, you may notice something about this food blog. What may you notice, pray tell? You just might notice a lot of recipes using tomatoes.

Why tomatoes? Well, we have 9 tomato(e) plants growing in pots on the bricked patio overlooking the pool. It gets nice and roasty toasty warm there, loads of daylight too, and I give 'em plenty of water and fertilizer (cow poop; in fact they started growing in a mix of half potting soil and half cow manure --makes the plants smell really good).

One of the plants is a truss tomato(e) and that sucker's first flush is gonna be 20 to 30 tomatoes! Mmmmmmmmmm... Last year we got over 100 from just 3 plants (no trusses) so this year I'd be expecting over 300.

That's a lot of tomatoes.

Lots

Of

Tomatoes

I still have a few jars of semi-sun-dried tomatoes packed in olive oil and fresh basil from last season. I also still have a jar of the end of season green tomatoes that I pickled.

I think we'll be eating a lot of tomatoes over the next 8 months :)

OT 95 F in the shade Friday... A little bit warm for middle of spring...


The sauce for this is the same as I use for my fish recipe that everyone down here loves, or at least those who've tried it.

The sauce is basically half olive oil and half lemon juice (or lime juice), a bit of salt, some ground white pepper, and some tarragon. Whisk the heck out of it and a nice emulsion forms.

The other day I was grilling up some basa with the above marinade, and I realised I had made too much marinade. I then noticed that we had 3 big, fresh, juicy tomatoes just sitting there on the kitchen table begging to be eaten.

Hmmmmm, thought I... perhaps I can thick slice them and grill them and drizzle the excess marinade on them? Oh, wait a sec! How's abouts I cut em in half and let the sauce soak into them before grilling? Yeah, that'll work!

They were a HIT! I mean a huge hit! The cool thing is that they kinda make there own little bowls of tomatoey goodness. Gobble, smack, slurp!

Here the recipe:

Whut Yoo Knead:
3 tomatoes
1/4 cup olive oil
1/4 cup lemon juice (or half lemon/half lime juice)
1 tsp sea salt
1/2 tsp ground white pepper (or black, no worries)
1 to 2 tsp dried tarragon leaves


Whut Yoo Doo:

Toss everything except the tomatoes in a bowl. Then whisk like crazy. The sauce will form an emulsion. Very very very tasty.

Slice each tomato(e) in half. Latitudinally, not longitudinally (that means if the stem is the north pole, then slice along the equator). Put the halved tomatoes on a plate with the cut side UP. Spoon the sauce over each half (that'd be six halves) and let them sit for an hour (while you go prepare whatever else you are having for dinner).

Crank up your grill (I have a six burner gas barbie) to high. Let the grill get really hot, then turn off the gas. Place the tomato(e) halves on the grill with the cut side DOWN. Close the lid.

In about 10 to 15 mins, open the lid, and plate them suckers up! Serve them with the cut side UP, and they'll each become their own little bowl of tomatoey goodness.

Yummers!

I'm sure you can do the same thing under a broiler (on the lowest temp possible) in the kitchen. I wouldn't suggest making them in an oven cus I think they'd soften up way too much. But hey, you can always try! But if you have a gas grill, it's easily done. Charcoal, no worries; just move the coals to one side after getting the part of the grill where you are putting the tomatoes nice and really hot.

Sunday, October 12, 2008

Cheesy Steamed Cauliflower

This is a main dish. Yes, that's right. It'll feed 3 hungry adults --provided they all like cauliflower, of course. It's dead easy to make and is quick. Heck, I'll bet even Ishmael could make it (but I doubt he'd eat it).

Here's what u knead:


one big ole cauliflower
1 litre full cream milk
1/2 cup cream
1 cup white wine
salt
ground white pepper
2 to 3 cups grated cheddar cheese
1/2 cup minced onion
corn flour (corn starch for you yanks)

What to due:

Cut the cauliflower up into large sized chunks --depends on the size of your steamer, the chunks should be as big as you can make them and still fit into the steamer. Don't forget to steam the greens too, very tasty and nutritious!

They'll need to steam for a good 30 mins and the sauce only takes 10 mins. That'll give you an idea of when to start the sauce. The sauce really makes this dish, yum!

Put the milk, cream, and white wine in a large saucepan heat it slowly. Keep the flame low as you don't want to scald the cream, but you should be able to get it bubbling without burning it. Add 1/2 tsp sea salt, and a few good shakes to white pepper --this is to YOUR taste.

Once the sauce in simmering, start sprinkling in the corn starch (corn flour for you Aussies) while whisking like crazy. Once the sauce is as thick as you like it (it should be fairly thin for this so that it soaks into the cauliflower) then add the minced onion and the CHEESE. Mmmmmmmm, cheese... drooooo-al...

Turn the heat off the sauce and let it sit for a few mins while you plate up the big cauliflower chunks. Liberally ladle the sauce over the cauliflower and use some process to get the food from your plate into your stomach.

Options:
Use a beer instead of the white wine
Use some cayenne powder
Use some garlic
Use some bleu cheese along with the cheddar
Parmesan along with the cheddar works well too
Serve with piping hot, soft, fresh, homemade bread (with lots of butter)

Mmmmmmmm

Friday, July 4, 2008

Veggie Soup Stock

This is so tasty! It's something I've wanted to try for a while and was finally able to cus we got some fresh corn with ALL the husk on. Now I know many of you are going to say to make tamales with the husks, and others of you are going to say to grill them with the husks on (I love em that way) but no one else in the household down here will touch them that way. To them, the corn cob has to be boiled... for a long time... sigh; heathens they are!

So I always end up with a huge pile of corn husks and nothing to do with them (yes, I'll make tamales for myself and grill mine in the husk but there's still a lot left over).

So how's about making soup stock with them!? Why the heck not? Here we go with


Dave's Veggie Stock


What you need:

a big pile of fresh corn husks
lots of water
lots of sea salt
ground black pepper
dried onion flakes (I make my own)
dried red bell pepper (I make my own of them too)
dried basil


What you do:

Fill your largest stock pot with water, toss in all the corn husks. Sprinkle with sea salt, cover, and crank some heat under that sucker. Turn the heat way down once it's boiling, push down any floating corn husks (use something besides your bare hand), and then go away for an hour.

When you come back in an hour, top the water up, sprinkle in some more sea salt, add some ground black pepper, onion flakes, dried red bell pepper strips and some dried basil. Put the lid back on and go away for another hour.

Ok, you've now come back; it's been a total of two hours since you started the whole process. The stock in your stock pot should be tasting pretty darned tasty right about now. Now's the time to adjust the seasonings. Add more salt or pepper if you think it needs it (hey, they are your taste buds, not mine). If it's too salty you have two options. One is to add more water without adding more salt (I don't favor this as it dilutes the overall flavor of the stock), the other is to add a chunk or two of raw potato and simmer for another 15 to 20 mins. Take the chunks of potato out (they will be darned salty after having absorbed a lot of the salt in the stock) and do what you'd like with them (I usually chuck them in the freezer and use them to add to mashed spuds when I need to). And now your stock has been desalted without the rest of the flavor being diluted. Presto!

Well now, you should have about a gallon of good veggie stock. It should only have cost you 50 cents, maybe a dollar. You had the corn husks anyways cus of the corn cobs, a small handfull of onion flakes and a few strips of dried bell peppers are pretty cheap especially if you dry your own, and who doesn't keep salt, pepper and basil in their kitchen? Go run to a store RIGHT NOW and price how much a PINT of veggie stock is, and then look at all the crap that's been added to it! Are you back? Yeah, see: it's much better to make your own!

What to do with the stock? Well, you can use it as soup broth right now, no worries. You can toss it in the freezer for future use. Use it the next time you are making a risotto! Makes a great cream soup too! Use your imagination and your kitchen ingenuity and you'll be amazed.

Yeah, a gallon of veggie soup stock for 50 cents... pretty darned good the way food prices are, eh?