Showing posts with label eggs. Show all posts

Sunday, August 26, 2012

Authentic Yorkshire Pudding (Important Update!)

What's that I hear you ask? How does a bloke from the Interior of Alaska who now lives in Adelaide, South Oz know anything about making AUTHENTIC Yorkshire Pudding?

Good question!

The answer is that my MIL is from Stockton-On-Tees which for the longest time used to be part of Yorkshire. She got the recipe from her mom who got it from her mom so this dates back to the mid to late 1800's. I'd say that is pretty darned authentic.

No, this is not the original type where you have the pan of eggy-floury-milky stuff under a roast on a fire where the meat drippings infuse themselves into the pudding as it rises. That's what gravy is for nowadays!

Alrighty then, dave's Authentic Yorkshire Pudding recipe courtesy of his mother-in-law.

BTW, this dish is a side dish to a nice roast. You must use the pan drippings from the roast to making loads of gravy to go over the puddings and meat slices too. And this will make 12 muffin-sized Yorkshire Puddings.

What you need:
2/3 cup plain flour (NOT self-rising)
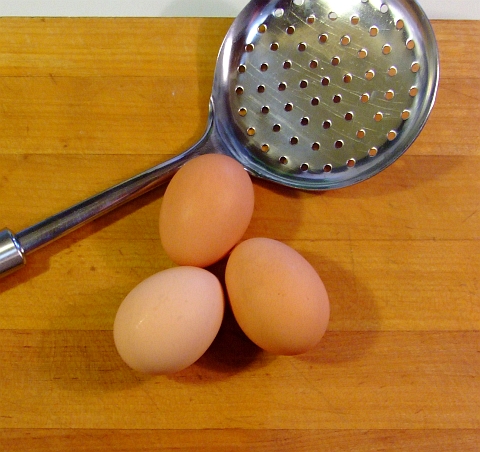
4 large eggs
milk
1/4 tsp salt
dash black pepper
butter
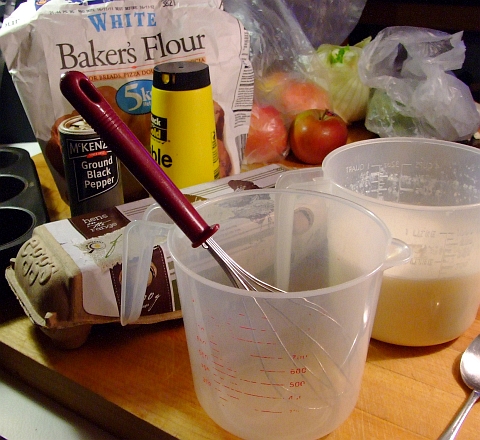

DSCF0163

And a muffin tray to cook them in!

What you do:

First thing is to preheat your oven. MIL always says "a hot oven" to which I interpret to mean 210C/425F. You also preheat your muffin tray(s). The muffin tray(s) need be very hot when you pour the batter into them! Butter the muffin trays before you put them in the oven. And do not put them in the oven until the oven itself is preheated.

Whisk the eggs together in a large measuring cup. Add the salt, pepper, flour and mix till it's a paste. Then add enough milk to bring the volume to 1/2 pint (600 mls or slightly more than one TWO cups).

Whisk it thoroughly until it is the consistency of cream. It should look like this:
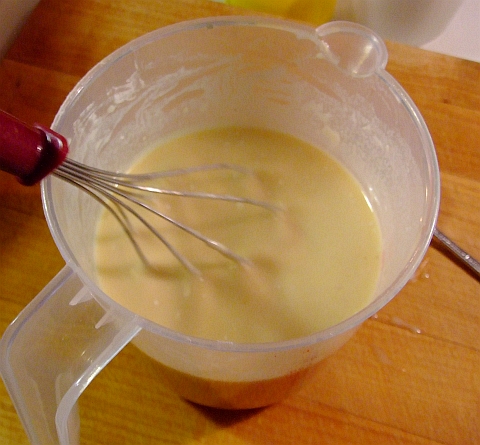
DSCF0168


After whisking the mix thoroughly, take the muffin trays out of the oven. The butter in each muffin cup should be sizzling and bubbling by now, if not then leave them in a bit longer.

Do not fill the muffin cups more than 1/3 full! These babies are going to foof up like you wouldn't believe!
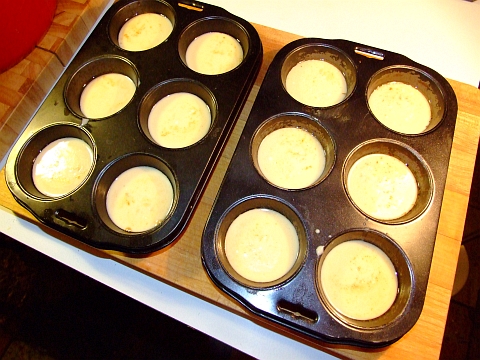
DSCF0180

And then immediately put the trays in the hot oven.

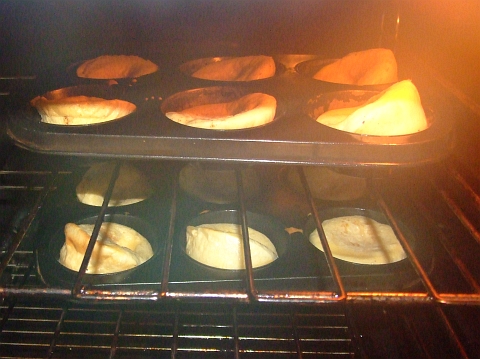
After a few minutes you'll notice (don't open the door, just turn on the oven light!) the puddings are rising very quickly around the sides but not the middle. That means you are doing it right!
DSCF0182

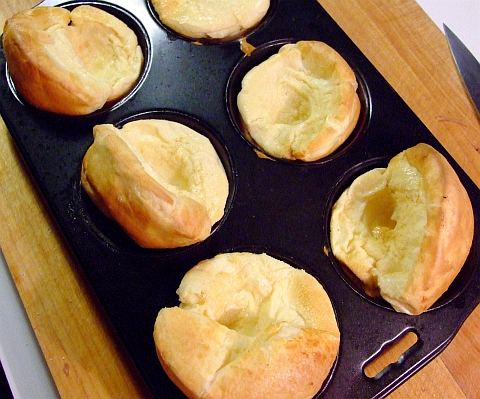
Let the tops brown nicely whilst in the oven. The whole cooking process should take anywhere from 15 to 20. This should be the time when you make your gravy and mash the potatoes. When the tops are browned then it is time to take them out
DSCF0184

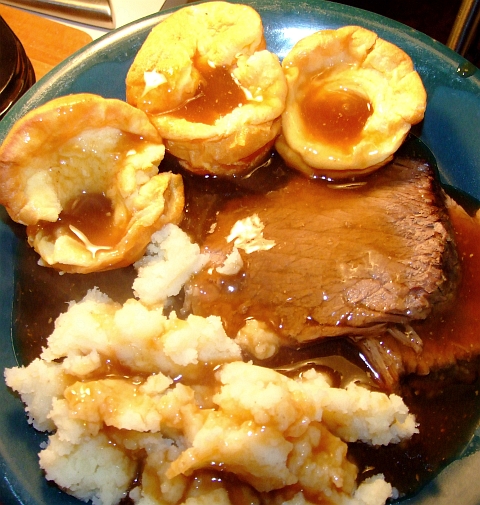
and immediately serve them! A plateful of roast beef, mashed spuds, Yorkshire puddings with lashings of gravy over everything is some seriously great comfort food on a cold day!
DSCF0186

Enjoy.

UPDATE: Important! Did you see where I said that 600 mls was slightly more than ONE cup? My bad. I doubled the recipe to make 12 muffins and went thru and changed everything but I missed the one cup to two cup. Gack! 600 mls is 2 and 1/4 cups!!!!!

Friday, December 2, 2011

Perfect Hard Boiled Eggs with pics and humor!

hb12


Hard boiled eggs. Yes, I wrote "hard boiled" instead of "hard cooked". Why? Cuz I can, that's why. And I'd never heard the term "hard cooked" until just recently.

Apparently there's a recent(?) move afoot to call them hard cooked instead of hard boiled. The method involves putting the eggs into cold water, bring the temp up to just boiling, cover, then turn heat off and let sit for a certain length of time.

Harumph, says I!

As long as the yolks are solid and there's no green tinge around the outside of the yolk then they're fine without doing some new-fangled cooking technique. So there.

BTW, that thar greenish tinge is not harmful and doesn't stink and doesn't taste like crud... it just looks like it!

But what is it? It's just iron sulfide formed when the iron in the yolk reacts with the hydrogen sulfide in the white. Oh, the hydrogen sulfide is what makes rotten eggs stink. It does the same thing to crude oil too!

Anyways, it's quite easy to make perfect hard boiled eggs that peel easily, never crack whilst cooking and have no iron sulfide formed around the yolk.

How is this done? Quite easily as it turns out. And since eggs are the original Meal Ready to Eat, you want to know how to cook them in their shells properly.

Here's how:

Dave's Perfectly Cooked Hard Boiled Eggs

What you need:
3 medium eggs
some water
salt
vinegar
some sort of slotted spoon/ladle type thingy
ice cubes

What you do:

Take the eggs out of the fridge for an hour before you'll be BOILING them. The shells are much less likely to crack if they aren't cold to start out.

hb01
Above is the eggs coming up to room temp. Eggsciting, eh?


Once the eggs have warmed up, get the water boiling (I'd suggest using a saucepan to contain the water), give it a sprinkle of sea salt and a splash of vinegar.

Why salt? It makes the eggs much easier to peel, that's why.
Why vinegar? If the eggs do crack, the vinegar will seal them up so none of your egg whites leak out.

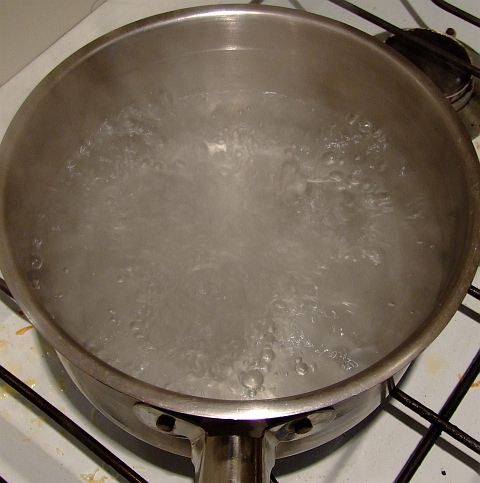
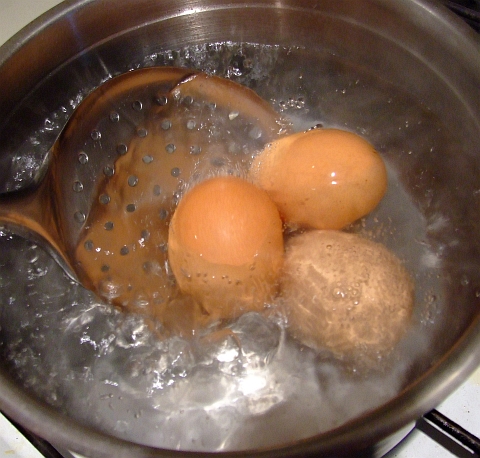
Once the salted, vinegary water is boiling (here's a handy reference pic in case you don't know what boiling water looks like)
hb02
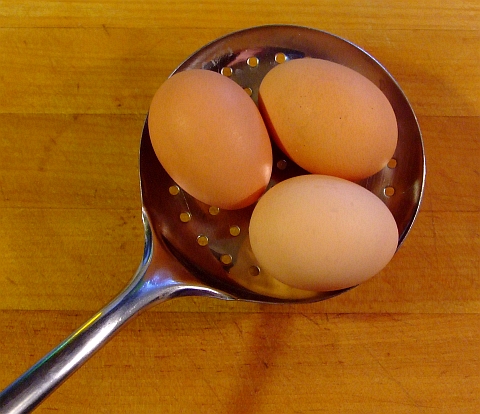
you want to very carefully load your room temp eggs into your slotted/holey spoon/ladle
hb03
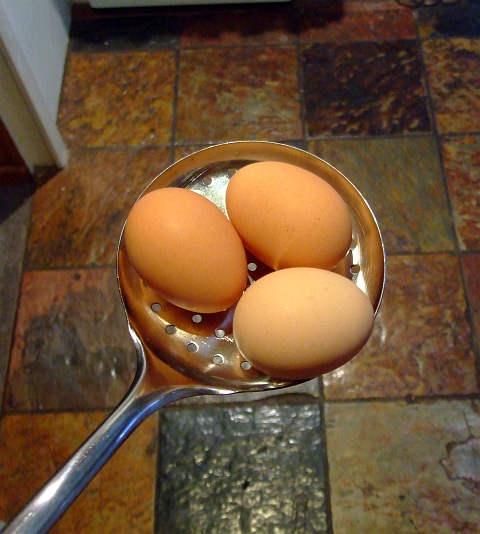
and slowly walk across the kitchen to your boiling water without dropping any eggs!
hb04


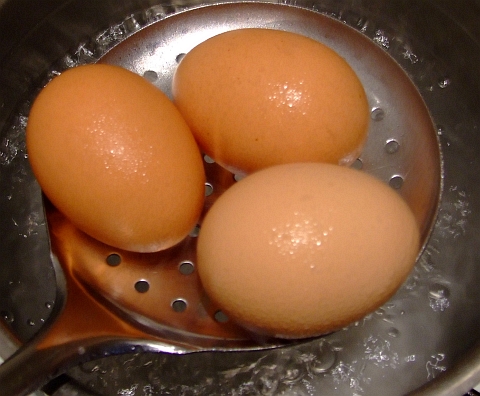
Lower the eggs over the boiling water, but DO NOT IMMERSE!

hb05

Hold the eggs over the boiling water till condensation forms (20 to 30 seconds)

hb06

and then carefully lower the eggs into the boiling water

hb07
then cover the saucepan and set your oven timer for TWELVE (12, XII) minutes.

hb08


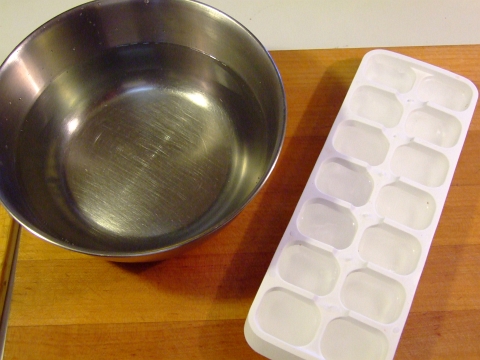
Whilst you are waiting for your eggs to finish cooking, you can prepare the ice water that you'll plunge them into to stop the cooking process.

hb09


Once your 12 minute oven timer beeps, turn off the heat and rinse the eggs under cold tap water for a moment, then plunge them into the ice water! Ker-sploosh!
hb10
If you omit this step, you will not halt the cooking process and the outer surface of your yolks Will. Be. Green.

After they've been in the ice water for 30 minutes then go ahead and chuck em in the fridge, use whenever you want them!

And you'll find that the shells practically fall off!
hb11


And of course the yolks will be perfect when you slice them:
hb12

Monday, July 26, 2010

Cheese & Bacon Mini Muffins

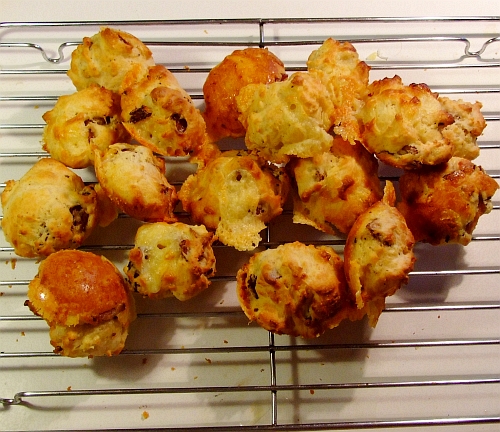
And they are oh so tasty! A quick snack, they do make. Bake up a mess of 'em on Sunday and toss a few in your lunch box throughout the week. If they last that long... which I doubt.

I got the idea for these from an Aussie cookbook circa 1972 titled Cooking With Wine & Cheese. 50 cents at a garage sale. And with a title like that I certainly wasn't going to pass it by. No sirree!

The recipe from the book, with it's frail, aged pages, did not call for bacon and some of the amounts were not what I'd use. Especially since they didn't use nearly enough cheese. Also, mine are made in mini muffin tins so they are bite-sized. Very handy. I also use different techniques and different ingredients. But I did get the idea from the book.

But you gotta like any recipe book that says to not only to preheat the oven but to also preheat the "irons". Irons? Yes, "irons" is what any type of metal (always cast iron) baking implement used to be called. These days you'll rarely hear the term outside of grey-haired camping aficionados as some still refer to campfire cooking implements as "irons".

Anyways, just use a muffin tin, no worries. Make sure you use the smallest you can find. These aren't called mini muffins just cuz, you know?

On with the recipe!

Cheese & Bacon Mini Muffins this makes 36 mini muffins

What you need:

1 1/2 cups self raising flour
1 tsp salt
3 tbsp full cream milk powder

1 tbsp butter

3 slices of Aussie sized bacon slices; diced, cooked and drained. 6 if you are using US sized bacon slices.
125 grams diced cheddar (equal to 5.33 ounces or 1/3 of a pound)

1 egg
2/3 cup water (H2O)


What you do:

Put the first 3 ingredients in a mixing bowl. Stir em up so they are combined. Add the butter and cut it in with a fork --if your butter is really cold you can use your fingers if you do it quickly.

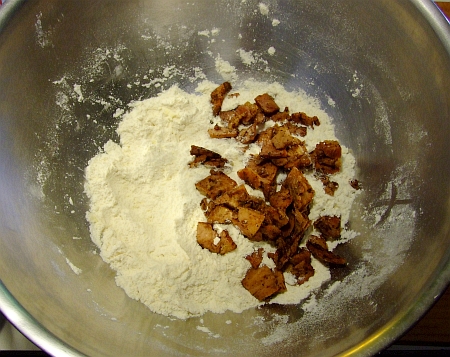
Toss in the cooked & drained bacon pieces:
muff01


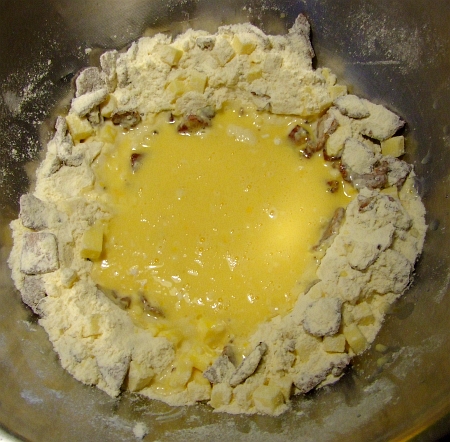
Mix it up so the bacon is coated. Then add the cheese:
muff02


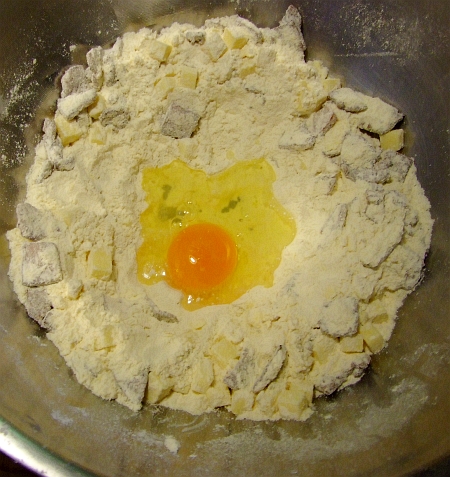
and mix it around so the cheese chunks are coated. Make a small well in the center of the mix and crack an egg into it.muff03


Add the water and beat the egg and water together.
muff04


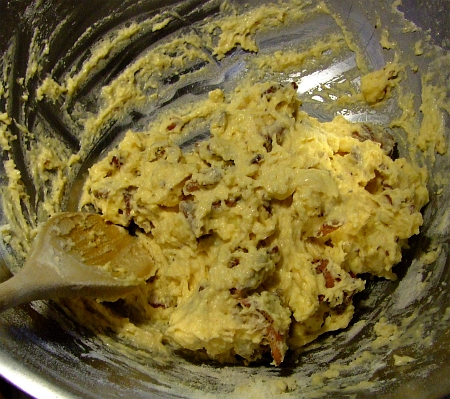
Grab a wooden spoon and mix the whole mess together!muff05


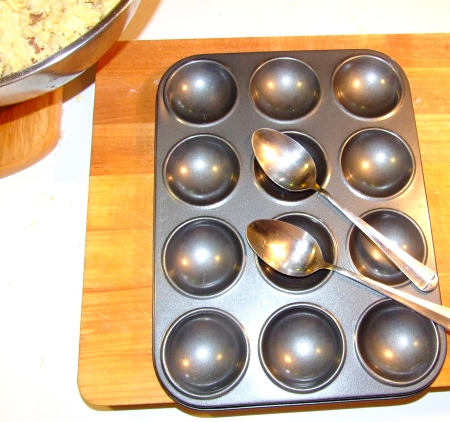
Grab your muffin tray and the spoons. I put a couple of table spoons on the tray so you'd get an idea just how small each muffin hole is.
muff06


Fill the tray with a decent sized spoonful of the mix in each muffin hole:
muff07
As I said earlier, you'll get 36 mini muffins or 3 tray fulls from this recipe.

You should have preheated your oven to 220 C (428 F) a while back. I'd recommend doing that first thing as the preparation doesn't take very long.

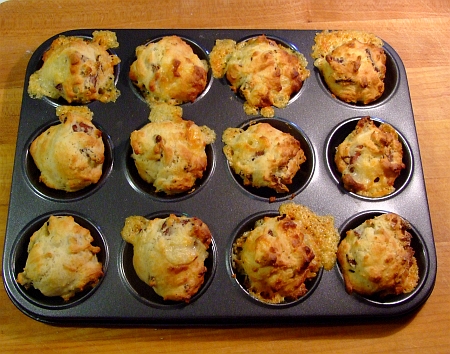
Bake them for 12 to 15 mins till they look something like this:
muff08


Pop em out and put em on a cooling rack. Load the tray up for the next round. After a while your cooling rack will look something like this:
muff09


That picture was taken after 2 of the 3 rounds were done. You'll notice there is not 24 of the buggas on the rack. They are, ummmmmm, very tasty and very easy to eat as you make them, well at least that's what I've heard. Great hot and great cold.

Make these and you'll be happy. So will your taste buds. So will your tummy. Just try not to eat them all at once.

Monday, May 24, 2010

Biggest Morning Tea

Each year, the Biology dept up at our local Flinders Uni hosts what they like to call "The Biggest Morning Tea". It only costs $4 to get in (that's just a couple of Aussie $2 coins). All the cooking is done on a volunteer basis.

My BIL works at the Paleo lab in the Bio dept so he's on their email list. Last week he received an urgent email asking for more cooking-type folks. So far only 4 people had volunteered, and none of them featured any savory dishes.

Mike (BIL) told them about my cooking prowess, and I got in email contact with the lady in charge. She is very thrilled with what I said I could make for them.

Here's the list of what I'll be making between now (monday arvo) and thurs morn:

Cheese and bacon muffins

soft pretzels w/ cheese sauce

mexican chocolate fondue

zucchini bread

cumin seed crackers

wholemeal chia seed bread w/sunflower and pumpkin seeds

morrocan seasoned pan bread w/ grana padana cheese

fresh homemade ricotta cheese (it's easier than you think) to go with the cumin crackers and whatever.


They are expecting 100 to 150 people... This will be challenging, especially as MIL has a couple of doctor appointments this week.

Wish me luck folks!

Oh, the proceeds from it go directly the Flinders Med Centre (right next to the U) for their cancer research.

Friday, March 6, 2009

Wasabi Mayonnaise

Mayonnaise... Ahhhhh what great and wonderful stuff it is... mmmmmmmm, drool...

Did you know that originally mayo was made with garlic? Yup! I do like mine that way since I use a LOT of garlic (Vlad will not get me, HA!) when cooking anyways. Now, it's just hearsay, but the story goes that mayo was made in France with garlic. But when one particular Cardinal came to power he decreed NO garlic in mayo. He hated garlic. Something tells me he wasn't *really* French.

Anyways, that's just what I heard yonks ago and have absolutely no idea if it's correct or not.

There's also two conflicting versions of the origins of mayo, and I really don't feel like (or have time to) check wiki and sift through the references. Why don't I have time right now? Cus I'll be cooking a batch of pappadams in less than 5 minutes so I'd better get a move on.

Now I know that you could just open up a jar of mayo and add a squeeze of wasabi paste (mmmmmmmmm... wasabi...) and call it good. But if you did that then you'd be getting all the preservatives and chemical crap from the jar of mayo. And that's what we're trying to avoid.

BTW, this calls for egg yolks. Make sure you save the egg whites for meringue. Oh, the chooks down here aren't fed growth hormones either.


Wasabi Mayo


What you need:
2 egg yolks
2 tbsp lemon juice
2 tsp wasabi paste (or more!)
1/2 cup olive oil


What you do:
Chuck everything but the olive oil in a small food processor. Process on low for a min or two. Then slowly add the olive oil while the processor is running.

Hey, now just how darned easy was that? Of course, you can add any sort of other herbs or spices you want, but the wasabi paste pretty much makes the taste and I've found other additions to be a waste as they don't really come through flavour-wise.

Enjoy!

I'm off to fry a batch of pappadams to have with tonight's Mango Chicken Curry. Ta.

Sunday, September 14, 2008

Ham and Egg and Cheese Cupcakes!

???? Like, Ummmm... ham, eggs, cheese and cupcakes? What the hell are you thinking this time dave?

Gosh, I get asked questions like that daily, hourly, minutely!

Now to be fair to me, I did NOT come up with this. I read it in a magazine at the grocery store checkout counter. I thought it sounded really good. I even thought it should taste really good too.

Can I lay claim to this? Well, I did use different herbs (mainly cus I didn't have the ones they used) and I would've loved to use some different cheeses... But it just so happened that I had everything needed in stock (except the fresh herbs they used, so I used ones I had). I also used shaved ham instead of proscuitto (how the heck do you spell that???)...

THEY ARE GREAT!!!!!!!!!!!!!!!!! Like seriously tasty!!! I'm making these whenever I have the fixin's for them. One of the great things about them is you can make one or a dozen so that if someone in the house don't like 'em, then you can still make them as a side dish for yourself!

And they are simple and easy to make. You can also modify them to your taste buds as I'm sure your taste buds are much different from mine (I hope).

On with the show:

Ham, Egg and Cheese Cupcakes:

What you knead:
one muffin tin that'll make six muffins or cupcakes
6 to 12 slices of shaved ham
butter
6 eggs
1 or 2 tbsp crumbled feta cheese
1/2 cup grated cheddar cheese
2 tbsp minced scallion
2 or 3 tbsp fresh coriander (cilantro) leaves
Pinch of chili powder

What you due:

First, preheat your oven to high heat. While it's preheating, do the following:

In a bowl, mix the feta, cheddar, coriander leaves, scallion and chilli powder together. Then use the butter to grease your muffin/cupcake dish. Line each cupcake hole with shaved ham so that the ham forms a "cup". Put a tbsp or two of the cheese mixture into the ham holes. Then carefully crack an egg over each "cupcake" --don't break the yolk! Top each "cupcake" with the rest of the cheese mix.

Put that sucker in your hot oven for about 12 to 15 mins. When the egg is done to your liking ( I like the yolk slightly runny for this) then it's done.

The ham and whatever cheese and egg leaked through will form a nice cupcake, with savory, herbed, egged goodness in the middle. Pop them suckers out and serve 'em on the side with whatever you are having for dinner.

I made breaded fish fillets with a fresh salad along with these puppies last night. Plates were licked clean by all.

I'm terrible at food pics, but here's what the whole spread looked like. Ah, the two ham, egg and cheese cupcakes are on the upper right of the plate.
ham and cheese cupcakes

Now, if you'll excuse me, I have to go make a 3 cheese sauce to go over a steamed cauliflower. Adieu amigos!

Thursday, April 3, 2008

Hollandaise Sauce

This post first appeared on my other blog, way back in the dark ages. For those of you who've been bored enough to trawl those archives, then you've seen (scene) this already. For the rest of you (especially all my new readers!), here ya go:

Have you ever had a rich, yellow, creamy, smooth, buttery sauce at a restaurant and wondered, "how in the hell do I make that?" Or you may have wondered, "what the heck is this wonderful sauce?"

It's that yellow sauce on Eggs Benedict; it's that yellow sauce on asparagus; it's that yellow sauce served with some types of fish... Yes, you've guessed right:

HOLLANDAISE SAUCE

But, alas, you've heard that hollandaise sauce is hard to make and it doesn't always come out 'right'. So off you go to the grocery store and buy a little packet of hollandaise sauce mix --you know the kind! Yup, the one with a paragraph of fine print ingredients that aren't fit to serve to your worst enemy (for those of you that gots em).

So you despair... You love the taste, but the pre-packaged crap will kill you and you don't know how to make the sauce from scratch. Never fear cus it's EASY!!! It takes all of about 3 MINUTES --no wait, it really only takes 45 seconds! No, I'm not doing a 'cheating' Hollandaise Sauce (hey, I can type Hollandaise in my sleep now), this is the real deal.

In fact, it's sooooo easy, I'm going to give you a few variations --of the recipe, get your mind out of the gutter, this is not Penthouse!


Here we go:

What you need:

1/3 cup (75 ml or 2 1/2 oz) of real butter (DO NOT USE MARGARINE!!!! More about that crap in a few posts...)
a pinch of salt (non-iodised sea salt! Ah, more about the salt you all have to put up with in the US soon)
1 tbspn (15 mls) lemon juice Have I mentioned I have my own lemon tree out front? No I haven't? Well I have now.
2 egg yolks eggs from chooks, not emus (An emu is a very cool bird, I'll try to upload a pic for y'all)


What you do:

In a small saucepan (Don't use a coated saucepan, BLECK!), heat everything except the egg yolks until the butter is melted but not bubbling. Then: TURN THE HEAT OFF.

Whisk the egg yolks in a bowl (ten seconds perhaps).

Pour egg yolks into saucepan while whisking like a lunatic (I can relate to that).

Use immediately

There now, wasn't that quick and easy? You can make the sauce in about 45 seconds with some practice getting the egg yolks out without the egg whites (I know three different ways, I'll pass them along to you eventually). BTW Always save the egg whites. If you aren't going to use them soon (more soon) then they freeze well, just make sure you put them in a container before tossing them in the freezer.


Now for some variations on a theme...

Use half lemon juice and half lime juice. Or all lime juice, they are both tasty.

Use some tarragon (great herb). Put the tarragon in the melted butter and let it sit for a bit before whisking in the egg yolks --you may need to SLIGHTLY heat the butter mixture back up. You can use either fresh or dried, no worries.