Showing posts with label main course. Show all posts

Wednesday, May 2, 2012

Prawn Squid Chili Alfredo

Now does that just sound ultra tasty mates? Well to me it does! And since I uploaded a picture of the final, plated product to twitter and I have a few folks asking for the recipe, I suppose I should share it with YOU.

This is what the finished dish should somewhat look like:
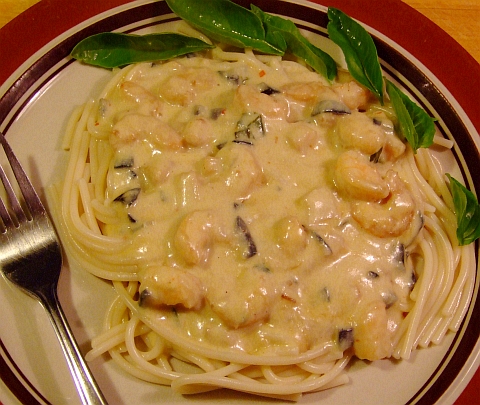

DSCF0053s

Your plates and cutlery may vary of course.

 This is also one of dave's (tm) seat-of-the-pants whatcha-got-cuz-I'm-in-a-hurry creations.

The above being typed, this of course means that the following amounts may or may not be somewhere in the general vicinity of the amounts I used. But hey mates, I'm trying! Gotta give a bloke credit for that, right?

Here is what I *sorta* did:

What you need and do:

For the first part...
2 tbsp minced red onion
1 tbsp minced garlic
1 tbsp chili paste (try to find the kind at least 90% chilis)
1 small handful of fresh, minced basil leaves
1 small handful of fresh, minced, onion greens
1 tbsp olive oil
sprinkle of sea salt
Add all the above ingredients to a large cast-iron skillet.
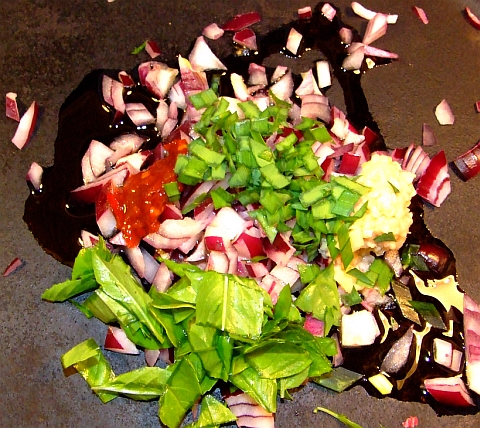
DSCF0046

Simmer and stir for a few minutes till the garlic is close to browning.

Then add 1 cup of white wine (or water) and let it simmer for a few minutes till the liquid is *almost* reduced to nothing.

For the next part you'll want to have these two things handy:
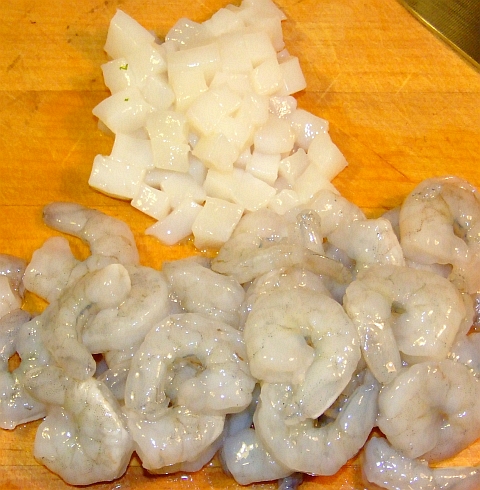
200 grams prawn meat, peeled and deveined
100 grams minced squid tube, cleaned of course

Perhaps your seafood may look something like this:
DSCF0049
Your cutting board may vary of course.

Add that wonderful, delicious seafood to your that large saucepan that has just simmered down!


DSCF0051
Oh yeah, I'm getting hungry just thinking about the wonderful smell from the saucepan last night.

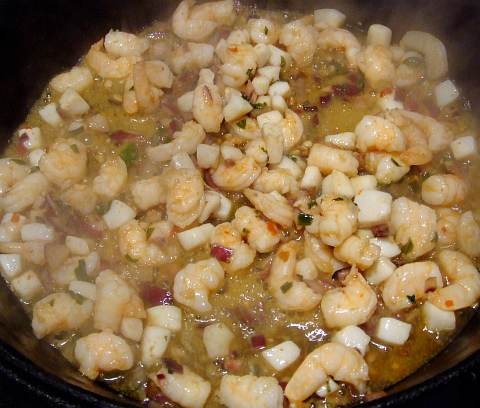
Turn the heat up a bit and stir for a minute, then turn the heat to low. Add 1 cup water, cover and simmer till the liquid is gone.
DSCF0052

Now you get to make it "Alfredo"!

Add 1 cup of full cream milk and 1/2 cup cream. Stir to combine while heating. Grate 1/2 cup cheddar cheese over the simmering mix, sprinkle on a pinch of sea salt. Stir to combine well.

Turn off the heat and cover.

Now you thicken it a bit. I use tapioca flour to thicken these type of sauces but if you only have cornstarch then that's ok.

Mix 1 tbsp tapioca flour with 1/2 cup cold water. Add to the saucepan with all your wonderfully smelling goodies in it; quick stir to combine. Wa-La!

Serve over any kind of pasta as takes your fancy. Garnish with fresh basil.

Note, MIL wanted spaghetti, Wifey-Poo wanted fettuccine, and I wanted angel-hair. Here's a pic of MIL's plate.

DSCF0053s

Enjoy!

Saturday, January 7, 2012

Maggie's Creamy Vegetarian Pepper Pot Soup

DSCF7784

I have fun trading recipes, cooking tips n tricks, ingredients substitution, etc on twitter. One of my most wonderfullest twitter mates is named Maggie. She's a vegetabletarian but she also puts my meatiness recipes on her daily paper.

The other day (month!) we were chatting about soups and she said she'd send me her pepper pot soup recipe.

Of course I had to make it!

And of course I had to change it around a bit! Why? Cuz I didn't have all the ingredients at hand so I subbed a couple of items. I also changed the amounts a bit as I was only making it for myself.

She later told me that she herself had modified the original recipe from the person she received it from! Hey, all's fair in the kitchen mates!

Here is her original ingredient list plus directions:

PEPPER POT SOUP

2 Cups Water
2 Cups Veggie Stock
2 Good Sized Potatoes, Shredded
2 Medium Carrots, Shredded
2 Celery Stalks, Chopped fine
2 Medium Onions, Chopped fine
1 Green Pepper, Chopped fine
½ Cup All-Purpose Four
2 tsp Salt
½ tsp Pepper, fresh hand milled
1 Cup Water
6 Cups Milk

Mix first 7 ingredients together in a large saucepan. Bring to boil. Cover and simmer for 20 minutes. Mix flour, salt, pepper, and 1 Cup Water together in a small container until no lumps remain. Stir into the simmering soup to thicken it slightly. Add milk. Heat through. Check for seasoning.

Makes 12 ½ Cups

Not being one to take directions too well, I decided to make a few changes based upon why I had on hand. And remember, I was only wanting to end up with 6 to 8 cups. Here's what I came up with:

Maggie's Modified Vegetarian Pepper Pot Soup


1 Cup Water
2 Cups Veggie Stock
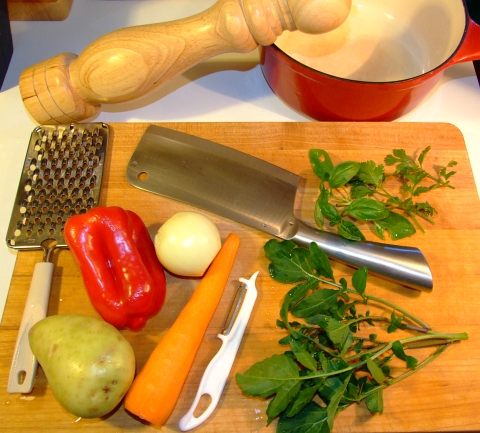
1 Good Sized Potato, Shredded
1 Medium Carrot, Shredded
1 Bok Choy, rough chopped, leaves included
1 Medium Onion, Chopped fine
1 Red Bell Pepper, Chopped fine
1 Handfull of fresh Rocket (the peppery kind)
A few fresh basil leaves, rough chopped.
A few fresh coriander leaves (cilantro to North Americans)
½ Cup All-Purpose Four
2 tsp Salt
½ tsp Pepper, fresh hand milled
1 Cup Water
2 Cups Milk

DSCF7774

DSCF7777

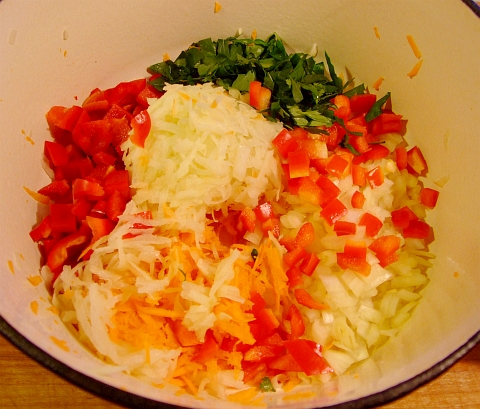
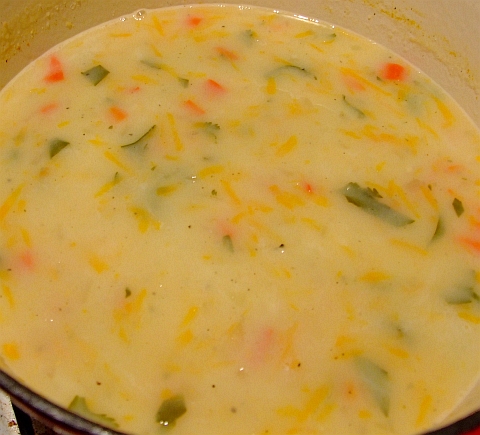
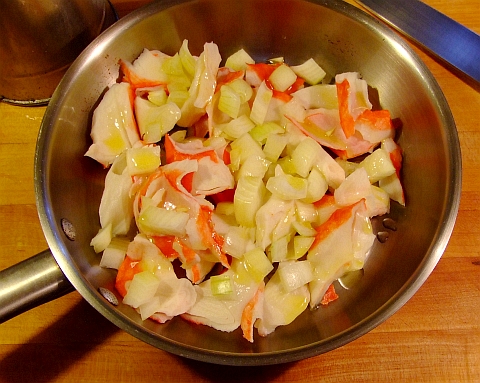
I mixed first 10 ingredients together in a large saucepan and brought it to a boil.

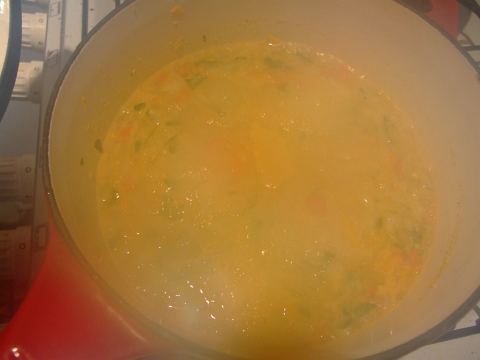
It was then covered and simmered for 30 minutes.
DSCF7780

Then the flour, salt, pepper, and 1 Cup Water were whisked together and that slurry was stirred into the simmering soup as a thickener and a spicy-er.

DSCF7782

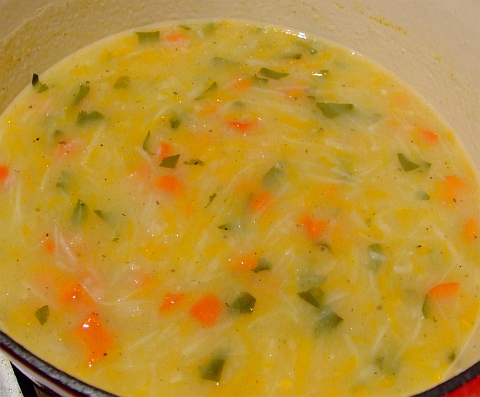
The milk was added and the soup was brought back up to temperature.

DSCF7783

I checked to see if it needed any more seasonings (like salt) and I added a pinch of sea salt.

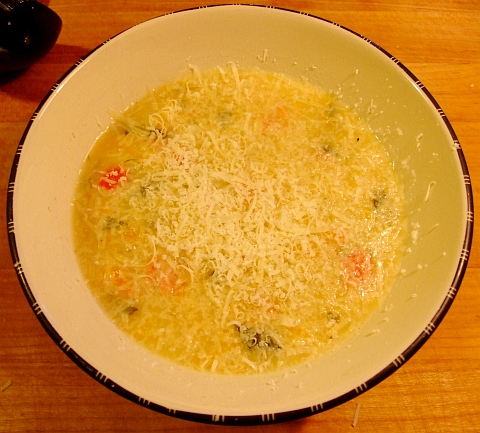
And it of course looks great in a bowl!
DSCF7784

I of course just had to make one little, itsy, bitsy, teeny, tiny final adjustment...


Fresh grated Parmesan!
DSCF7785

The soup was very very tasty, I thoroughly enjoyed it. And you can all thank Maggie up in Canada for sending me the recipe!

Monday, April 11, 2011

Baked Crab Cakes

I wasn't planning on making crab cakes last night. In fact, not for a while till fresh crab prices come down. But someone needs a crabcake recipe that has just a "hint of 'heat'".

That someone being http://twitter.com/#!/cheeriogrrrl

I had to use the fake crab stuff. I'm sorry. I really am.

And I'm also a bit sorry --well, not really-- that this is another recipe with no exact amounts. Why? Cus when I make crab cakes or fish cakes I never measure stuff. The amounts depend really on just how much leftover mashed or baked potato I have leftover and I eyeball the seasoning amount.

But at least this should point you in the general direction! And there are pictures to help you.

And these are baked. That means healthy.


Dave's crab cakes

What you need:

Some leftover mashed or baked potatoes
Volume of crab meat that's about 2/3 of the amount of leftover potatoes
half an onion
minced garlic
dillweed
capers
dried mint
sea salt
white pepper
olive oil
grated parmesan
breadcrumbs
cayenne powder


What you do:

Put the large chunks of crab meat, the chopped onion, and a bit of olive oil in a saucepan. Cook on med-high heat for a few mins. Turn off heat, add the minced garlic, give it a good stir.

These pics show the before and after process.

cc02
This is before it goes on the heat


This is after 5 mins on the heat with the garlic added, and everything then minced finely.
cc03


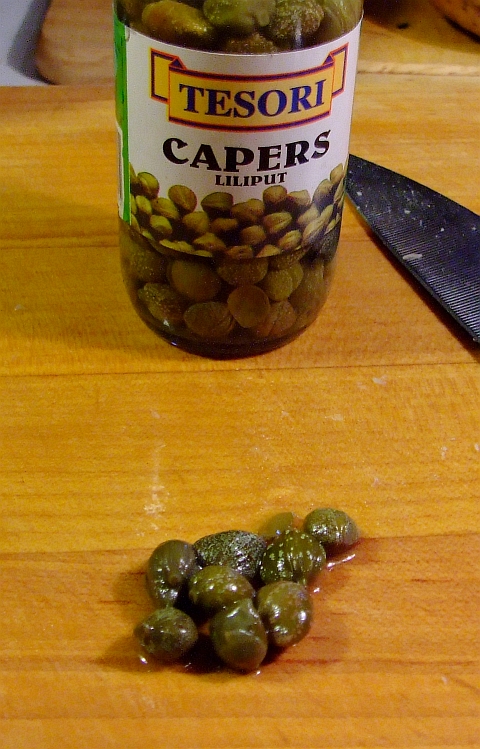
Now take 6 to 10 capers and chop them up. See, look: capers!
cc04


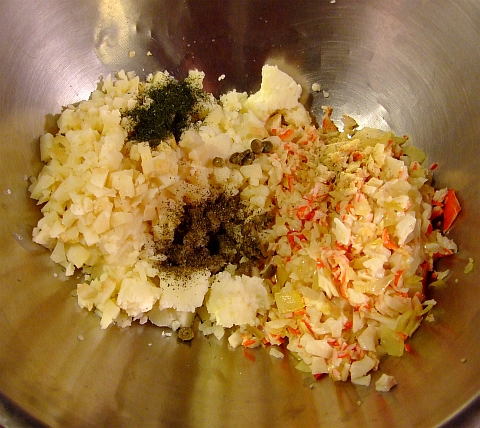
Add to a large bowl the leftover potatoes, the minced crab-onion-garlic, the chopped capers, sea salt, white pepper, dillweed, dried mint. This pic may help you with the relative amounts:
cc05


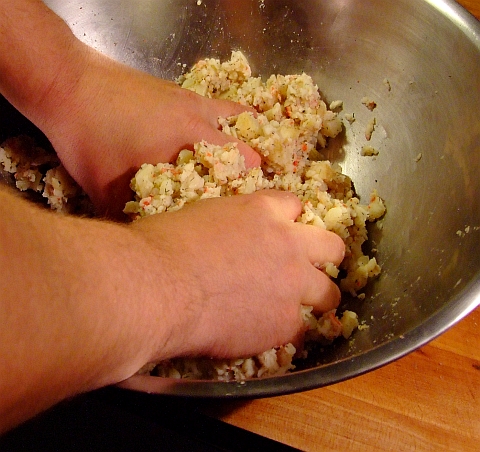
Mixing it all together is the fun part!
cc06


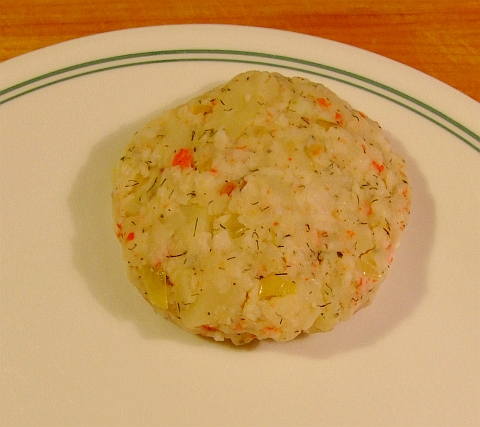
Form them into "cakes" around 2.5 to 3 inches in diameter
cc07


Since I'm baking these I don't need to dip the cakes into eggwash to get the breading to stick as I would have to if I deep-fried them, so that step can be omitted when baking them.

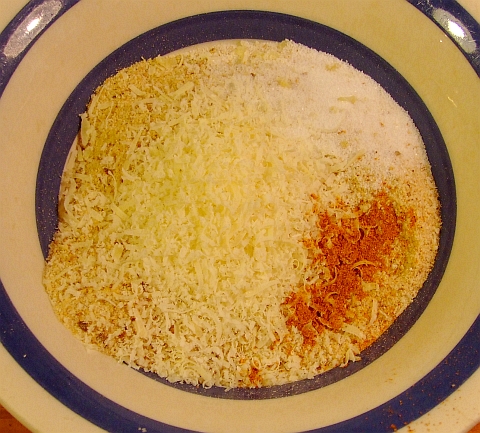
Time to make the breading. Breadcrumbs, cayenne powder, sea salt and freshly grated parmesan.
cc08


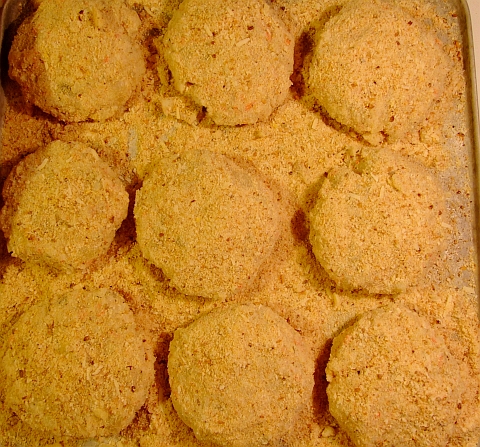
Carefully coat the cakes with breadcrumbs and put on a baking tray. Sprinkle whatever leftover breading you have between and over the cakes.
cc09


Drizzle a bit of olive oil over each cake and bake in a hot oven till tops are browned (around 12 minutes or so). Carefully turn them over, drizzle with a bit more olive oil and bake for another 12 mins or so. All ovens are different so keep an eye on them since you don't want the breading to blacken.

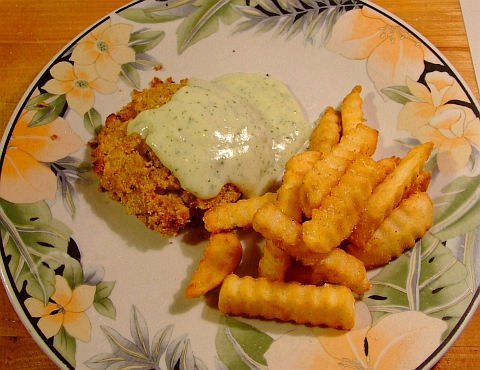
For serving them I made a quick parsley sauce and fried some chips (french fries for you US folk). Doesn't this look tasty?
cc01


If you have questions about relative amounts or anything else about these just ask away in the comments, no worries mates.

Sunday, December 5, 2010

Beer Batter Waffles

Alight, confession time... This is another post from my other blog before this here food blog was hived off. So you'll have to put up with my silliness.

But trust me, these are ultra delicious! Serve em with butter, dollop of freshly whipped cream, and maple syrup, side of bacon and you've got some seriously happy campers.

And here for your reading pleasure is THE recipe for Dingo Dave's Extra Special Beer Batter Waffles!

Special Beer Batter Waff-lees

You may notice something here as time goes on (ummm, besides the ticking of the clock), and that something is the fact that you'll see quite a few beer battered goodies from yours truly (or at least from me).

Remember, the founding fathers of the US of A were home brewers (we'll just go along with modern revisionist history about ignoring them pretty much all being slave owning folk too, eh) and I believe it was one of those dudes (I can't remember which, my memory is hazy from that long ago) who said in reply to a tax on beer "But sirrah, it is liquid bread!"

Alrighty, enough waffling already: here's what you need for some really great waffles:

One waffle iron --well, DUH! However, I am soooo glad that I brought my waffle iron down here from Alaska as I have yet to see a single waffle iron of ANY kind for sale here in the land down under... SHEEESH, the Belgian immigrants must be furious.

Alrighty, no dramas, here we go...


What you need:

2 1/4 cups (533 mls) flour --note, not self-rising!
3 (45 mls) tablespoons sugar --I use raw sugar for everything (well, almost, snicker snicker)
1/2 tsp (1/2 teaspoon) salt (NON-iodised sea salt --see a previous rant of mine somewhere)
6 tbsp (6 tablespoons or 90 mls) melted butter (not clarified... ah, perhaps I should clarify that term...)
2 eggs (chicken eggs, not platypus eggs) lightly beaten --don't forget to crack them outta their shells before beating them suckers
1 tsp (5 mls) vanilla essence --imitation or real, don't matter except for the price
1 tbsp (15 mls or 1 tablespoon) orange juice --if you don't have an orange tree out front (snicker, I gots a lemon tree out front too), then try to
use the freshest you can obtain (orange, not tree)
1 can of brewskie --a light pilsner works best, but hey, to each his/her own


Here's what you do:

Mix flour, sugar, and salt. Ummmm, I'd suggest using a large bowl to mix it in...

Melt the butter and let it cool --How to melt butter: microwave for 20 seconds (1/3 minutes), then stir, then nuke another 1/3 of a minute (20 seconds)... repeat till it's all melted (the butter you fool).

Chuck everything (including melted, cooled butter) into the bowl with the flour, sugar, and salt. Beat the heck out of it with a wooden spoon until the batter is smooth.

Let the batter sit at room temp* for at least an hour (overnight works too).

Give the batter a quick stir before using it in your waffle iron. If I have to tell you how to use and clean your waffle iron then I think you are on the wrong blog.


*room temp... Damn how I LOVE that term!!! The room temp here when the a/c is off is around 100 F (38 C). In the mornings room temp in the back can be 5 C (41 F).

So, like, try it, you'll like it!

Wednesday, December 1, 2010

Cassarole

This is a "blast from the past" recipe. It's from other blog before I hived off this here food blog. Which of course means it is full of some rather inane and silly comments from me.

You've been warned.

So here's the cassarole recipe in it's entirety from over 4 years ago.

*********************************************************************

A Cassarole (not the US style, please note)

This is another easy one, in fact you get TWO recipes with this --weeee, something
for free in this world: a toofer (you know, two for one... toofer... oh, never mind).

Extra bonus: No conversions needed!!! Woo-hoo! This one's for everyone**!

Have you noticed I'm starting you all out gently with recipes and cooking? Don't
worry, they get more fun and adventurous as time drags on. Ugh, can't believe
I just typed that line of crap...

What you need:

one roaster pot with a lid (them old black, enameled ones your mum had that she
got from her mum work the best)
a few of hunks of really cheap, tough beef (or pork, or lamb, or roo, or moose, or bear, or wombat, or sheep, or BUNYIP, or wooly mammoth, or smilodon, or sasquatch, or caribou, or whatever)
2 onions; rough chopped
4 carrots; rough chopped
6 spuds (potatoes) peeled (or not); rough chopped
salt


What you do:

Put the hunks, chunks, or pieces of cheap beef in the bottom of the roasting pot.

Add everything else, layering as you go (up, dummy) and lightly salting each layer.

At this point, your roaster should full be right to the top. Add water (H2O) till the
water (H2O) is about half to 2/3rds to the top.

Put the lid on (this step has a serious DUH-factor).

Cook in oven for 2 1/2 to 3 1/2 hours at 175 C (350 F).

Ummm, serve it up! You can make gravy with the juices if you'd like (damn, gotta do a gravy
making entry soon).

BONUS recipe: The next day, take all the leftovers and chuck them in the blender (add
more H2O (Water) if needed) and blend it till it's all liquified (I like that word: liquify It can mean so much to so few...). Heat it up and serve with fresh, homemade (homaid) bread (damn, gotta do a homaid (homemade) bread entry).

Do ya'll like my use of parenthesis? Comes from a programming background.

** I put a double asterisk so you'd notice. Don't worry you vegetarians, I've got several
coming up for you too so please stay tuned :)

*************************************************************************************

See? I was much more funny back then. And make some fresh bread to go along with this, you'll be happy.

You can obviously season it with whatever seasonings happens to tickle your taste buds that day, no worries.

Tuesday, August 17, 2010

Ratatouille with Fennel and Okra

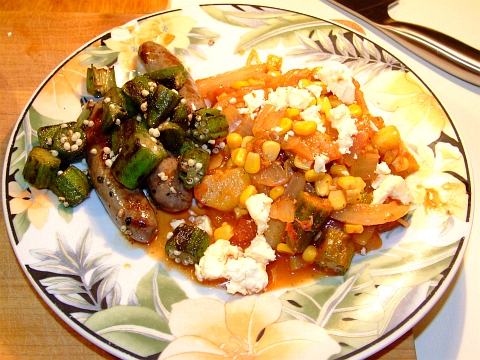
And I served it with feta crumbled over the top and some grilled venison sausages w/okra on the side.

Plates were emptied! Quickly! Very very tasty.

Full disclosure: I've never made ratatouille until I made this. My first try I knocked out of the park!

I got the idea for making ratatouille from a great post at a wonderful food blog. She's a professional chef and teaches cooking classes full-time. Friendly and she answers comments and questions. You can find Helen at:

Beyond Salmon

and her ratatouille is here:

Beyond Salmon's Ratatouille

Go have a quick look and you'll see where I got the inspiration for my Ratatouille. I know that fennel isn't a common ingredient in Ratatouille but it's in season down here in South Oz and very inexpensive. Okra is in season here too, and it IS a staple veggie in Cajun cooking commonly used in gumbos.

And I do apologize for using canned corn. Fresh corn cobs are very pricey down here due to the 10 year ongoing drought. When you use canned corn make sure the ingredients are corn, water, salt. Nothing else. No chemical crap!

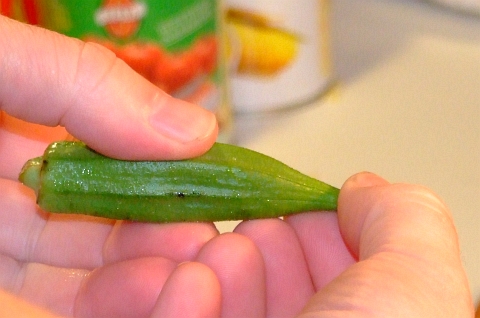
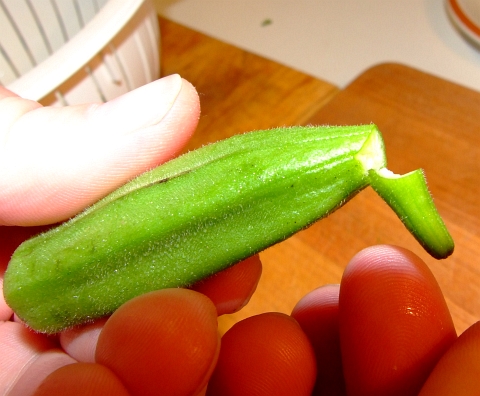
A quick word about fresh okra. When you are selecting okra to buy, you want to buy smaller rather than larger. The larger ones can have a "woody" texture. You also want to test a tip or two. If the tip snaps off then they are fresh. If it bends completely over, then that bin of okra is not very fresh. Here's what I mean:

Give the tip a little bend like this:
testing okra 01


And the tip should snap off thusly if it is fresh:
testing okra 02


Anyways, on with the recipe:


Fennel and Okra Ratatouille with Venison & Okra on the side

What you need:
One large fennel bulb
12 to 16 small, fresh okras
1 large onion, rough chopped
One 12 ounce can of corn kernels
2 or 3 cloves crushed garlic
1 large zucchini
1 can crushed tomatoes
1/2 tbsp dried rosemary
1/2 tbsp dried oregano
sea salt
olive oil
a bit of crumbled feta

4 mini venison sausages (2 per person)
12 to 16 small, fresh okras --in addition to the ones going into the ratatouille
olive oil
sea salt
small handful fresh coriander (cilantro) leaves


What you do:

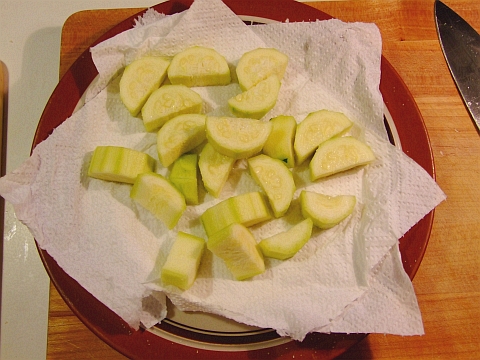
First, peel and slice the zucchini. Try to aim for 1/2 inch thick slices. Sprinkle the slices with sea salt, toss to coat, and let them set on paper towels for 15 minutes or so --this is to draw moisture out of the zucchini. I do this with eggplant, but it was the first time I'd done it with zucchini. Worked like a charm.

See? Have a look:
prepared zucchini


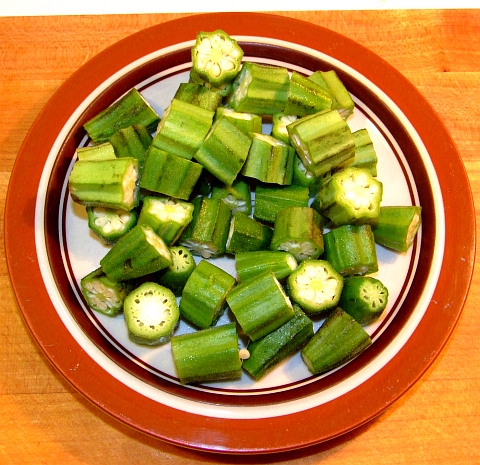
Prepare the okra: cut the tips and stems off, then cut each okra into 3 pieces. Don't worry about the sticky stuff as that is normal. Fry them up with a bit of olive oil for a minute or two so they are just browned. Set aside to drain and cool. This is what they look like before lightly frying:
chopped okra


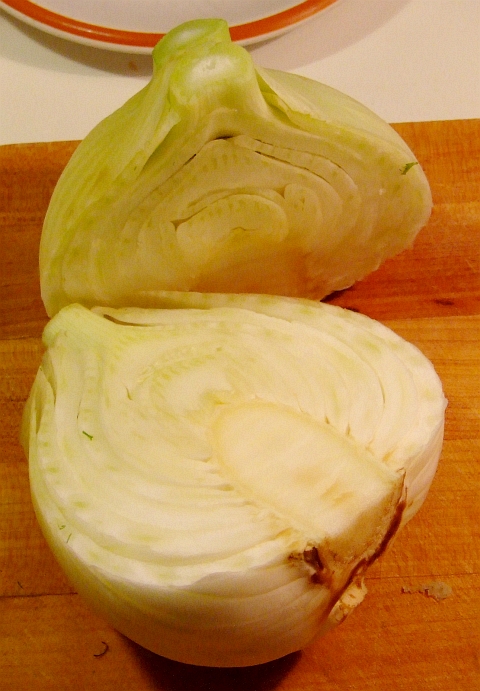
Slice your fennel bulb into 1/4 inch thick slices. If you need to halve or even quarter it to facilitate the slicing then be all means go ahead and do that, no worries.

fennel cut in half


fennel sliced


Now give your onion a rough chopping. Don't make the pieces small otherwise they'll be lost in the ratatouille.

By now the zucchini slices should have lost enough moisture. Give them a quick pat with paper towels and fry them in a bit of olive oil till the just start to brown. A minute or two each side should do the trick. Set them aside to drain.

In the same pot you'll be cooking the ratatouille (I recommend an enameled dutch oven) put the sliced fennel and chopped onion. A bit of olive oil and fry em up. You want the fennel and onion to just caramelize. Once they've caramelized then add the garlic, basil and rosemary; continue to fry for another 30 seconds.

Now you get to de-glaze the pot. Add the liquid from the can of corn to the pot and stir it around so the fennel and onion aren't stuck at all. Put the lid on and simmer on low for 5 minutes.

Add the can of tomatoes and the corn. Simmer for another ten minutes. Now add the zucchini and okra. Put the lid on and simmer for 10 to 15 minutes. Turn the heat off and let it sit in the dutch oven while you get the sausages and the rest of the okra cooked.

If you want this dish totally vegetarian, then just don't use sausages at this point, no worries.

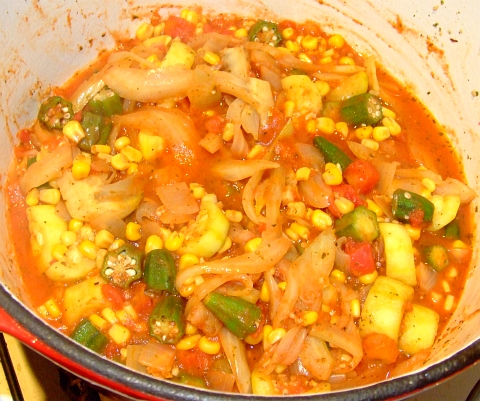
Hopefully your dutch oven should now look something similar to this:
ratatouille in pot


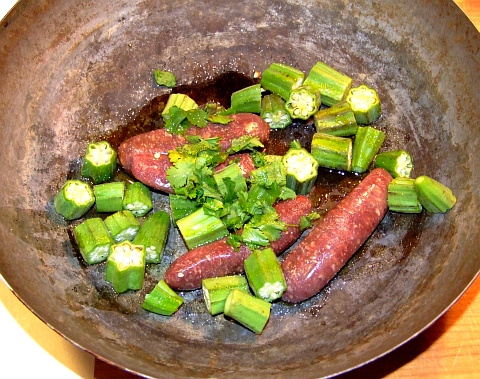
Cut the rest of the okra into thirds, as you did for the ratatouille. Put the cut okra and the venison sausages into a wok with a bit of olive oil, sprinkle a bit of sea salt, and toss in the coriander leaves:
venison and veg


Fry it up till the sausages are done. Toss/stir regularly so nothing sticks. Once they are done you can plate it up!

Spoon the ratatouille onto a plate, sprinkle with crumbled feta, and put two sausages plus some fried okra onto the plate:
plated


It's easier to make than it sounds and OH SO TASTY!

Again, a big thanks to Beyond Salmon for posting her wonderful ratatouille recipe and guidelines for making it! Thanks Helen!

Thursday, August 12, 2010

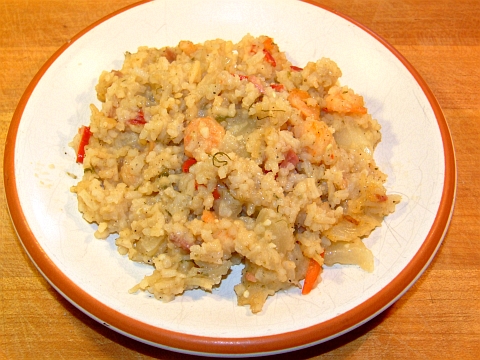
Fennel and Prawn Risotto with Prosciutto

A risotto is actually a very easy dish to make so if you've never made one cus you think it's hard; it is not! Just go for it! And don't be snobbish about using ONLY arborio rice. You don't need to do that.

Yes, I know I've just offended millions of untold readers who are risotto aficionados. Tough. Tough, I say. I've made it with arborio, jasmine, basmati, long-grain, short-grain, medium grain, and probably a few others. Heck I even did one with half basmati and half long-grain brown rice.

You know what? They all tasted great. The key (for me at least) is to dry fry the rice a bit first so it goes from translucent to opaque, THEN start on the liquid it'll be cooking in.

I used prosciutto in this because I got a large, unsliced slab of it half off at the shops and after I finished thin slicing it I had a small piece leftover that just wouldn't go through my meat slicer.

Well, it probably would have but I doubt I'dve had any fingertips left for typing.

Obviously, a piece of ham or bacon can be substituted for the prosciutto, no worries.

You'll also notice that this risotto is not heavily seasoned as I really wanted the fennel flavour to stand up and be noticed. It was.

What you need:
1 hunk of prosciutto --about the weight of a full sized bacon rasher

1/2 of a large fennel bulb

1 cup of rice --any kind, uncooked
1 or 2 tbsp olive oil
sprinkle of sea salt

2 litres (1/2 gallon) of MY fennel stock
handful of dried red capsicums, minced
fronds from the fennel bulb

250 grams (about 1/2 pound), peeled, cooked, deveined small prawns


What you do:

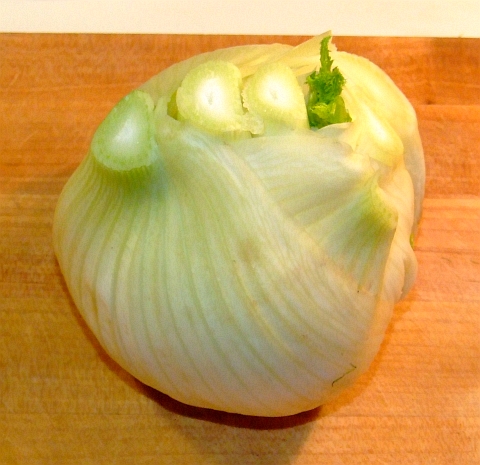
First, prepare the fennel. Remember what a fennel bulb looks like?
fennel bulb


Trim the stalks off.
fennel bulb no stalks


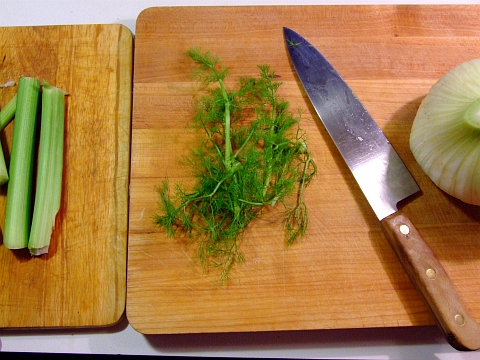
Hey look! A pile of fennel stalks with fronds!
fennel stalks


Trim the fronds off the fennel, you'll use the fronds for flavouring the risotto.
fennel fronds


Then chop up all the fronds. I don't need to show you a picture of that, do I? Thought not.

Next, cut your fennel bulb in half.
fennel cut in half

Notice that thick core? Some people cut that away. I don't. Especially since it'll be so soft and succulent in this dish.

Slice one of the fennel halves (or both, your choice). Try to make them about 5 mm or 1/4 of an inch thick.
fennel sliced

Then, for this dish, I cut the slices in half. You don't need a picture of that, right?

Take your hunk of prosciutto and trim the fat off. Keep the fat! Chop the fat up finely and put it in the large fry pan you'll be using for the risotto. Cook it till the fat is liquid and the little bits left over are browned.

Now add you sliced, cut, fennel bulb and cook it till it looks about like this.
fennel fried
Slightly caramelized, but not soggy. Stir whilst frying, of course.

Next, add the rice, the olive oil, and the sea salt. Fry it (whilst stirring) till the rice turns opaque. This'll only take a minute or two.

Now add 1 litre of the fennel stock, the minced fennel fronds, and the dried red capsicums (bell pepper). Give it all a good stir, turn the heat down to medium low. Cover it.

Check it in 5 minutes. Stir it. If the liquid isn't cooking down and being absorbed into the rice the turn the heat up a bit higher. Stir it every few minutes. Add more fennel stock as need until the rice is done and there's almost no liquid left.

The above paragraph should take around 18 minutes.

Turn the heat off and add the prawns, give it a mix. Put the lid on and let it stand for a few more minutes. Now's a good time to finely mince the rest of the prosciutto. Add the minced prosciutto, mix well.

Serve it up!
fennel prawn risotto


Obviously, you can modify and add ingredients to your heart's content. With this one though, I really wanted to get the fresh fennel flavour.

Thursday, August 5, 2010

Smoked Salmon Sushi Plus Fried Goodies

If any of you have been reading this blog or my other one for any length of time, then you know I'm a big fan of sushi. In all it's wonderful forms!

Ahhhhhh.

This post really isn't about how to make sushi as there are plenty of sites out there to show you how. This is more about what you can do with the sushi and what you can serve on the side.

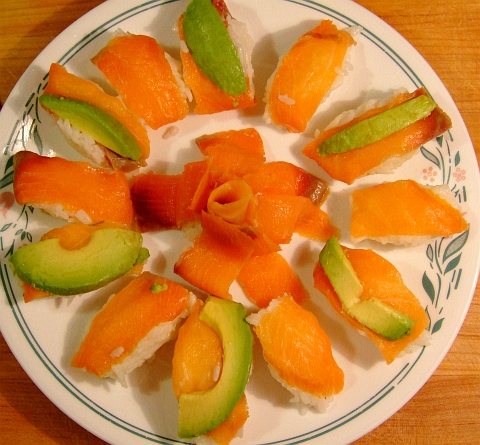
Firstly, let's have a look at the first plate:
sushi plate 01


Very simple, no frills. Oh, each avocado slice is actually slightly pressed into the smoked salmon so it stays put. I had a bit of leftover rice so I made a small rice patty in the middle and tried to arrange the last few smoked salmon slices around it in a decorative fashion. Yeah, it doesn't show too well.


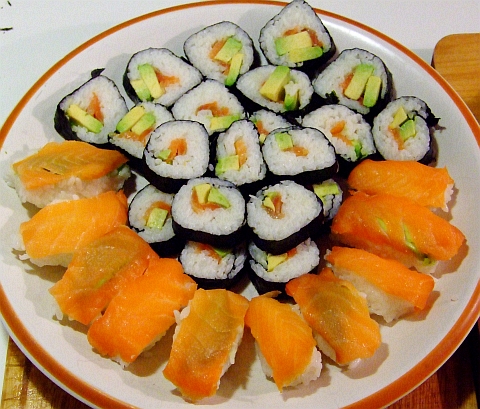
Next up is the second plate:
sushi plate 02


Again, simple. The rolls are just smoked salmon and avocado, whilst for the nigiri sushi I put the avocado UNDER the smoked salmon. Tricky, eh?

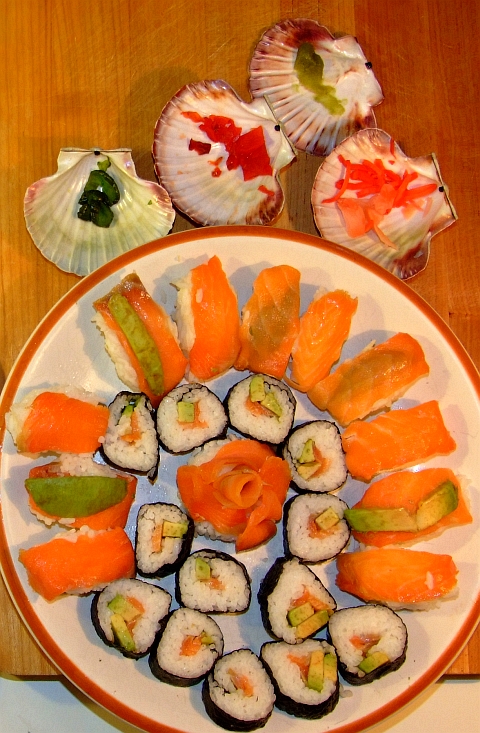
For the sushi fixin's I did the following (please note this pic was taken halfway through after I'd consolidated all the sushi onto one plate after our first grazing):
sushi with fixings


Serving the pickled Japanese veggies along with the wasabi paste in scallop shells made a nice presentation. Soy sauce was in a bowl, not a scallop shell.

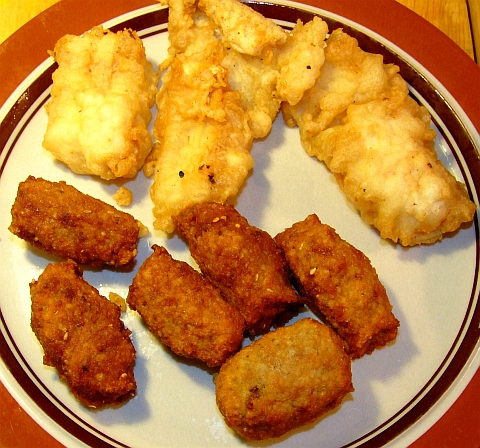
But I didn't stop there. I also made two (2) fried dishes. One was some deep-fried rice puffs and the second was battered, fried, lingcod pieces. Instead of typing in what I did for the rice puffs, how's about you watch a video?


And if you want to see me make them really fast...


They didn't puff up as much as I'd hoped, but they were still darned tasty!
rice puffs fried


After I fried the rice puffs, I put them in a warm oven while I battered and fried the fish. I don't really need to tell you how to batter and fry fish, do I? No, didn't think so.

Just enjoy a pic of the finished pieces:
fried fish with rice puffs


Everything was served on platters on the table and folks just dug in to what they wanted. Sorry, no pics of the whole thing put together as we were too busy stuffing our faces.

Hope you enjoyed the pics today.

Sunday, May 16, 2010

Creamy Potato and Pea Soup

And it is best served with a crusty, fresh, loaf of french bread for dunkers.

No pics of this as the batteries died when I turned the camera on (ooh baby, what big lenses you have!) and I didn't have time to charge another set --of batteries.

But trust me, it is delicious! If you'd like I can take a pic of an empty bowl and you can sorta imagine the soup in it... maybe not.

I shall now try to remember what went into the soup and the procedure I used...

What you need:

8 to 10 medium potatoes, peeled and diced
1 onion, chopped
2 cloves garlic, crushed
1 litre of water (4 cups)

1 cup cream
2 glasses chardonnay (and a 3rd one for the cook)
1 can garden peas (should only have 3 ingredients: peas, water, salt)
3 or 4 wild onion greens, minced (or garlic greens)
1 tsp dillweed

sea salt
white pepper

2 thai chili peppers, minced (optional)
1/2 small onion, finely minced (optional)
1 wild onion green, minced (optional)
1/2 tsp mint (optional)
1/4 tsp turmeric (optional)

What you do:

Take the first 4 ingredients and chuck em into a big ole dutch oven. Put the lid on it and simmer till the spuds are soft --around 45 mins. Remove from heat and remove the lid.

Take a spud masher and mash the heck out of the contents. You'll end up with a slurry-type liquid. Now add the next 5 ingredients and give a a good stirring to thoroughly combine everything.

Put the lid on and bring it back up to a simmer. Give it a taste test and season with sea salt and white pepper till it suits your palette.

Serve it up with a crusty bread for dunking!

Optional stuff:

Add the mint at the same time you add the dill. Ditto for the turmeric. The onion greens and chili are for garnish; just sprinkle over the top of the soup. I also sautéed some minced onion in a bit of olive oil and a bit of salt, then deglazed the wok with a splash of chardonnay and cooked the liquid down (that whole procedure took all of about 2 minutes). Those onions were then sprinkled over the top of my soup, along with the chili and greens.

Be creative with this, just try not to overpower the subtle taste and creamy texture of the soup with too many additions.

Monday, May 3, 2010

Leek & Beef Soup

Otherwise known as Mock Oxtail Soup. Oh heck! Let's just shorten it to Moxtail Soup!

This recipe is kind of a cross betwixt a traditional UK oxtail soup, a Scottish Cock-A-Leekie soup, and a Sri Lankan mulligatawny soup.

Given all that, it is SSSSOOOOOOOOOOOO GOOD!

And you don't knead an oxtail either. But you do need a leek. And some ground (minced) meat. I used beef this time but I've also made it with ground kangaroo, ground moose, ground lamb, and ground caribou.

It's very easy, few ingredients, but it does take some time for the flavours to develop. There are also many additions to this, I'll mention a few at the end of the post, no worries.

What you need:
500 grams beef mince (ground beef)
1 fresh leek
water (H2O)
1 can of roma tomatoes (diced, whole, whatever; as long as the ingredients are: Tomatoes, water, salt)
2 or 3 glasses of red wine --I usually use shiraz for this
1 to 4 tbsp vindaloo paste (not vindaloo sauce, but the REAL stuff)
sea salt
ground white pepper

What you do:
Slice the leek into 1 cm disks. Put the disks into a colander and rinse them well. If you've never used a leek before then you may like to know that dirt can hide in the darnedest nooks and crannies of the leek --so rinse the disks well.

Lightly cook the meat in the pot you intend to make the soup. As soon as the meat is JUST barely cooked through then remove the meat from the pot so as to leave all the wonderful juices behind. Set the meat aside.

Add the leek disks to the meat juices along with 1 litre of water. Simmer till the liquid is reduced by half. Add a half litre of water (or so) plus 2 or 3 glasses of red wine. Simmer for a few mins to bring it back up to temp.

Toss in the can of tomatoes --oh, make sure you OPEN the can first and only add the CONTENTS of the can. This is a good time to add the cooked meat too. A sprinkle of sea salt and a few grinds of fresh black pepper should be added now.

Give it a taste. Rather bland, eh? Now add the vindaloo paste a tbsp (or tsp if you are a wuss) at a time. Stir well after each addition and give a taste test. Once you've got the spiciness up to where you want it then (obviously) stop adding the vindaloo paste.

Turn the heat off. Cover and let stand for the afternoon. Crank the heat up before serving so it's close to piping hot. A good hunk of crusty, homemade, buttered, bread goes great with this.

What else can be done with this soup? Well, pretty much any red, ground meat can be used, game or not. Yes, that includes emu and ostrich. Use the ground (minced) meat as you would the minced (ground) beef.

Celery and/or cabbage make nice flavour additions. For the cabbage, shred it as thinly as possible and add it at the same time as the leek. I'd add the celery (very thinly sliced) a little bit through the simmering though. Carrots are a nice addition too. The softness of the carrots depends upon when you add them to the simmering leeks, your call.

For a slightly different flavour you can sear the leek (and whatever veggies you are using) in the pot first with some butter or olive oil along with a sprinkle of sea salt. Deglaze with the meat juices and a bit of red wine and then continue on with the recipe.

Anyways, loads of variations and loads of flavours can be yours just from this one simple soup.

Enjoy!
Monday, April 5, 2010

Today I am making...

Jellied Ox Tongue!

I'll be taking pictures throughout the process for you, no worries. And then I'll put up the "how to" post in 2 days as it has to set in the fridge overnight to jelliefy.

This should be seriously tasty and I'll have a serious amount of it. And I have plans for all of it too! See, I won't be pickling or heavily seasoning the ox tongue so that when I need some beef for a stir fry or whatever, I can just slice off a hunk of the jellied tongue.

Ingenious, eh?

Dinner tonight will be homemade deep pan pizza with shredded pork and whatnot for toppings. But you probably don't want to hear about that...

Anyways, stay tuned in a couple of days for the process of jellying ox tongue! 

*Update*

It appears I have a corned ox tongue to begin with. That's fine, it's just an old fashioned way of curing meat with salt. It also means the "sweetbreads" will probably have been removed, along with the little bones at the base of the tongue.

Friday, April 2, 2010

Easy Cheesy Tuna & Potato Bake

Yeah, yeah. I hear ya. How can I be putting up a recipe about such a simple, mundane (but tasty) casserole? The answer is simple: mine is better than any type of tuna n spud baked casserole you've ever had.

Yes, this is better than your mother's. Ummmmmm, sorry mum...

It also takes a wee bit more cooking than a "traditional" bake.

What you need:
5 large spuds; scrubbed, peeled and diced into 1 inch chunks
2 cans of chunky tuna in oil
high quality cheddar cheese
Old Bay seasoning --the real kind with NO preservatives


Simple list, eh? The key is in the cooking of the spuds (that'd be potatoes for those of you knot in the know) of course.


What you due:

Put the diced spuds and 1 tsp of old bay into a large steel wok. Cook on low heat for 10 to 15 minutes while stirring/tossing regularly. Once the spuds are seared nicely but still not totally cooked, add the oil from both cans of tuna. Yes, you read that right! Stir to de-glaze the wok of all the yummy seasoned potato brownings, and simmer till most of the liquid is gone.

Into a roasting pan add half of the almost-cooked spuds. Use a fork to break apart the chunky tuna and spread it over the potato. Shred a good amount of cheddar cheese over the tuna and then sprinkle a tsp of Old Bay. Spread the other half of the spuds over the top and add some more grated cheese. Pour the wok juices over the top. Cover and bake till the cheese is melted through.

This is, um, DARNED tasty! Simple, easy and very good. And I'm sure you can think of many things veggie-wise to add to the roasting pan such as broccoli, cauliflower, carrots, pumpkin, green beans, peas, eggplant, whatever.
Cheesy Tuna & Potato Bake

Yeah, yeah. I hear ya. How can I be putting up a recipe about such a simple, mundane (but tasty) casserole? The answer is simple: mine is better than any type of tuna n spud baked casserole you've ever had.

Yes, this is better than your mother's. Ummmmmm, sorry mum...

It also takes a wee bit more cooking than a "traditional" bake.

What you need:
5 large spuds; scrubbed, peeled and diced into 1 inch chunks
2 cans of chunky tuna in oil
high quality cheddar cheese
Old Bay seasoning --the real kind with NO preservatives


Simple list, eh? The key is in the cooking of the spuds (that'd be potatoes for those of you knot in the know) of course.


What you due:

Put the diced spuds and 1 tsp of old bay into a large steel wok. Cook on low heat for 10 to 15 minutes while stirring/tossing regularly. Once the spuds are seared nicely but still not totally cooked, add the oil from both cans of tuna. Yes, you read that right! Stir to de-glaze the wok of all the yummy seasoned potato brownings, and simmer till most of the liquid is gone.
Into a roasting pan add half of the almost-cooked spuds. Use a fork to break apart the chunky tuna and spread it over the potato. Shred a good amount of cheddar cheese over the tuna and then sprinkle a tsp of Old Bay. Spread the other half of the spuds over the top and add some more grated cheese. Pour the wok juices over the top. Cover and bake till the cheese is melted through.

This is, um, DARNED tasty! Simple, easy and very good. And I'm sure you can think of many things veggie-wise to add to the roasting pan such as broccoli, cauliflower, carrots, pumpkin, whatever.

Saturday, March 27, 2010

Squid Chili

The other day I actually got to make a dinner JUST FOR ME! Ahhhhhhhh, bliss. Of course I had to make other stuff for the rest of the clan. Why? Well, firstly, I thought B.I.L. would be heading out to teach before dinner so I hadn't planned anything for him --turned out that not only would he be around for dinner but that I would also have to give him a ride to the U. And M.I.L. is having teeth probs so it was going to be something soft yet tasty for her. Wifey-Poo had some tummy probs so she was wanting something very mild and light.

Needless to say, I ended up making four completely different main courses. But the one I had was THE BEST! Mine was the chilli, of course.

Normally if I'm going to make chilli then I'll get the beans soaking the night before. I did not have that luxury this time so it meant extra cooking time for the beans, but that's ok since I can do loads around the house and grounds while the beans simmer, no worries.

So, here is what I did for my Squid Chilli!

To a large pot, I added the following:

150 gm dried berlotti beans
8 dried curry leaves
1/2 an onion, diced
4 cloves of garlic, crushed
sprinkle of sea salt
lots of water

I put it on to boil and boiled till almost no liquid left, added a few more cups of water and boiled it down again till the beans were soft.

Into a hot, oiled wok I added the following:

1 squid tube --cleaned, sliced into rings, and blanched*
1/2 an onion, diced
2 cloves of garlic, crushed
3 tbsp chilli paste (use the kind that's at least 90% thai chillis)
2 tsp ground cumin
2 tsp ground coriander
1/2 tsp ground cardamom
1 tsp ground ginger
1 tbsp dried basil
sprinkle of sea salt


*if you blanch the squid rings after cleaning and slicing then you can use them in any sauces and any cooking length without them going "tough" or "chewy".

I seared all that in the wok for 5 to 6 minutes, stirring/tossing regularly. I deglazed the wok with 2 glasses of shiraz and cooked it down till there was only a bit of liquid left.

The contents of the wok were then added to the pot with the cooked beans (and all that other stuff). One can of peeled roma tomatoes was added along with 2 tsp of chilli powder.

Simmered down till it was thick but not sticking and then served up! I did grate some fresh onion and cheddar cheese over the top of my bowl and I used some of my wholemeal flatbread as scoopers.

This was darned good! No reason why this can't be done for pretty much any type of meat you want to use in the chilli. Ground roo (kangaroo) instead of the squid would be particularly nice I think, as would moose.

Tuesday, March 16, 2010

Sloooooooow Gravy

Now I can whip up a quick gravy for mashed spuds or whatnot in about 30 seconds. It's so simple I'm not even going to go into the making thereof.

This gravy IS NOT like that.

This gravy is the main course for my extra special biscuits n gravy dinner that everyone down here loves. There are 2 keys to making this dinner... An awesomely good biscuit recipe (which I have) and the makings (and 8 hours) to make the gravy.

Yes, this gravy takes 8 hours. Most of that is "resting" time and some simmering time so it's not like you are going to slave over the stovetop all 8 hours. I usually do about 5 mins on my way through for each step.

You don't get an ingredient list since this changes depending on just what sort of meats and pan juices I have lying around. In fact, I think I'll just tell you what I did.

Here's what I did:

Half a can of mushrooms plus one glass of port wine went into the food processor and it was processed. That was put into a large saucepan along with 1/2 a minced onion, 2 cloves of crushed garlic and a sprinkle of sea salt. I simmered it till no liquid was left. Saucepan was de-glazed with 2 glasses of chardonnay and then simmered till almost no liquid was left. 3 glasses of shiraz were then added and it was simmered till the liquid was reduced by half.

It was then left to sit for 3 hours. I do believe I had a swim in the pool and then a nap during those 3 hours.

3 thick slices of a small, cooked, beef topside roast were diced along with the other half of the onion. It was all added to a wok along with 2 more crushed garlic cloves, sprinkle of sea salt and ground black pepper. That was dry seared in the hot wok for a minute or two, then deglazed with 1 glass of shiraz and 1 glass of chardonnay, and then simmered till the liquid was reduced by half.

That then sat for an hour.

Everything was combined into the large saucepan and roasting pan juices from a corned silverside and a beef topside roast were added --about two cups total. Plus 2 cups of water.

Whisked and heated, then checked for seasonings --nothing more was needed! Brought up to a boil and thickened with cornstarch/cornflour (in Aus it's called cornflour, in the US it's called cornstarch --same thing and it comes from WHEAT, not CORN) and then massive amounts of it were ladled over fresh, hot, flaky biscuits.

Very tasty, clean bowls all around!

Wednesday, February 10, 2010

This Food Blog Is NOT Abandoned!!!!

And I mean it, seriously!

It's just that I've been rather busy lately. Not only with keeping up around the house and grounds outside, but doing a lot of kitchen work.

Not only have been making cheeses but I've been experimenting with some new processes. I'll, uh, have to wait a few more weeks to find out how it well it works. But you WILL be the first to know!

Tofu making is a weekly --sometimes twice-weekly-- event now. Quick, cheap, and easy.

Bread and beer making too, of course. I've also been experimenting with chia seeds in various breads and curries. So far so good and I'll let you know all about that soon.

Jarring homegrown sundried tomatoes in olive oil happens daily --at least until the tomato plants call it a season. Harvested 1134 tomatoes so far this summer.

Jams from brambleberries and wild rose-hips is going well.

I've also been doing quite a bit of research. Health and nutrition mainly. I want to keep this blog as a "recipe only" type thingy so I've decided to launch a health blog. I'll keep you posted, no worries.

Aaaaaaaaannnnnnddddddd, here's todays recipe! This is more of a tip though.

Have you ever cooked a beef roast and had it come out dry or tough? Or perhaps you didn't have enough pan juices to make gravy? Bland tasting maybe?

I can help, really.

Place your beef roast in your roasting pan with the fat side UP. This way not only will the fat drip down through the roast to keep in tender, but you can also take the lid off the roasting pan for the last 20 or 30 mins to crispy-ize the fat if so desired.

Next, pour a half bottle of a strong red wine over the roast. Shiraz, merlot, cab-sauv, any of those will work nicely. Then grind a lot of black pepper over the top of the roast and rub the pepper in with your fingers. Lightly sprinkle with sea salt, put the lid on it, and then put it in the LOWEST oven temp you can get away with for 2 to 4 hours. The time depends upon the size and how well done you like your roast.

When you take it out of the oven for serving, pour all the pan juices into a saucepan for gravy making. The only thing you'll have to do for the gravy is boil the juices in the saucepan and add cornflour (called cornstarch in the US) --dissolved in cold water, of course-- while whisking. How much you add completely depends on how thick YOU like your gravy.

Gravy making should only take 2 minutes, max.

Thin (or thick, your choice) slice pieces off that roast and serve it up with the gravy! Loads of mashed spuds (potatoes), grilled corn on the cobb, and steamed veggies make great accompaniments to this. Serve with a glass of red wine and a glass of ale.

Saturday, November 28, 2009

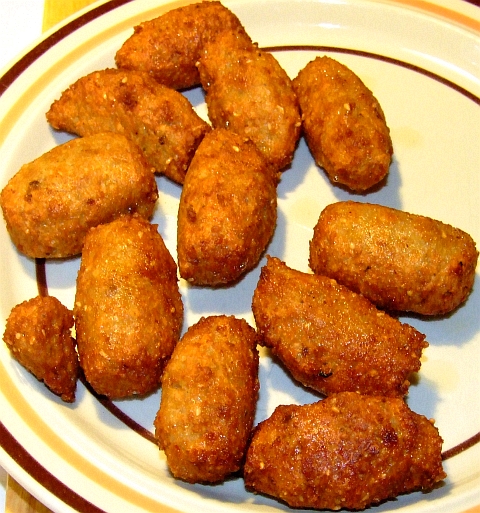
Cheesy Baked Croquettes with Smoked Trout & Prawn Sauce

Yeah, that's quite the title isn't it? The prawn sauce is optional, BTW. One night I served them as a main course without the prawn sauce but with a side salad, and the next night as a side dish with the prawn sauce.

Personally, I like them better with the prawn sauce.

The amounts of each ingredient aren't listed --with one or two exceptions-- you'll see why, no worries.


Cheesy Baked Croquettes with Smoked Trout & Prawn Sauce


What you need:

For the croquettes:

4 to 6 cups of leftover mashed potato --do I REALLY need to explain how to make mashed spuds?
handful of fresh basil leaves
diced cheddar cheese --somewhere around 1.5 cm but please don't be exact
salt
pepper
couple of handfuls of bread crumbs
cumin powder
turmeric powder
thin-sliced smoked trout (or smoked salmon)

For the prawn sauce:

Handful of prawn shells (I ALWAYS keep prawn shells after shelling the prawns, they freeze well and you just break off a hunk whenever you want to make a sauce or stock)
1 crushed garlic clove
1 or 2 tsp dijon mustard
1 tbsp lambrusco wine
1 tbsp cream fraiche OR sour cream OR double cream
dash of sea salt
dash of ground white pepper
4 cups H2O (water)


Whut U Due:


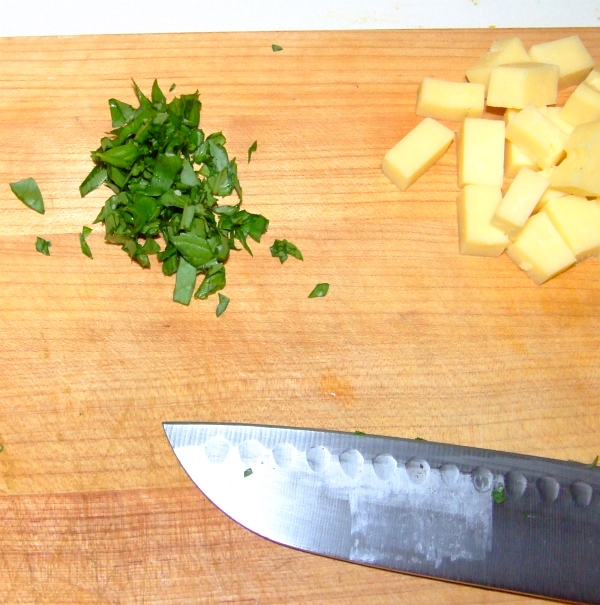
Cube some cheddar cheese to around 1.5 cm (3/5 of an inch) --or somewhere thereabouts. Mince up some fresh basil leaves (rinse them first, could be caterpillars hiding).

Your cutting board should now look thusly:
DSCF6555


Mix the basil into the mashed spuds. Place some of the spuds into your hand --each croquette should be between golfball and tennis ball size.
DSCF6558


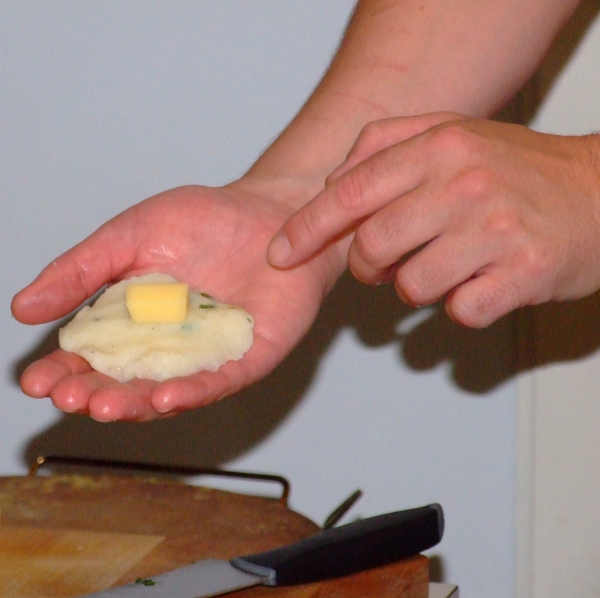
Flatten the mashed potato in your palm and place a piece of cheese in the middle.
DSCF6566


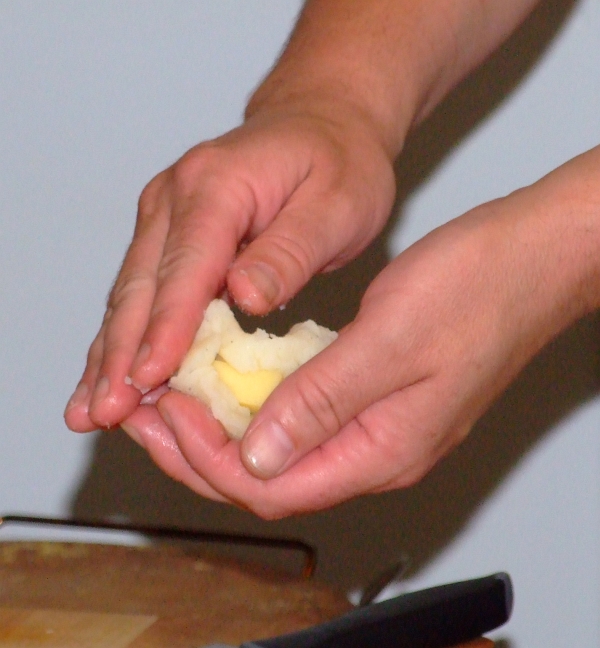
Carefully mold the potato around the cheese
DSCF6567


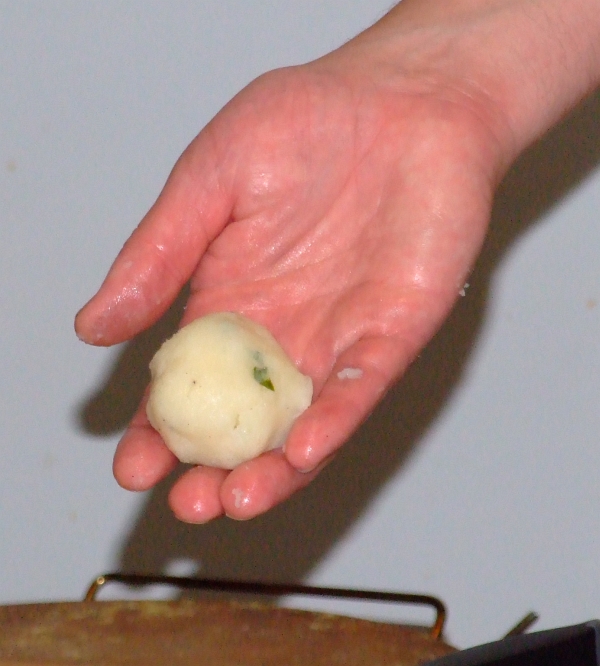
Ta-da!
DSCF6569


Make up as many or as few as you'd like, no worries. I used three per person as a main and one per person as a side dish. Put them on a plate and then refridgerate for an hour. This way they'll be easier to crumb.

So, like, what to do for an hour while the croquettes chill in the fridge? How about make some prawn sauce!

Add your empty prawn shells and the garlic and 4 cups of water into a saucepan. Crank the heat up and simmer for an hour. If the water gets too low, then just add some more water. You want to end up with around 2 cups of liquid.

Turn off the heat. Take a potato masher and mash the shells flat to extract every last bit of prawny goodness. Strain and return the strained liquid to the pan. Cover the saucepan and set aside. Let's return to the croquettes.

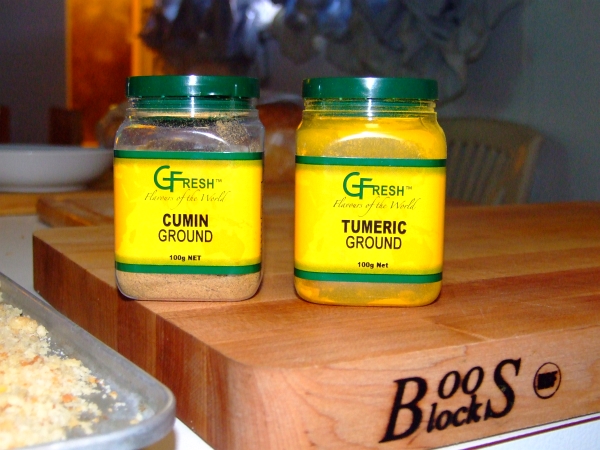
Spread your plain bread crumbs on a tray or plate. The sprinkle on a bit of salt and two of my favourite spices; cumin powder and turmeric powder.
DSCF6572


Mix the breadcrumbs around so the crumbs are full of the spices.

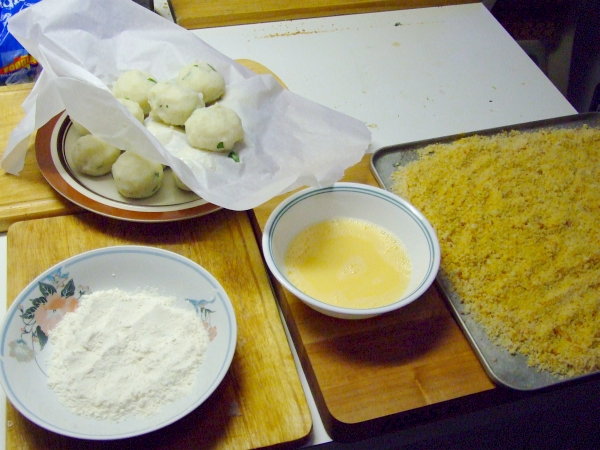
After the potato balls have chilled, take them out of the fridge and make up an egg wash: one egg plus equal amount water. And put a bit of flour in a bowl too.
DSCF6576


Roll each bowl in the flour (lightly shake off excess), roll it in the egg wash, and then roll in the breadcrumbs.

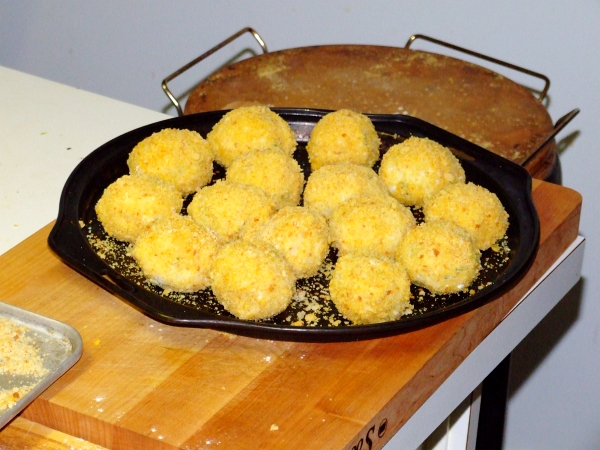
This is what they look like before baking:
DSCF6578


Bake them at around 375 F. Long enough to brown the breading, but not so long that the cheese leaks out. 15 mins should do it --I wasn't timing these but I'd check every few minutes to make sure the cheese wasn't running out.

While they bake, shall we finish the sauce?

Turn the heat on the liquid as low as possible and add the mustard, wine, salt and pepper. Whisk it well, let the sauce come up to a simmer (don't boil it) and taste for seasonings. You might want to add a bit more salt or pepper, but don't make it spicy as this isn't a spicy sauce.

Turn the heat off and cover to keep warm. Just before serving whisk in the cream fraiche (or sour cream or double cream). If you need to heat it back up do so, but it'll only take a minute at most --don't let it boil after you've added the cream.

Spoon it over the baked croquettes BEFORE you top with the smoked trout and basil sprig.

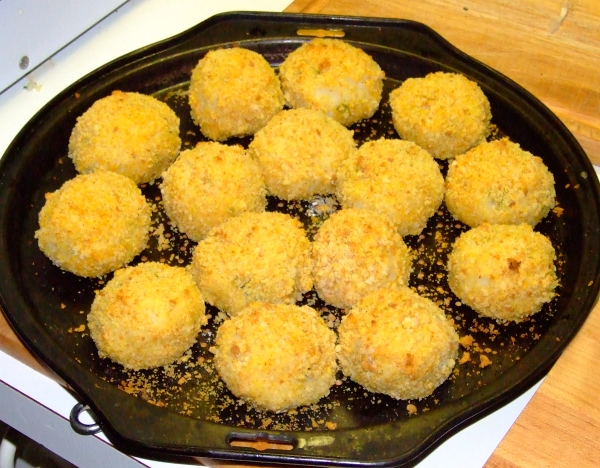
This is what the croquettes look like after baking:
DSCF6579


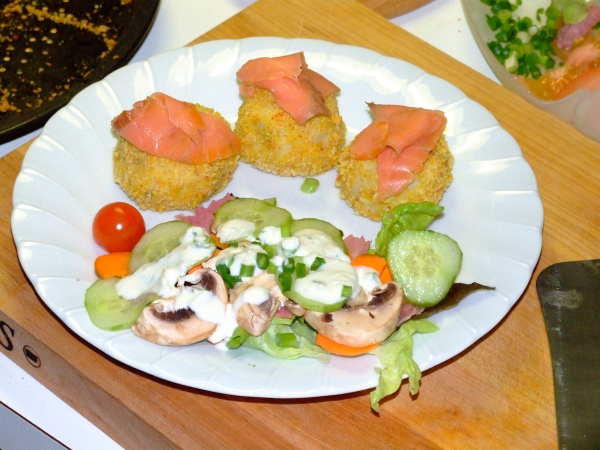
The first night they were a main course without sauce. 3 per plate and a thin slice of smoked trout curled on top. This was my plate:
DSCF6585
No, that's not gunky, fatty dressing. It's my own homemade tzatziki


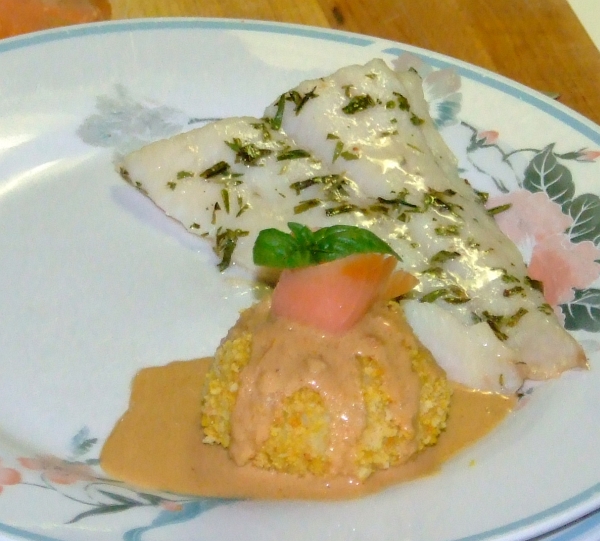
The next night they were a side dish to baked basa and I made the prawn sauce to drizzle over the top. After the sauce is drizzled over the croquettes, then artfully arrange a slice of smoked trout on top and fresh basil to top it. This plate was MIL's just before I added the side salad.
DSCF6615


This plate was mine:
DSCF6621


I've been told that I can make these ANY time I want, everyone loved them. Enjoy!