Showing posts with label bread. Show all posts

Thursday, June 16, 2011

The Perfect Grilled Cheese Sandwich

Or sammy. Or sarnie. Or buttie. Or pieces. They all mean SANDWICH!

I don't think (yes, I'm sure you all know that already) that I've ever posted a sandwich recipe before as they always seemed rather intuitive to mean. I also didn't think anyone would be interested in a sandwich recipe.

Boy was I wrong. I sorta kinda let it slip (accidently of course) that I make a really good grilled cheese sandwich. So I now feel honour-bound to post my Perfect Grilled Cheese Sandwich recipe complete with the high quality pictures you've come to expect from me.

This is my basic, standard grilled cheese. I also make premium ones with various additions which I'll put on the end of the post, no worries.

The most important thing for making a grilled cheese sandwich is to have a pan or griddle that heats evenly and holds it's heat for a while. I recommend cast iron. Something like this:
grilledcheese01


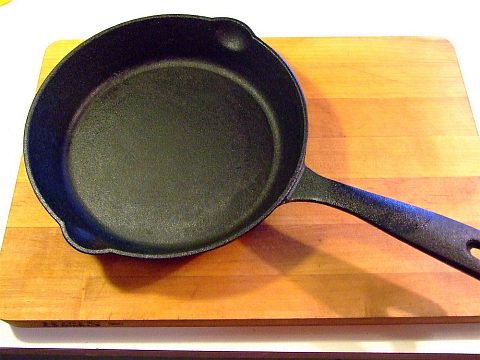
If you don't have cast iron, then a thick bottomed stainless steel one will do, no worries. I don't recommend anything thin, but if you are used to that and can control the temp then it should work.

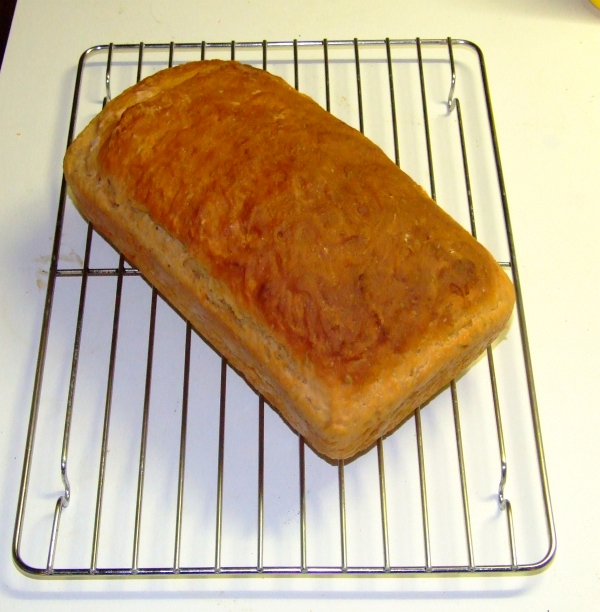
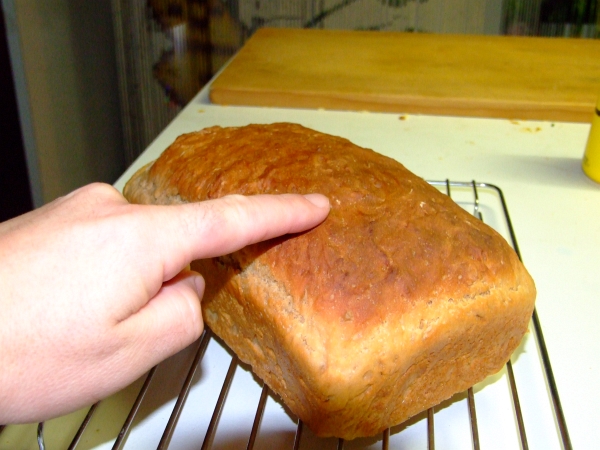
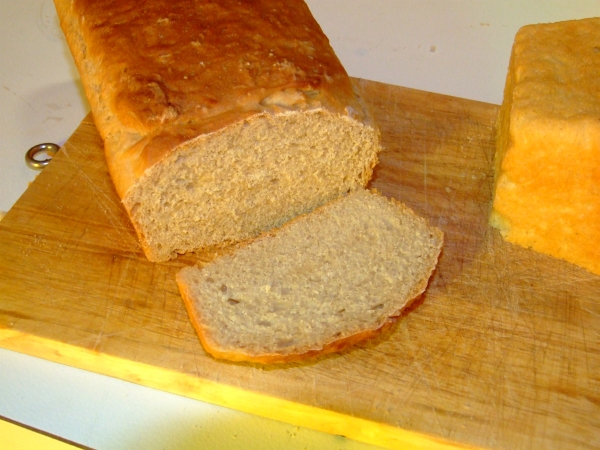
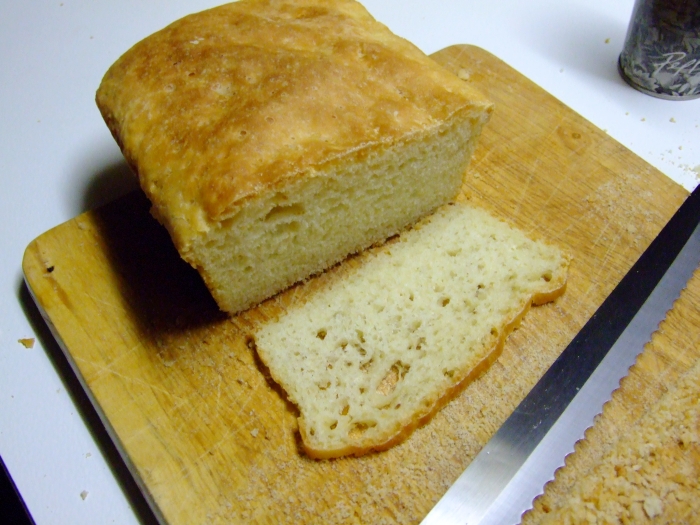
Some folks say white bread only for grilled cheese. I'm not one of them. I prefer wholemeal. I don't use multigrained bread for my grilled cheese sarnies as I don't like the taste of the multigrain bread to interfere with the toasty, gooey, cheesy goodness.

The basics needed for The Perfect Grilled Cheese Sandwich

2 slices of bread, white or wholemeal
2-3 tbsp of butter
4 slices of REAL cheddar cheese

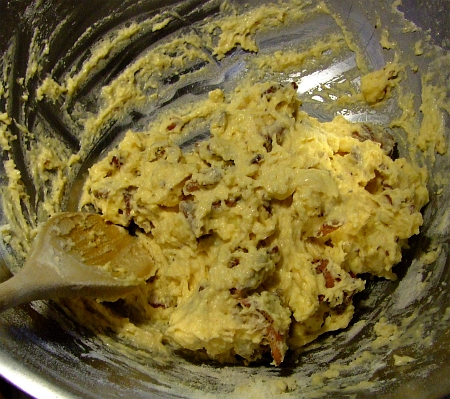
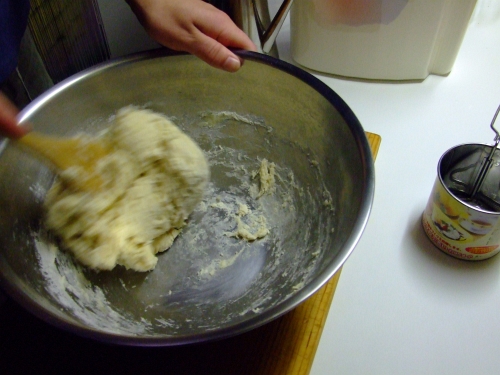
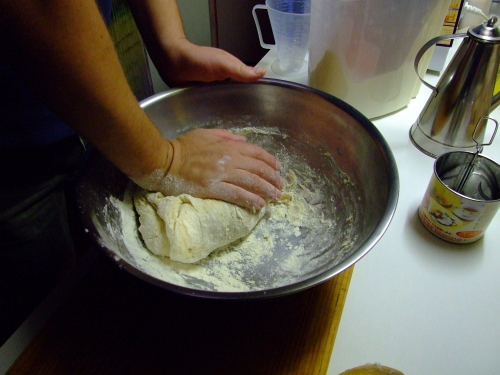
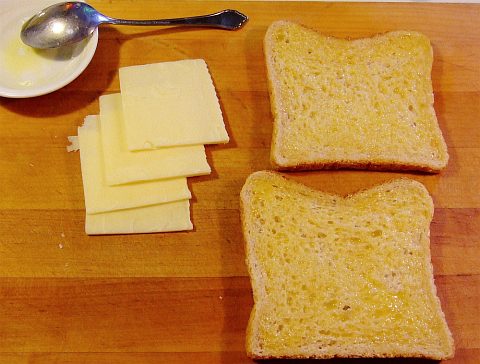
The first thing you need to do is just slightly melt the butter. Just enough to soften it, but not enough to separate the butter. Have a look at the melted butter up at the top of this picture and you'll see what I mean:
grilledcheese02
Don't worry if your cheddar isn't white, but please don't use any of the "processed" stuff.

Spread the melted butter over one side of each bread slice. Make sure you get all the way to the crust as that is VERY important, trust me. What I do is spoon on a bit of the butter, then spread it around with the back of the spoon. Remember, you only want the butter to be *just* melted so it doesn't seep through the entire slice.
grilledcheese03


You should have put your frypan on the heat before you spread the butter, that way it should be just about ready by now. A low heat is to be used as you don't want the bread to burn before the cheese is melted. I've been known to turn the heat off completely for a few minutes and let the residual heat from the pan continue to toast the bread and melt the cheese.

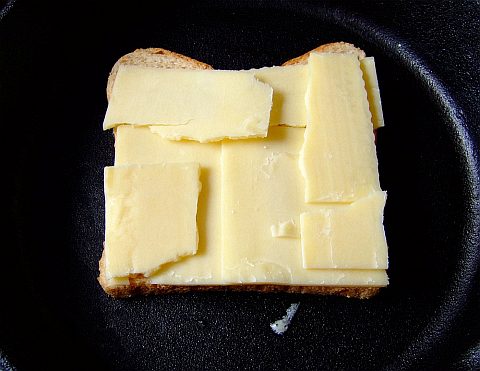
Place one slice butter side down on your pan and cover EVENLY with the cheese. A common mistake is to have too much cheese in the middle. If you do that the edges will be dripping out onto the pan before the middle is melted. Just break up the pieces to whatever shape is needed to cover the bread evenly.
grilledcheese04
Now immediately place the other slice of bread on top, butter side facing up of course.

After about 2 minutes it'll be ready for it's first flip. The first flip is the only one that's hard as the cheese hasn't melted into the "top" slice to hold things together yet. I just lightly place my fingertips on the top slice as I quickly flip the sandwich.

If the fry pan is heating up too quickly at this point you can turn the heat way down or even off. This is the point I turn the heat off for 3 to 4 minutes and let the heat from the cast iron frypan take over. This lets the cheese melt evenly while not burning either slice of bread.

Don't worry if you need to turn the sandwich a couple more times in order to get both slices of bread evenly toasted. Besides, when the bread is evenly toasted it also means the cheese is melted through if you use a low heat.

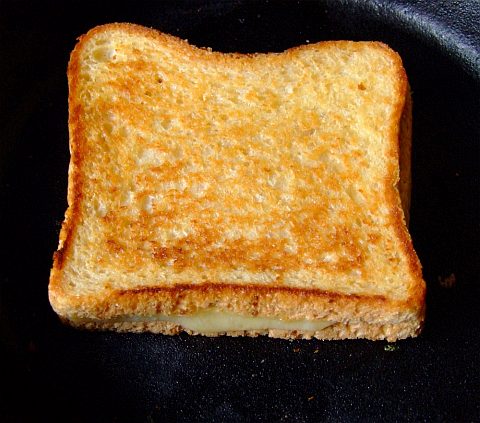
The finished product should look like this:
grilledcheese05


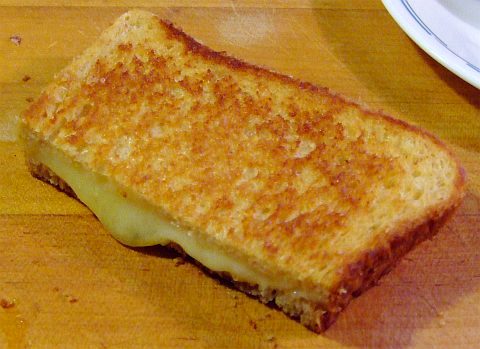
And if you are sharing the sandwich with someone and you slice it, you'll notice the cheese is melted evenly throughout.
grilledcheese06


That's my basic Perfect Grilled Cheese Sandwich.

There are other things you can do. Some folks like to press the sandwich together. In fact, sandwich presses are very popular down here in Oz. Personally though, I don't like them pressed. But if you do want to press them you can, just don't let me catch you doing it with mine!

Additions:
salt
thin-sliced onion
minced garlic
thin-sliced tomato
shaved ham
various types of salami type meats
any type of pickled veggie

Salt: Some people sprinkle some salt on the buttered side of each bread slice before or after cooking. I've been know to do this, but mostly not.

Thin-sliced onion: And I do mean THIN! I don't like thick slabs of onion on the sandwich as it can (and will) slide apart as you eat it. Put the onion down before the cheese, that way the cheese will melt the onion onto the base slice so it doesn't slide apart as you flip it.

Minced garlic: You can spread it on the buttered side so the garlic toasts along with the bread, or on the inside if you really love that garlicky flavour!

Thin-sliced tomato: Again, very thin slices so the sandwich doesn't slide apart as you eat it. Use same as the onions.

Shaved ham: Same thing as the onion or the tomato.

Salami type meats. Cured meats are much denser than shaved ham so after slicing them I'll slice each slice into strips. That way when you bite into the sandwich you won't pull out a whole wedge of salami at once.

Pickled veggies. Ah yes. Pickled veggies. Obviously pickled cucumber leaps to mind, but pickled cabbage or pickled carrots go quite well. Pickled peppers too! Whatever pickled veg you choose to use, make sure it is drained well! Otherwise the pickle juices will seep into the bread and it won't be nice a crispy, toasty, grilled-like, crunchy texture. It'll be soggy instead and I don't like that --and neither will you I'd imagine.

I will get the seitan recipes up! I promise! I'm doing many different things with it so it'll be like 3 or 4 posts in one, lucky you!

Friday, June 3, 2011

Braided Bread Rolls

I'm sure many of you have been wondering why I haven't been posting food stuff lately. Well, I have a very good reason! I've been busy. Working on a project. What kind of project? I'll tell ya at the end of this post. Or you can just scroll to the end but you'll miss all the cool pics.

Braided Bread Rolls. These are very easy to make, look beautiful and taste even better. Plus they'll impress the heck out of whoever you are cooking for!

First you need to make a simple bread dough. Not difficult!

4 cups baker's flour
400 ml water (just over 1 2/3 cups)
1 tsp salt
2 tsp yeast
2 tbsp sugar
2 tbsp olive oil

Mix the dry stuff. Then add the wet stuff. Mix together, then knead in a bowl or lightly floured surface till it is dough.

Drizzle a bit of olive oil over the dough and let it rise in a warm spot for an hour. Punch the dough down, knead for a minute.

Ta-da. Simple bread dough. Your bowl should now look something like this:
DSCF5424


Separate the dough into 9 somewhat, sorta, kinda-like evenly sized pieces. Something like this:
DSCF5426


Now roll out each piece into a strand around 16" long. You'll end up with 9 16" long strands of dough. Here's what they look like. Oh, these are the same length, it's just the perspective distortion that makes the far ones seem shorter.
DSCF5427


Here's where you get to braid them! Do 3 at a time. Lay out 3 strands parallel to each other and start by laying an outer strand over the middle, then the other other strand over the new middle. Like this, see:
DSCF5428
If you aren't sure on how to braid just ask your mother, wife, sister, girlfriend, daughter, gay neighbor, etc. It really is easy to do. My wife showed me how.

Don't worry about finishing the end nicely, no need to. You should now have 3 bread braids and each one should look something like this.
DSCF5429


You'll need a baking dish. I used one that's a foot square. Worked perfect. Olive oil the bottom and sides of the dish. Now lay each braid into the dish. As you stuff them in you'll understand why you didn't need to finish off the braid. Here is what you should have.
DSCF5430

I also drizzled a bit of olive oil along the outer edges of the bread. Put it into a COLD oven, turn heat to around 180 C or 360 F. You want the oven to be cold so that the bread rises in the dish as the oven heats up.

Bake for 40 minutes or so. Or until it looks like this.
DSCF5431


Let it cool in the dish for a few minutes. Put a plate on top, flip over, then flip back over onto a cooling rack. Ta-Da! Done and DONE!
DSCF5432


I made it as a pull-apart for dunking in soup, everyone loved it. You can also separate it along the two central seams and the slice up each braid for rolls.

And it looks as good as it tastes!
DSCF5433

DSCF5434

DSCF5435


Now then, since you've made it this far, I'll tell you why I've been busy. I'm working on a series of cookbooks. Yes, you read that right. The bloke who has no official culinary training nor any official writing training (except for the odd research paper in kolledge) is writing a SERIES of cookbooks.

Needless to say, this project has strained my last few remaining brain cells to the point where food blogging was neglected. But no more!

Next post will be how to make a meat subsitute out of plain ole flour so stay tuned mates.

Monday, July 26, 2010

Cheese & Bacon Mini Muffins

And they are oh so tasty! A quick snack, they do make. Bake up a mess of 'em on Sunday and toss a few in your lunch box throughout the week. If they last that long... which I doubt.

I got the idea for these from an Aussie cookbook circa 1972 titled Cooking With Wine & Cheese. 50 cents at a garage sale. And with a title like that I certainly wasn't going to pass it by. No sirree!

The recipe from the book, with it's frail, aged pages, did not call for bacon and some of the amounts were not what I'd use. Especially since they didn't use nearly enough cheese. Also, mine are made in mini muffin tins so they are bite-sized. Very handy. I also use different techniques and different ingredients. But I did get the idea from the book.

But you gotta like any recipe book that says to not only to preheat the oven but to also preheat the "irons". Irons? Yes, "irons" is what any type of metal (always cast iron) baking implement used to be called. These days you'll rarely hear the term outside of grey-haired camping aficionados as some still refer to campfire cooking implements as "irons".

Anyways, just use a muffin tin, no worries. Make sure you use the smallest you can find. These aren't called mini muffins just cuz, you know?

On with the recipe!

Cheese & Bacon Mini Muffins this makes 36 mini muffins

What you need:

1 1/2 cups self raising flour
1 tsp salt
3 tbsp full cream milk powder

1 tbsp butter

3 slices of Aussie sized bacon slices; diced, cooked and drained. 6 if you are using US sized bacon slices.
125 grams diced cheddar (equal to 5.33 ounces or 1/3 of a pound)

1 egg
2/3 cup water (H2O)


What you do:

Put the first 3 ingredients in a mixing bowl. Stir em up so they are combined. Add the butter and cut it in with a fork --if your butter is really cold you can use your fingers if you do it quickly.

Toss in the cooked & drained bacon pieces:
muff01


Mix it up so the bacon is coated. Then add the cheese:
muff02


and mix it around so the cheese chunks are coated. Make a small well in the center of the mix and crack an egg into it.muff03


Add the water and beat the egg and water together.
muff04


Grab a wooden spoon and mix the whole mess together!muff05


Grab your muffin tray and the spoons. I put a couple of table spoons on the tray so you'd get an idea just how small each muffin hole is.
muff06


Fill the tray with a decent sized spoonful of the mix in each muffin hole:
muff07
As I said earlier, you'll get 36 mini muffins or 3 tray fulls from this recipe.

You should have preheated your oven to 220 C (428 F) a while back. I'd recommend doing that first thing as the preparation doesn't take very long.

Bake them for 12 to 15 mins till they look something like this:
muff08


Pop em out and put em on a cooling rack. Load the tray up for the next round. After a while your cooling rack will look something like this:
muff09


That picture was taken after 2 of the 3 rounds were done. You'll notice there is not 24 of the buggas on the rack. They are, ummmmmm, very tasty and very easy to eat as you make them, well at least that's what I've heard. Great hot and great cold.

Make these and you'll be happy. So will your taste buds. So will your tummy. Just try not to eat them all at once.

Monday, May 24, 2010

Biggest Morning Tea

Each year, the Biology dept up at our local Flinders Uni hosts what they like to call "The Biggest Morning Tea". It only costs $4 to get in (that's just a couple of Aussie $2 coins). All the cooking is done on a volunteer basis.

My BIL works at the Paleo lab in the Bio dept so he's on their email list. Last week he received an urgent email asking for more cooking-type folks. So far only 4 people had volunteered, and none of them featured any savory dishes.

Mike (BIL) told them about my cooking prowess, and I got in email contact with the lady in charge. She is very thrilled with what I said I could make for them.

Here's the list of what I'll be making between now (monday arvo) and thurs morn:

Cheese and bacon muffins

soft pretzels w/ cheese sauce

mexican chocolate fondue

zucchini bread

cumin seed crackers

wholemeal chia seed bread w/sunflower and pumpkin seeds

morrocan seasoned pan bread w/ grana padana cheese

fresh homemade ricotta cheese (it's easier than you think) to go with the cumin crackers and whatever.


They are expecting 100 to 150 people... This will be challenging, especially as MIL has a couple of doctor appointments this week.

Wish me luck folks!

Oh, the proceeds from it go directly the Flinders Med Centre (right next to the U) for their cancer research.

Tuesday, April 20, 2010

Wholewheat Seed Bread with Chia, Sunflower & Pepita

This is quite possibly the healthiest bread you'll ever make or eat. I'm not kidding! It is also very easy to make.

Have any of you heard of chia seeds? No, not those silly chia pets, sheesh. To find out just how healthy chia seeds are for you, I'd suggest letting Ma Google lead the way. I throw a handful of chia seeds in all my curries now, btw.

Back to the recipe. Easy, very easy.

Just start with my standard, easy, white bread recipe.

Instead of 4 cups of unbleached bakers flour, use 2 cups of the bakers flour and 2 cups of wholewheat flour (called wholemeal flour down here in Oz). So that means half white, half whole wheat flours.

When you add the dry stuff (sugar, seasalt, yeast, etc) you also add 1 TBSP chia seeds, 2 TBSP shelled sunflower seeds, and 3 TBSP pepitas.

Pepitas are raw, shelled, pumpkin seeds.

Then just follow along with the rest of the how-to and then you'll be eating some very healthy and TASTY bread.

Sunday, June 14, 2009

Cider Fadge

Hmmm, methinks there might be a term or two that needs to be defined. Ya think?

Fadge

Knowing how The Urban Dictionary likes to use obscure words to mean other (usually crude) things, I would not be surprised to find "fadge" in their listings. I, however, don't go there. So whatever crude, vulgar, or slang term you think "fadge" means; just don't even go there. This recipe has nothing to do with whatever The Urban Dictionary thinks it means.

Many of you may know of Irish Fadge. It's a pan fried bread made with leftover mashed potatoes (and various bread type things). This post is nothing like that.

Ok, some of you may be thinking of the fadge made in Durham county using a piece of old bread as a starter (the original sourdough). Close, but no cigar.

This type of fadge is made in the south of Durham County and most of Cleveland County (at least it was a hundred years ago) and the starter is the leftover yeasty sludge from the bottom of your primary beer fermenter tank. If you haven't guessed yet, I'm not talking about Cleveland, Ohio, USA but rather Cleveland County, UK.

I got the idea for making this when I was bottling the latest round and had remembered that Cooper's Brewery down here recycles their yeast. That meant the yeasty sludge from the bottom of the tank must be active!

I then chatted about that with a certain octogenerian I know (from Stockon-on-Tees) and she said, "Oh great! I haven't had fadge in over 60 years!" Hmmmmm, well it should work then!

The first batch didn't turn out well. Firstly it was from a batch of dark ale so it didn't have the colour I was hoping for. Secondly I treated it more like a baking powder bread. It ended up tasty, but was very thick and heavy. Good for frying though.

The second batch was PERFECT! I'd just finished up bottling some apple cider and the yeasty sludge at the bottom was not only the colour I wanted, but it also smelled ohhhhhhhh so apple-y. This time I also decided to treat it as a yeast bread (this was a big DUH moment!) and to write down how much of what I used and the procedure.

Now don't think that you can't make this if you don't homebrew cus I've come up with an idea. It has to do with sourdough so if you are familiar with sourdough baking you can probably guess where I'm going with that.

But I'll tell you about that after I get finished with the recipe. You'll just have to read along and be patient.


DINGO DAVE'S CIDER FADGE

What you need:
6 cups high quality baking flour
1 tsp sea salt
2 tbsp sugar
1 and 1/4 cups yeasty cider sludge
2 tbsp olive oil
1/2 cup water
1/4 cup of flour for dusting and kneading


What you do:
First, let your yeasty cider sludge "age" in a small, covered (but not tightly sealed as it needs to breathe) container for 3 to 5 days. Don't worry if it separates cus it's supposed to. When you take the lid off you'll be hit with a beautiful apple smell. Mmmmmmmmmm! Give it a good stir to recombine it (just like you'd do with sourdough starter).

Now follow the "whut yoo due" directions in my easy white bread post. The only exception is when you are supposed to add the 400 mls of water you instead add the cidery, yeasty, sludgy goodness (plus that extra 1/2 cup of water). Oh yeah: DON'T add any yeast! Just use the ingredients from this post, but the procedure from the Easy White Bread post.

The second rise will take anywhere from one to two hours, so be patient! It's worth it, trust me.

Here's some pics of how the cider fadge turns out:
cider fadge 01


The crust is nice and soft, not sure if you can tell by these next two shots. The first is with my finger on top of the crust and in the second I've pushed the crust down a half inch and the crust sprung right back:
cider fadge 02

cider fadge 03


And the texture is ohhhhh so good --along with the apple scent when you slice it!
cider fadge 04


This loaf lasted approximately 12 hours. Gone in a day!

But Dave, I don't homebrew so how can I make this?

Easy. Take some sourdough starter and add a few tbsp of apple sauce to it. Let it sit in a covered (but not tightly sealed, it needs to breathe) container for a couple of days and use it in the recipe where it calls for the yeasty cider sludge. Should be perfect!

But Dave, I don't have any sourdough starter! Help!

No worries. To make sourdough starter all you do is take some leftover mashed spuds, add some water, some flour, some sugar and a bit of yeast. Cover it (but let it breathe and stir a few times per day) and keep it in a warm spot for 3 days --it'll then be nice and bubbly and sour. As far as the amounts go here's a good rule of thumb:

1 medium spud, cooked and mashed
1 cup water

Mix them so you get potato water and then add
1 cup flour
1 tbsp sugar
1 pinch of dry yeast

Easy stuff!

Once your sourdough is ready (3 or 4 days) then add your apple sauce and let it "mingle" for a few days before using.

Yeah, the initial set up may take some time (for the starter) but after that you can make this every day by just keeping some of the starter back to make a fresh batch the next day and then again the next day, etc.

Does this mean I need to make a post about sourdough?

Monday, June 8, 2009

Addendum to White Bread Post

My previous post was about how I make the bread for the ole homestead that everyone here loves. I now realise there were one or two thing I've left out. No, not with the basic procedure. Just follow the directions from the previous post and you'll be right.

Rachel (nice lady who cooks wonderful goodies) mentioned she'd like to see a pic of the spongy type bread, and she also was asking about spongecake.

I will, of course, answer the second question first, and the first question second. Just because I can.

Spongecake: I keep forgetting that I've been in Oz for 9 years now. Many of my spellings have become UK standard instead of US standard and I'll be darned if I can figure out which is which nowadays. I also am forgetting whether a term I'm using is an aussie term or something from Alaska.

Hence, spongecake. Think of a cake you've made that has the texture of a sponge. Not soft like an angelfood cake, but has that same texture. Here, maybe this picture will help,
spongy bread 01


Notice how thin I'm able to slice the bread even though it has a very "airy" texture. This is what you get if you let the bread from the previous post rise for 4 or 5 hours during it's second rise after the punch down. Make sure that you divide the dough into two buttered bread pans, otherwise it'll do a blob-dripping-down-the-side routine.

Reminder, here's what you'll get if you follow last post:
finished bread
Excellent toasting and sandwich making bread


And this is the airy, spongelike bread you get by dividing in two and letting the second rise go for 5 hours:
spongy bread 01


Obviously, this spongy bread isn't good for toasting. I tried just to make sure, but it don't toast well. However, it makes the most awesome bread for soup dunkers! It's also great just buttered and eaten. It's not too good for sandwiches; the reasons should be obvious.

But if you want a slice of plain buttered bread or something to dunk in soup, this "takes the cake" if you know what I mean.

Up next: cider fadge! And then how to make great feta cheese!

Friday, June 5, 2009

Easy White Bread

Firstly, let's start with a picture of how the bread is supposed to turn out.
finished bread


Yeah, looks good! Mmmmmmmmmm... But dave, how do I make it?

This could be the easiest yeast bread you've made; time involved, ease of making, ease of cleaning up, etc. If you've done a bit of bread baking before, you'll quickly notice that this is NOT a standard bread recipe and it doesn't use all the "standard" techniques. But it works nonetheless!

I came up with this myself after doing some experiments. Hey, you never know if something will work till you try. Remember the saying, "From the ashes of disaster grow the roses of success!"

Here I am showing my age again...

Ok, let's get on with it!

Dingo Dave's Easy (and tasty) White Bread


What you need:

One large mixing bowl (the one I use is 13 inches wide (330 mm) at the top
One heat source for baking --I recommend an oven, preferably gas
Sturdy wooden spoon for stirring
One or two 9" by 5" bread pan(s)
Pie dish with some water in it


Ingredients:

4 cups baking flour (minimum 11.9% protein)
1/2 cup flour (for dusting and kneading)
2 tsp sea salt
3 tbsp raw sugar
1 and 1/2 tsp dried yeast
400 ml (1 and 2/3 cups) water
4 tbsp extra virgin olive oil


Whut yoo due:

First, fill your shallow pie dish about half full of water and put it on the bottom rack of your oven. I always do this first so that I don't forget to later on, ahem. What the water does is keep the oven humid so that not matter how dark your bread crust looks, it's nice and soft.

Next, put 4 cups of the baking flour in your large bowl. Remember, your flour should be at least 11.9% protein. Most household flours are anywhere from 9.6% to 10.9% protein and they don't make really awesomely good bread. Just check the nutritional info on the back.

Ho[pefully it'll look something like this:
bread making 001


Wallaby Bakers flour is made at Strath, about 30 miles from here. It has one ingredient: Unbleached wheat flour. Gotta like that!

So here's where we are at:
bread making 002
Just ignore that pack of thawing lamb chops in the background...

Now add your sea salt, raw sugar, and dried yeast. Give the bowl a couple of quick tosses to mix things (or use a spoon).

A quick word about dried yeast. If you buy it in large quantities you'd better make sure you use it within a few months. Otherwise your dough rising won't be too good. This size cannister lasts me about 2 months:
bread making 003


Add your 400 ml of water
bread making 004


And then drizzle the olive oil over the top
bread making 005


Grab your solid wooden spoon and start mixing!
bread making 006


In about 10 seconds it'll start looking like this
bread making 007


Now's the time to turn your oven on high. Don't worry, you'll be turning it off in a minute or two, this is just to get a nice warm place to rise the dough.

Kinda roll the sticky dough around the bowl to get all the stuff off the side
bread making 008


In around 30 seconds your dough should look something like this
bread making 009
Make sure you get all the doughy goodness off the spoon!

Sprinkle some flour on, it looks like I used about 1/2 of a cup
bread making 010

bread making 011
Please note, my orange scoop holds 1/2 a cup

Roll the dough around the bowl to get the dusting flour on it
bread making 012


Now you get to start kneading the dough. Remember, always use the "heel" of your hand to knead. The only time you use your fingers with the dough is just to move the dough towards you so you can knead it again.
bread making 013

bread making 014

bread making 015

bread making 016

bread making 017


And in less than a minute it'll look like this!
bread making 018


Ok, turn the oven off. It should only have been on for 2 minutes MAX. This is just so there's a nice warm place to rise the dough. You may want to leave the oven door open for a minute if it got too hot.

Now put the bowl in the warm oven. Let it rise for around 90 mins. It should then look like this:
bread making 022


Here's the point where you need to make a decision... do you want one really good loaf (like the pic at the top of this post) or do you want TWO really soft, sponge-cake like loaves?

Let's say you want one. Butter up one bread pan. Just use your finger, no one's looking I promise. You don't need much, maybe 1/2 a tbsp.
bread making 019

bread making 020

bread making 021


Now is when you get to punch down the dough! Always a fun thing, woo-hoo!
bread making 023


Then gather the dough up (the bottom will be a bit sticky)
bread making 024


Look! Dough!
bread making 025


Form it into a roughly bread pan shape
bread making 026


And plop that puppy into the bread pan
bread making 027
Plop!

Here's another technique that baking purists won't like... Stretch the dough so it forms into the pan
bread making 028


And it'll look something like this
bread making 029
But maybe not as blurry

Put the bread pan into your (hopefully) still warmish oven for the second rise. When the bread reaches the top of the bread pan, then turn the oven on. 180 C (that's 350 F) for 45 minutes should do the trick.
bread making 030


And when it looks like this, it's done! Cool on a rack, then enjoy!
bread making 031

finished bread


Remember, the top may look crusty, but it's very soft cus of the water in the dish in the bottom of the oven.


Let's say you wanted the two loaf spongy type. Once the dough has risen the first time, butter up two bread pans. After punching the dough down, divide it into two. Shape each into somewhat bread pan size and plop them in. Now, let them rise in a warm place (like the still warm oven) for FOUR OR FIVE HOURS. Then turn the oven to 180 C with the water dish still in the oven. It'll be like spongecake!

I'm sure I'm going to hear from some bakers saying that this is all wrong, but it really does work! Try it.

And clean up is a breeze. Just soak the large mixing bowl in water for a while and then wipe it clean. Ta-da!