Monday, November 29, 2010

Australian Italian Sausage Rolls

Remember back in July when I made Aussie bacon n sausage rolls for you? And do you remember that I said they aren't the traditional style of Aussie sausage rolls? Well, this one is much more the traditional way as it uses bulk sausage meat instead of formed sausages.

Just go back to the July post, have a quick squizz at it then come on back here. I'll wait, no worries.

You're back already? That was quick.

Just to let you know, I didn't measure anything for this, which is coincidentally another Aussie tradition! And I Slape n Sons sausage meat. Made locally here in Adelaide, very tasty, and inexpensive.

Australian Italian Sausage Rolls

What you need:
About 500 grams bulk sausage meat
1 tsp (or thereabouts) ground white pepper
1 tbsp (or so) fennel seeds
small handful of finely minced onion
3 sheets of puff pastry

What you do:

I could very easily describe this in one rather short paragraph but that wouldn't be fair to you as it's been a wee will since I posted anything here. So how about I string it out for a bit using ten (10) pretty pictures? Yes, how about I do that.

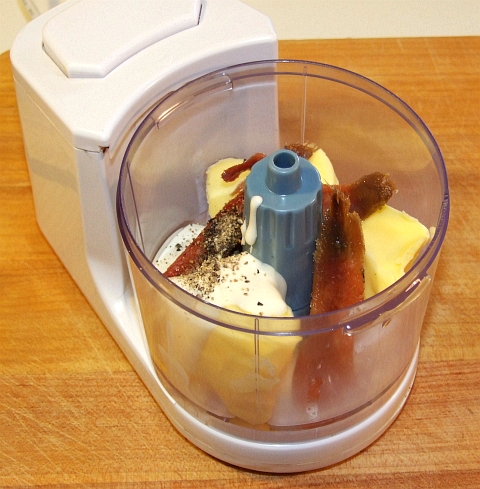
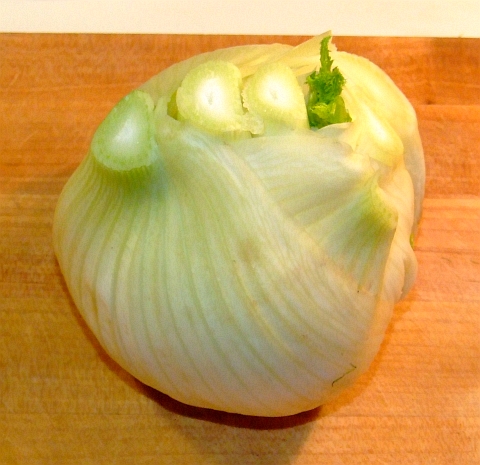
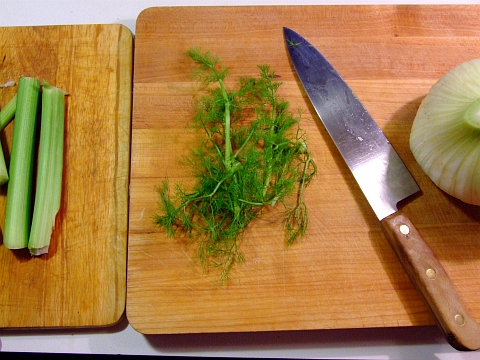
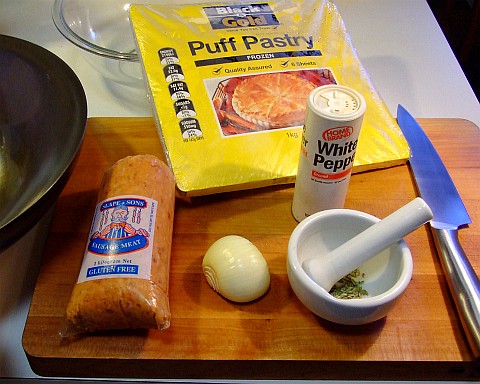
Firstly, make sure you have everything needed at hand:
isr01


Next mince up the onion and half-grind the fennel seeds in your mortar. Add that plus the white pepper to a large bowl.
isr02


And then plop in your sausage meat.
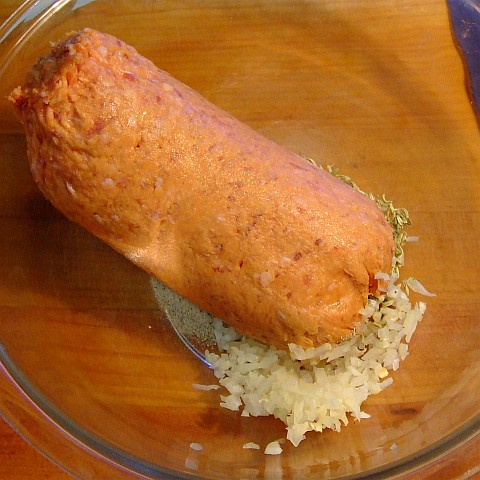
isr03
*plop*


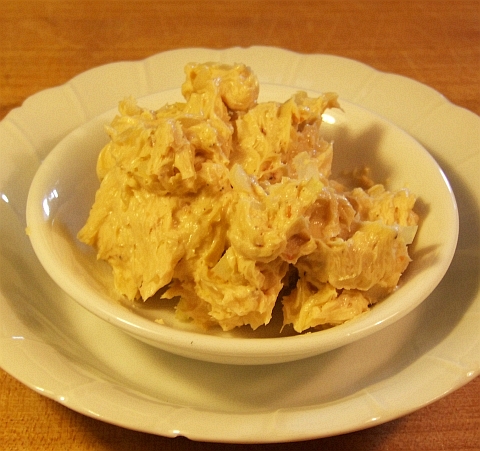
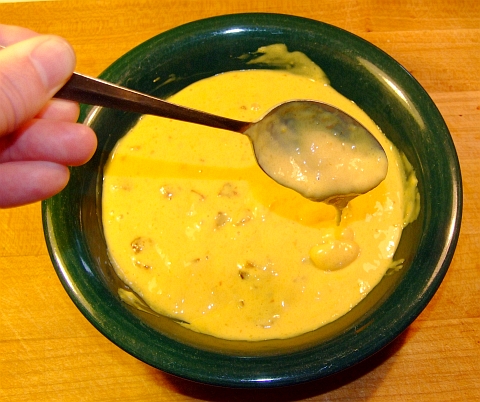
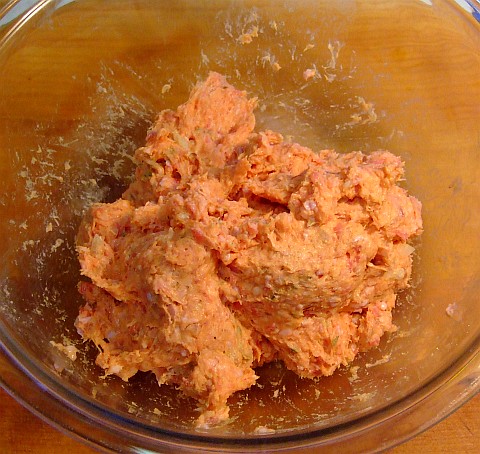
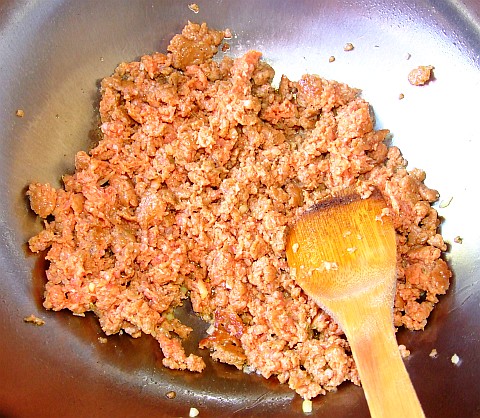
Now mix it all together thoroughly. Just use your hand and start squeezin' till it looks like this:
isr04


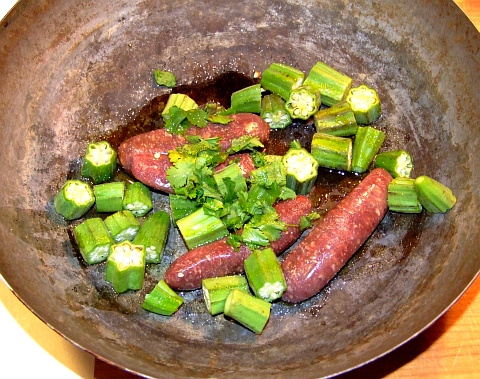
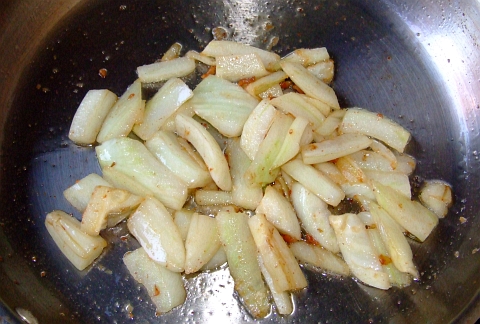
Toss it into your freshly seasoned and brand new thin-walled, polished, cast-iron 15 inch wide wok and light a fire under it. Make sure you break apart the sausage as it cooks, but you probably woulda guessed that part. Here it is halfway cooked:
isr05


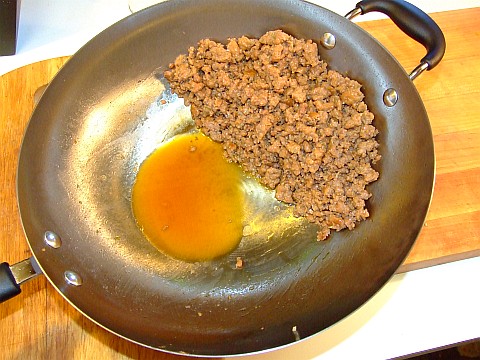
And here it is fully cooked.
isr06


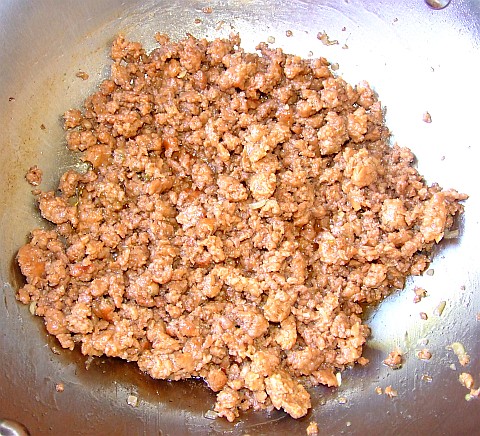
Make sure you drain the meat well.
isr07


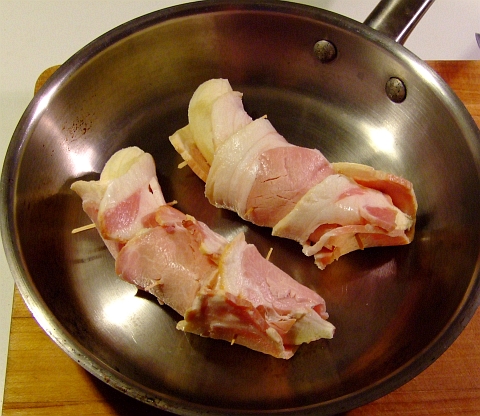
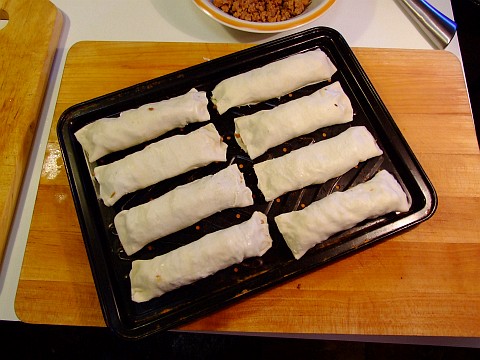
Take a thawed pastry sheet and cut it into fourths. Put some of the drained meat onto one quarter...
isr08


...and then roll it up. I ended up with 13 rolls from one pound of sausage meat. Here's one tray filled with 8 of them.
isr09


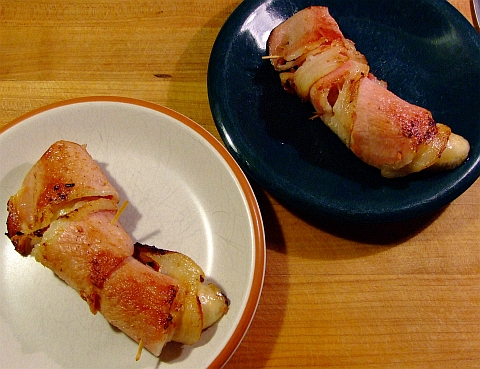
Bake em in a hot oven till they look like this:
isr10
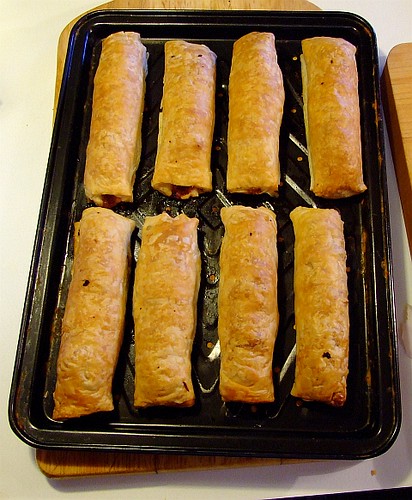
These were cooked at 190 C in a fan-forced, gas oven for around 25 minutes.

Let them cool, bag em up, toss in the freezer. Tada! Sausage rolls for the week. Enjoy.

Sunday, September 26, 2010

Whipped Anchovy Butter

Hey! Where are you going? This is good, trust me.

A while back when I was at a doctor's office waiting for mum-in-law to be finished with her appointment I was skimming a magazine. Can't remember which one it was, could've been Gourmet Traveller but I truly don't remember.

Anyways, one of the recipes I skimmed was butter with anchovies and bunch of other stuff like tuna lots of seasonings. Since I couldn't remember all the ingredients I figured I'd try making some when we got home but that'd I'd "keep it simple".

Fast Forward almost a YEAR!

Totally, completely, forgotten about. But then when I was checking the pantry I noticed we were getting low on anchovies and that reminded me about the recipe I skimmed a year previous.

Not remembering anything that went into it besides anchovy and butter I pretty much started from scratch. But I did get the idea from the magazine --whichever magazine it was!

Dave's Whipped Anchovy Butter

What you need:

2 to 3 tbsp butter
2 or 3 anchovy fillets (1 per tbsp of butter)
1 tbsp cream
1/4 tsp freshly cracked pepper
1 tbsp finely minced onion
1 food processor


What you do:

Firstly, assemble your ingredients. Note that I'm using a mini-food processor. If you make a lot of this at a time then a regular f-p will work but otherwise try to find a mini one. They're cheap.

anchovy butter 01


Put everything EXCEPT the minced onion into the food-pro.

anchovy butter 02


Process till it has a whipped look/consistency. Should take more than 30 seconds.

anchovy butter 03


Mix in the minced onion, and then artfully arrange it for taking purdy pictures!

anchovy butter 04

anchovy butter 05


Use it just like you would regular butter, no worries.

Sunday, September 5, 2010

Easy Vegetable Stock AND Easy Cheese Sauce

You get 2 recipes today! Mainly cus I've been negligent in my posting lately, my bad.

These really aren't "recipes" as I think they are just too simple for ingredient lists and the like. Besides, I make each one different each time. Don't worry, I'll write all about various substitutions and methods.

We'll start with the veggie stock. Why make your own? Have you ever looked at the list of ingredients on powdered or liquid stock you buy at the shops? GAAACK! The rule is if you either can't pronounce it or don't know what it is then DON'T buy it. I happen to be able to do both and it scares me just what people put into their bodies.

*dave climbs off soapbox now*

Simple to make you own veggie stock. And you don't even need a bunch of high priced perfect-looking veggies. Cheap ratty-tatty ones on quick sale work great. So do scraps from your meal prep!

Potato peelings? Toss em in the pot. Corn husks? Ditto! Same goes for that corn cobb you just ate. Shriveled garlic or dried out onion? Wee-hoo! Skanky looking outer cabbage leaves? The more the merrier! Shriveled carrot? No worries!

Here's what mine looked like:
veggie stock raw

The pot contains half a dried onion plus it's brown skin and roots, a mashed up garlic clove, fennel stalks and fronds, outer leaves from a cauliflower, and a small handful of cumin seeds.

Added just enough water to cover things as I didn't need too much stock. I was going to use this stock to start the cheese sauce so I didn't need much. If you are making enough for soup then use a larger pot and more water.

After simmering, covered, on the stovetop for an hour, this is what it looked like:
veggie stock cooked


Just strain it and put it into a small saucepan to make the cheese sauce.

Sometimes I use beer to start the cheese sauce, other times white wine. This time I wanted to use the stock I just made. Which, after all, was the whole reason for making the stock in the first place.

I had around 3 cups of stock and to that I added 1/2 cup cream and a pinch of turmeric (just enough to turn it yellow about 1/8 tsp). Heated it up and whisked till it was all combined.

The saucepan should now look something like this:
cheese sauce01


At this point you can also grate in some chedder; you won't get as creamy a texture though.

Next I removed it from the heat (thick bottomed saucepan so it held the heat nicely) and whisked in cornflour (cornstarch in the US) 1/4 tsp at a time. It's important to REALLY whisk the sauce at this point as you actually want to aerate the sauce. Once the sauce is just less than your desired consistency (while constantly whisking) then return the pan to the heat for about a minute. Now add 4 or 5 tbsp cream cheese and stir/whisk till cream cheese in incorporated into the nice, fluffy sauce.

Here I am whisking away after the 6th 1/4 tsp of cornflour was added.
cheese sauce02
Notice the aeration already? That'll keep it from "gellifying" when it cools.

Whisk CONSTANTLY. This whole process will take 5 to 8 minutes to get the sauce thickened but airy.

Those cramps in your hand are worth it, trust me. Or you could just use an electric mixer the whole time if you so desire.

Once you've heated it back up for a minute or two (while whisking constantly) and added the cream cheese, then remove the saucepan from the heat and pour it into a bowl.

Now's when you get to add goodies! Chilli flakes? No worries. Cumin powder? Oh yeah! Fresh coriander (cilantro in North America) leaves? You betcha! You are only limited by your imagination.

For this sauce I chose bacon. Seriously, doesn't EVERYTHING taste better with bacon?
cheese sauce03


Then just gently stir it in!
cheese sauce04


Notice the creaminess of the sauce? This last photo was taken AFTER the sauce had cooled. Neat huh? So you can make a creamy cheese sauce using cornflour --cornstarch-- provided you whisk or mix well for a bit of time to really aerate the mix so it doesn't congeal as it cools.

Enjoy!

Saturday, August 21, 2010

Grilled Fennel

Yeah! So simple. So good! So TASTY!

Caramalized fennel slabs. Gotta like it.

No "real" recipe as this is pretty darned simple.

Slice your large fennel bulb into 1/2 inch thick slabs.

Rub some olive oil or some bacon fat into the slabs. Grill them (or pan fry) till they are caramelized. Note: If grilling you'll want to move them off the direct heat occasionally so they don't burn.

When they are done, they are done!

I served last night's grilled fennel as a side dish to a sausage burger. The burger was topped with cheese, avocado, bacon, and lettuce. Needless to say, it was devoured quite quickly.

Try getting your mouth around this:
thick burger


See the grilled fennel slab next to the burger? Yeah, darned good tucka!

Tuesday, August 17, 2010

Ratatouille with Fennel and Okra

And I served it with feta crumbled over the top and some grilled venison sausages w/okra on the side.

Plates were emptied! Quickly! Very very tasty.

Full disclosure: I've never made ratatouille until I made this. My first try I knocked out of the park!

I got the idea for making ratatouille from a great post at a wonderful food blog. She's a professional chef and teaches cooking classes full-time. Friendly and she answers comments and questions. You can find Helen at:

Beyond Salmon

and her ratatouille is here:

Beyond Salmon's Ratatouille

Go have a quick look and you'll see where I got the inspiration for my Ratatouille. I know that fennel isn't a common ingredient in Ratatouille but it's in season down here in South Oz and very inexpensive. Okra is in season here too, and it IS a staple veggie in Cajun cooking commonly used in gumbos.

And I do apologize for using canned corn. Fresh corn cobs are very pricey down here due to the 10 year ongoing drought. When you use canned corn make sure the ingredients are corn, water, salt. Nothing else. No chemical crap!

A quick word about fresh okra. When you are selecting okra to buy, you want to buy smaller rather than larger. The larger ones can have a "woody" texture. You also want to test a tip or two. If the tip snaps off then they are fresh. If it bends completely over, then that bin of okra is not very fresh. Here's what I mean:

Give the tip a little bend like this:
testing okra 01


And the tip should snap off thusly if it is fresh:
testing okra 02


Anyways, on with the recipe:


Fennel and Okra Ratatouille with Venison & Okra on the side

What you need:
One large fennel bulb
12 to 16 small, fresh okras
1 large onion, rough chopped
One 12 ounce can of corn kernels
2 or 3 cloves crushed garlic
1 large zucchini
1 can crushed tomatoes
1/2 tbsp dried rosemary
1/2 tbsp dried oregano
sea salt
olive oil
a bit of crumbled feta

4 mini venison sausages (2 per person)
12 to 16 small, fresh okras --in addition to the ones going into the ratatouille
olive oil
sea salt
small handful fresh coriander (cilantro) leaves


What you do:

First, peel and slice the zucchini. Try to aim for 1/2 inch thick slices. Sprinkle the slices with sea salt, toss to coat, and let them set on paper towels for 15 minutes or so --this is to draw moisture out of the zucchini. I do this with eggplant, but it was the first time I'd done it with zucchini. Worked like a charm.

See? Have a look:
prepared zucchini


Prepare the okra: cut the tips and stems off, then cut each okra into 3 pieces. Don't worry about the sticky stuff as that is normal. Fry them up with a bit of olive oil for a minute or two so they are just browned. Set aside to drain and cool. This is what they look like before lightly frying:
chopped okra


Slice your fennel bulb into 1/4 inch thick slices. If you need to halve or even quarter it to facilitate the slicing then be all means go ahead and do that, no worries.

fennel cut in half


fennel sliced


Now give your onion a rough chopping. Don't make the pieces small otherwise they'll be lost in the ratatouille.

By now the zucchini slices should have lost enough moisture. Give them a quick pat with paper towels and fry them in a bit of olive oil till the just start to brown. A minute or two each side should do the trick. Set them aside to drain.

In the same pot you'll be cooking the ratatouille (I recommend an enameled dutch oven) put the sliced fennel and chopped onion. A bit of olive oil and fry em up. You want the fennel and onion to just caramelize. Once they've caramelized then add the garlic, basil and rosemary; continue to fry for another 30 seconds.

Now you get to de-glaze the pot. Add the liquid from the can of corn to the pot and stir it around so the fennel and onion aren't stuck at all. Put the lid on and simmer on low for 5 minutes.

Add the can of tomatoes and the corn. Simmer for another ten minutes. Now add the zucchini and okra. Put the lid on and simmer for 10 to 15 minutes. Turn the heat off and let it sit in the dutch oven while you get the sausages and the rest of the okra cooked.

If you want this dish totally vegetarian, then just don't use sausages at this point, no worries.

Hopefully your dutch oven should now look something similar to this:
ratatouille in pot


Cut the rest of the okra into thirds, as you did for the ratatouille. Put the cut okra and the venison sausages into a wok with a bit of olive oil, sprinkle a bit of sea salt, and toss in the coriander leaves:
venison and veg


Fry it up till the sausages are done. Toss/stir regularly so nothing sticks. Once they are done you can plate it up!

Spoon the ratatouille onto a plate, sprinkle with crumbled feta, and put two sausages plus some fried okra onto the plate:
plated


It's easier to make than it sounds and OH SO TASTY!

Again, a big thanks to Beyond Salmon for posting her wonderful ratatouille recipe and guidelines for making it! Thanks Helen!

Sunday, August 15, 2010

Bacon Wrapped Bananas with Chocolate Sauce

And doesn't that just sound AWESOMELY delicious? I know it does "it" for me! Seriously, what dish can't be improved by adding bacon?

I got the idea for this from a yoga teacher in New Zealand who has a cool food blog called Couscous & Consciousness. In one of her posts she asked folks about what trio or trios of food combination go well together. One of the ones I mentioned was bacon wrapped chocolate that gets battered and deep-fried. She thought it sounded ok but suggested some with bananas to go along with the bacon and chocolate.

Hence, this beauty of a recipe was born!

I made it last night, we all loved it. And that includes BIL who has a very fussy palate. In fact, he licked the plate clean!

Dingo Dave's Original Bacon Wrapped Bananas with Chocolate sauce with thanks to Couscous & Consciousness for inspiration.

What you need:

For the bananas and bacon:
One banana per person
1 to 3 slices of bacon per banana depending on size of slice

For the chocolate sauce:
175 grams of dark chocolate --that's 6.141592654 or pi+3 ounces
2 heaping tbsp butter
1/3 cup cream
1/4 cup cream port (or regular port, or a sherry variety)
1/4 tsp cinnamon powder
1/8 tsp cayenne powder (I usually double or triple this, but that's for when it's just me)

What you do:

Put everything for the chocolate sauce in a small, thick-bottomed saucepan. Your saucepan should now look like this:
stuff for chocolate sauce


Put the saucepan on the lowest heat possible and stir or whisk it while it heats. Make sure nothing sticks to the bottom and that it's well mixed. This should only take a couple of minutes.

Turn the heat off and cover it.

Now to assemble the bacon and bananas. Ummmmmm, this is pretty simple, just wrap the bacon around the bananas. If you need to secure the bacon with toothpicks the go for it.
bacon wrapped bananas raw


Then cook them till the bacon is done to your liking. Be gentle when turning them as you don't want to bananas to break apart.
bacon wrapped bananas cooked


Remove the toothpicks if you used them and liberally ladle the sauce on top!
bacon wrapped bananas with chocolate sauce
Notice how I used one dark plate and one light plate so that the color balance in the photo is way off? Yeah, I did that on purpose. Maybe.

And the obligatory closeup:
bacon wrapped bananas with chocolate sauce closeup


Use a sharp knife and a fork for eating. Why a sharp knife? So that you don't mush down the banana as you cut a piece.

You'll have lots of leftover sauce, I'm sure you'll think of some use for it.

Oh, next time I'm going to roll the bananas in brown sugar before wrapping the bacon around them!

Thursday, August 12, 2010

Fennel and Prawn Risotto with Prosciutto

A risotto is actually a very easy dish to make so if you've never made one cus you think it's hard; it is not! Just go for it! And don't be snobbish about using ONLY arborio rice. You don't need to do that.

Yes, I know I've just offended millions of untold readers who are risotto aficionados. Tough. Tough, I say. I've made it with arborio, jasmine, basmati, long-grain, short-grain, medium grain, and probably a few others. Heck I even did one with half basmati and half long-grain brown rice.

You know what? They all tasted great. The key (for me at least) is to dry fry the rice a bit first so it goes from translucent to opaque, THEN start on the liquid it'll be cooking in.

I used prosciutto in this because I got a large, unsliced slab of it half off at the shops and after I finished thin slicing it I had a small piece leftover that just wouldn't go through my meat slicer.

Well, it probably would have but I doubt I'dve had any fingertips left for typing.

Obviously, a piece of ham or bacon can be substituted for the prosciutto, no worries.

You'll also notice that this risotto is not heavily seasoned as I really wanted the fennel flavour to stand up and be noticed. It was.

What you need:
1 hunk of prosciutto --about the weight of a full sized bacon rasher

1/2 of a large fennel bulb

1 cup of rice --any kind, uncooked
1 or 2 tbsp olive oil
sprinkle of sea salt

2 litres (1/2 gallon) of MY fennel stock
handful of dried red capsicums, minced
fronds from the fennel bulb

250 grams (about 1/2 pound), peeled, cooked, deveined small prawns


What you do:

First, prepare the fennel. Remember what a fennel bulb looks like?
fennel bulb


Trim the stalks off.
fennel bulb no stalks


Hey look! A pile of fennel stalks with fronds!
fennel stalks


Trim the fronds off the fennel, you'll use the fronds for flavouring the risotto.
fennel fronds


Then chop up all the fronds. I don't need to show you a picture of that, do I? Thought not.

Next, cut your fennel bulb in half.
fennel cut in half

Notice that thick core? Some people cut that away. I don't. Especially since it'll be so soft and succulent in this dish.

Slice one of the fennel halves (or both, your choice). Try to make them about 5 mm or 1/4 of an inch thick.
fennel sliced

Then, for this dish, I cut the slices in half. You don't need a picture of that, right?

Take your hunk of prosciutto and trim the fat off. Keep the fat! Chop the fat up finely and put it in the large fry pan you'll be using for the risotto. Cook it till the fat is liquid and the little bits left over are browned.

Now add you sliced, cut, fennel bulb and cook it till it looks about like this.
fennel fried
Slightly caramelized, but not soggy. Stir whilst frying, of course.

Next, add the rice, the olive oil, and the sea salt. Fry it (whilst stirring) till the rice turns opaque. This'll only take a minute or two.

Now add 1 litre of the fennel stock, the minced fennel fronds, and the dried red capsicums (bell pepper). Give it all a good stir, turn the heat down to medium low. Cover it.

Check it in 5 minutes. Stir it. If the liquid isn't cooking down and being absorbed into the rice the turn the heat up a bit higher. Stir it every few minutes. Add more fennel stock as need until the rice is done and there's almost no liquid left.

The above paragraph should take around 18 minutes.

Turn the heat off and add the prawns, give it a mix. Put the lid on and let it stand for a few more minutes. Now's a good time to finely mince the rest of the prosciutto. Add the minced prosciutto, mix well.

Serve it up!
fennel prawn risotto


Obviously, you can modify and add ingredients to your heart's content. With this one though, I really wanted to get the fresh fennel flavour.