Sunday, April 17, 2011

Dave's Decadent Death By Chocolate Cake

So what makes this cake so special? I mean BESIDES the fact that I made it? Heck, it even uses a standard off-the-shelf cake mix as the Base! What make this special is the add-ons and various wonderful chocolaty "things" you do to this cake.

Like adding a bunch of chocolate drops to the chocolate fudge cake batter before baking. *drool*

There will be pictures, no worries. This is not one of my most photogenic creations, but it ranks waaaaaaaay up there on the taste scale! And the chocolate scale.

What you need:

One box of Betty Crocker Super Moist Chocolate Fudge Cake Mix
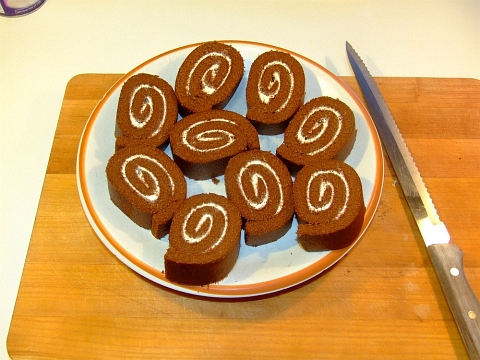
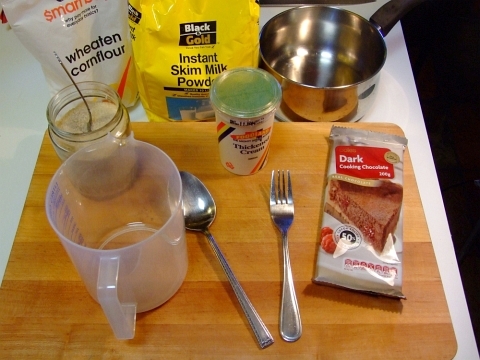
1/2 cup of chocolate melts -see the first picture

1 cup heavy whipping cream
1/4 cup raw sugar
1/3 cup cocoa powder

1 bar (375 grams or 12 oz) dark cooking chocolate
1 tbsp butter
1/3 cup of cream

You'll also need some sort of oven-like heating device, I'd suggest using an actual oven. Don't forget a cooling rack, and a LONG bread knife.


What you do:

Firstly, you'll want to make the cake mix according to the directions, pour it into a circular baking dish, but DON'T put it in the oven yet. This is the EXACT kind of cake mix you want:
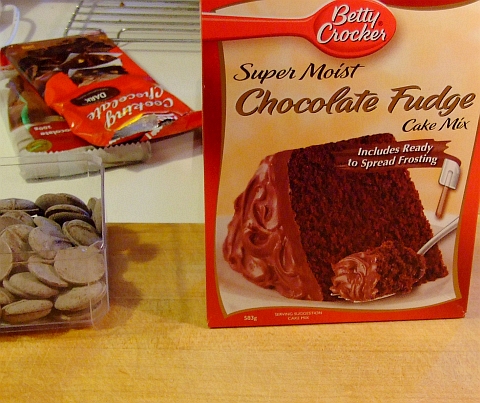
dbc01


Do you see those chocolate drops to the left in the above picture? You do? Good! Now take about 20 or 30 or them and carefully put them into the batter you've already poured into the baking dish. You want to insert them vertically so they don't float on the top. What happens when the cake is baking the melts don't fully "diffuse" through the cake so that when the cake cools you have a whole bunch of "nuggets" of chocolate throughout the cake!

When the cake is done --ALWAYS test it with a skewer, NEVER trust the time on the directions-- take it out and put it on the cooling rack. Let it cool for hours. You don't want any heat left in it at all.

Once it is completely cooled off, you want to slice the cake in half horizontally. Make sure you use a long, serated bread knife and don't be in a hurry. Remember, you'll encounter pockets of chocolate from the drops you put in the mix.
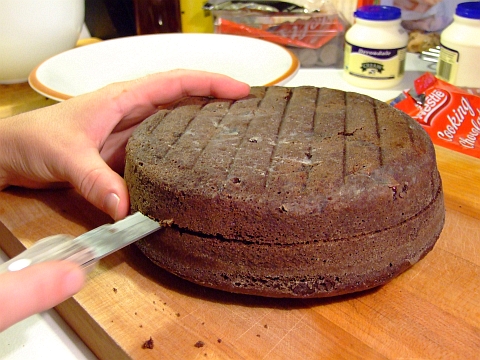
dbc02


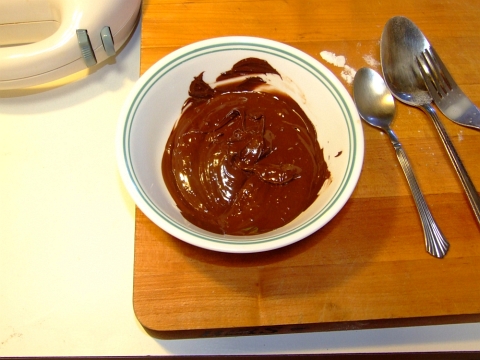
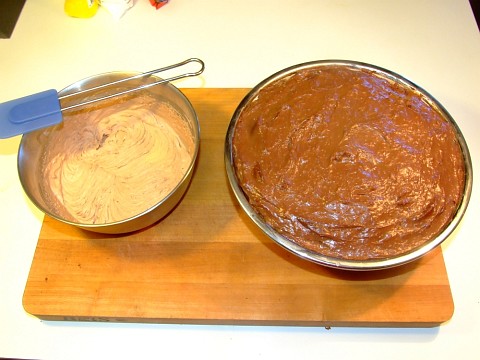
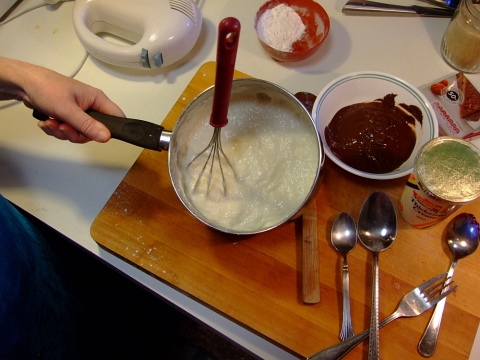
Now you want to make the chocolate cream! Add the 1 cup heavy whipping cream,1/4 cup raw sugar,1/3 cup cocoa powder to a mixing bowl and whip it up with you electric beaters till it's stiff.
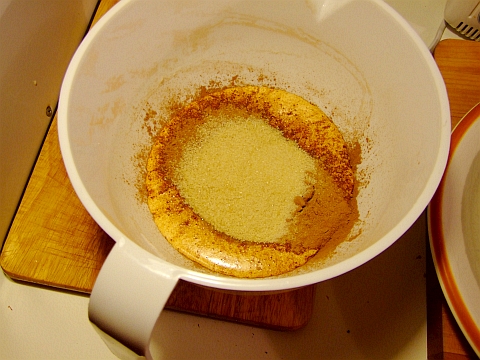
dbc03


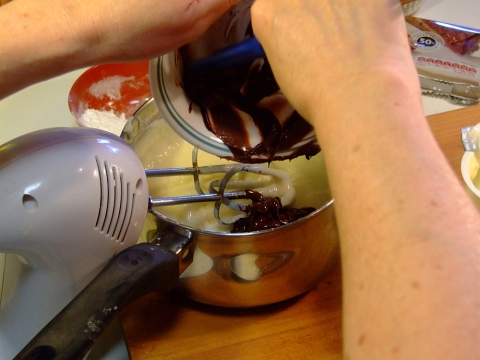
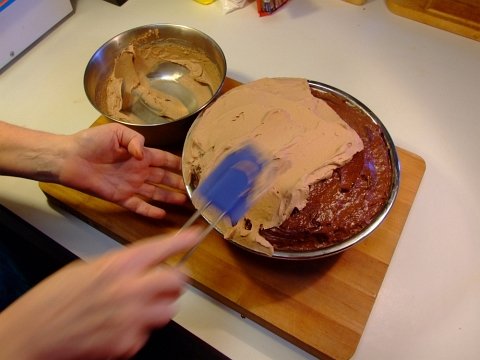
Put 1/3 to 1/2 of the stiff, chocolate cream betwixt the cake layers thusly:
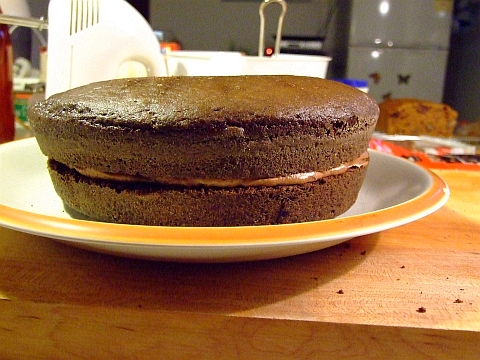
dbc04
I'm sure you can figure out the process yourselves.

Oh, remember that bit of "icing" that came with the cake mix? Slather it around the sides of the cake, there will not be enough for more than that.

Next you want to slather on the rest of the cream around the top edge of the cake. Don't worry if it doesn't look all "showy" as all you really want is a lip so the sauce (next step) doesn't drain off.
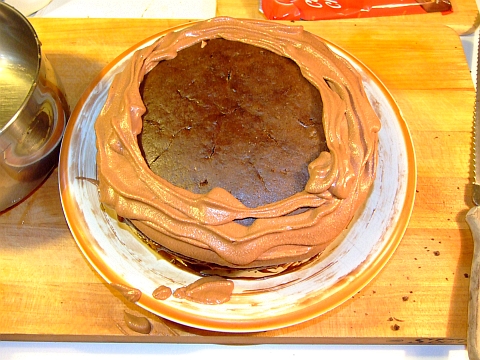
dbc05


Now put it in the fridge to chill of 30 mins or so.

Is it chilled yet? Good, time to make the chocolate sauce. You may note that this sauce has different amounts of butter and cream in it from my usual ones as I want this to firm up and almost harden upon cooling.

And no, you don't need a double boiler. A small, thick bottomed NON-COATED stainless steel saucepan works perfectly fine.

Add the last 3 ingredients into your saucepan. That'd be
1 bar (375 grams or 12 oz) dark cooking chocolate
1 tbsp butter
1/3 cup of cream
and put it on your lowest heat. Whisk everything together whilst everything melts together. This really should only take 3 mins at the most. Once everything is just melted, turn the heat off and continue to whisk for another minute.

Set the saucepan aside for 5 minutes or so till the sauce is partially cooled yet still pour-able.

Take the cake out of the fridge and slowly pour the chocolate sauce over the top. Put it back in the fridge. When the sauce on the top is firmed up (30 to 45 mins), then call it DONE!

Slice it and serve it!
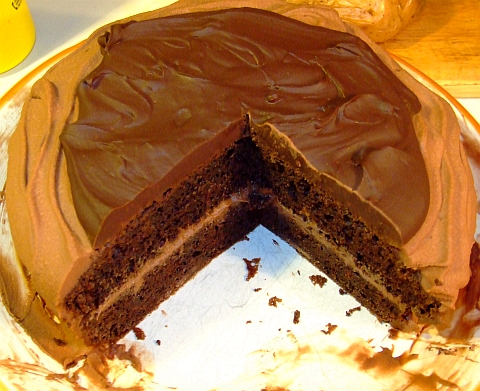
dbc06


Your taste buds will thank you for making this. Your waistline may not. You've been warned.

As a variation you can make more of the choc sauce and less of the choc cream and use the choc sauce as the layer betwixt the cake halves. I think I'll do that next time.
Monday, April 11, 2011

Baked Crab Cakes

I wasn't planning on making crab cakes last night. In fact, not for a while till fresh crab prices come down. But someone needs a crabcake recipe that has just a "hint of 'heat'".

That someone being http://twitter.com/#!/cheeriogrrrl

I had to use the fake crab stuff. I'm sorry. I really am.

And I'm also a bit sorry --well, not really-- that this is another recipe with no exact amounts. Why? Cus when I make crab cakes or fish cakes I never measure stuff. The amounts depend really on just how much leftover mashed or baked potato I have leftover and I eyeball the seasoning amount.

But at least this should point you in the general direction! And there are pictures to help you.

And these are baked. That means healthy.


Dave's crab cakes

What you need:

Some leftover mashed or baked potatoes
Volume of crab meat that's about 2/3 of the amount of leftover potatoes
half an onion
minced garlic
dillweed
capers
dried mint
sea salt
white pepper
olive oil
grated parmesan
breadcrumbs
cayenne powder


What you do:

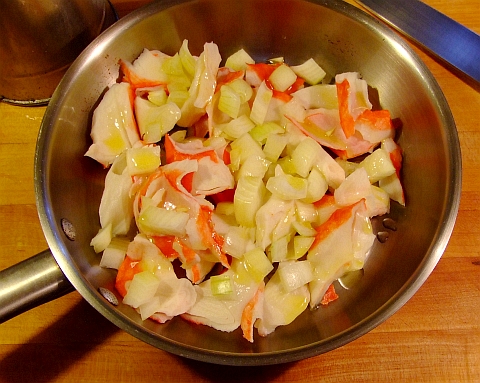
Put the large chunks of crab meat, the chopped onion, and a bit of olive oil in a saucepan. Cook on med-high heat for a few mins. Turn off heat, add the minced garlic, give it a good stir.

These pics show the before and after process.

cc02
This is before it goes on the heat


This is after 5 mins on the heat with the garlic added, and everything then minced finely.
cc03


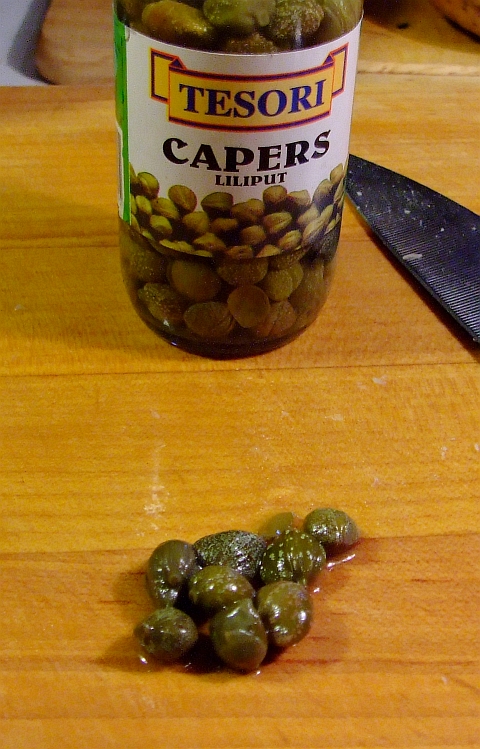
Now take 6 to 10 capers and chop them up. See, look: capers!
cc04


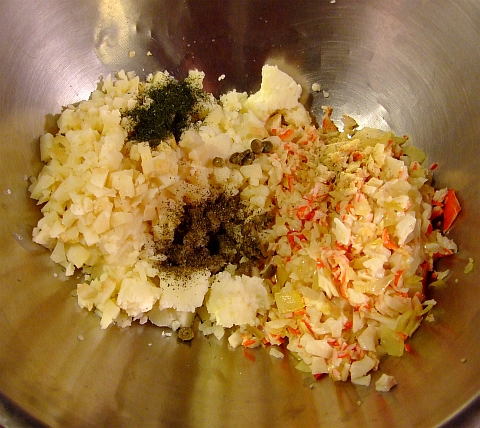
Add to a large bowl the leftover potatoes, the minced crab-onion-garlic, the chopped capers, sea salt, white pepper, dillweed, dried mint. This pic may help you with the relative amounts:
cc05


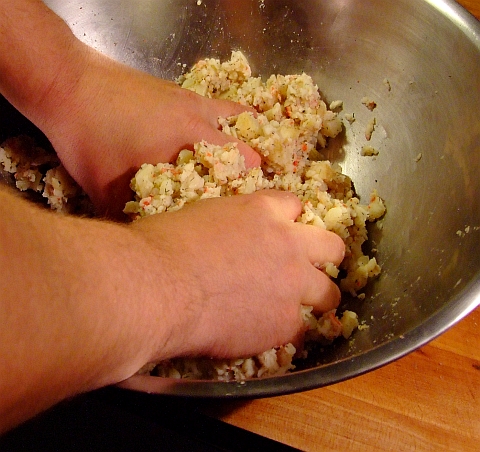
Mixing it all together is the fun part!
cc06


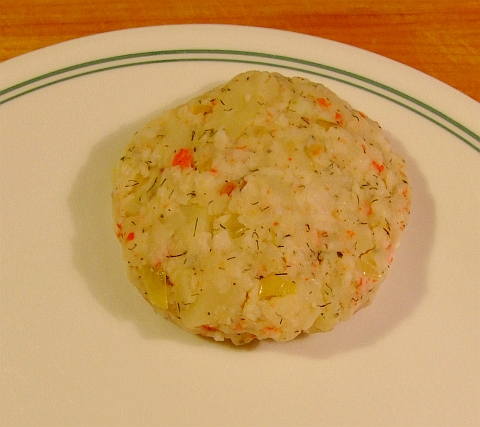
Form them into "cakes" around 2.5 to 3 inches in diameter
cc07


Since I'm baking these I don't need to dip the cakes into eggwash to get the breading to stick as I would have to if I deep-fried them, so that step can be omitted when baking them.

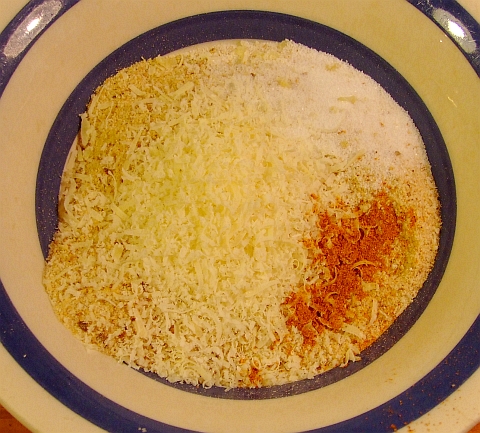
Time to make the breading. Breadcrumbs, cayenne powder, sea salt and freshly grated parmesan.
cc08


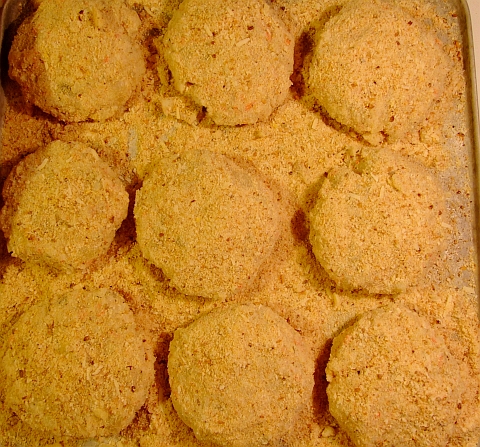
Carefully coat the cakes with breadcrumbs and put on a baking tray. Sprinkle whatever leftover breading you have between and over the cakes.
cc09


Drizzle a bit of olive oil over each cake and bake in a hot oven till tops are browned (around 12 minutes or so). Carefully turn them over, drizzle with a bit more olive oil and bake for another 12 mins or so. All ovens are different so keep an eye on them since you don't want the breading to blacken.

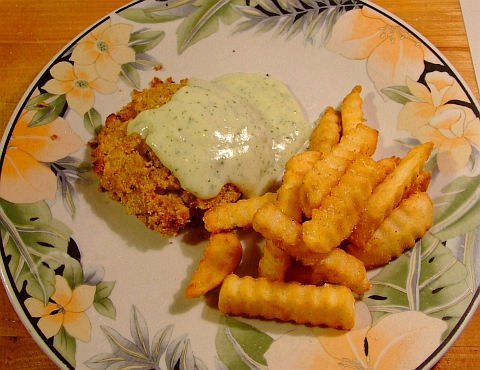
For serving them I made a quick parsley sauce and fried some chips (french fries for you US folk). Doesn't this look tasty?
cc01


If you have questions about relative amounts or anything else about these just ask away in the comments, no worries mates.

Saturday, April 9, 2011

What would you make with...

The other day I came back from the shops with a load of really good, fresh veggies. I had a fair few ideas of what I was going to do with them too.

And then I thought, "Hangabout mate! P'haps some of me tweeterers may wanna give it a go?" So I put the list up on twitter and also mentioned a well stocked pantry plus herb garden, and asked what folks would make!

Unfortunately, I don't have many foodies following my tweets, so only 2 people gave it a go. One was braise some of the veggies then through it all into a quiche. Ummmmmm, not exactly what I had in mind. The other was stuffing the bell peppers with the chilli, put them and the rest of the veggies in a casserole dish, cover with cheese and bake. Not bad. But again, not exactly what I had in mind.

Remember, it's hard to get the meaning through in only 140 characters via twitter!

So how's about we try it here!

You may assume a very very very well stocked pantry and good garden goodies. This means things like garlic greens, wild onions, fresh herbs, potatoes, spuds etc can be used. Pretty much any kind of dried spice, dried herb, or herb mix you can think of can also be used. As far as cheese goes, just make sure you use ones that I've heard of as I usually have 7 to 10 different kinds of cheeses on hand at any one time.
And lastly, let's keep this meat free. Just cuz I feel like it.

And try not to go overboard on the pantry items. Fettuccine with a creamy cheese sauce and a few of the fronds from the fennel bulb sprinkled over the top ain't gonna make the cut! The idea is to see what you would make from this list that features the ingredients, not the accessories.

And here is the list of goodies you get to work with:

Brussel sprouts, red n green n yellow bell peppers, green beans, large fennel bulb w/stalks and fronds, button mushrooms, fresh juicy just-off-the-vine tomatoes, fresh thai chillis, 3 bok choys.

I came up with a dozen dishes I'd make off the top of my head, and then pared it down to 6 simple, tasty ones.

If you feel the need to help your knowledge a bit (cheat) by using cookbooks or the internets then you may, but you'll have to live with your guilty conscience. (I'm just joking of course!)

Obviously, there's no need to go out and get all this stuff, I'm just curious to see what other folks would make. Use the comments, it'd be nice to get into double digit comments so spread the url for this post around!

Friday, March 11, 2011

Soup Fritters

Yes, I can hear the collective head-scratching from all the way down in South Oz.

Lemme 'splain it to ya! Firstly you have to understand that I am the undisputed Iron Chef of leftovers. That's right, I am.

Now then, how soup fritters came about. I made some soup the other day by boiling the dekerneled corn cobs and the husks in a lot of water. Plus 2 bay leaves and a large sprig of fresh rosemary from the garden.

I then diced up a spud (potato), half a leftover onion, and the last 2 rashers of bacon from a kilo pack. Quick fried them all up, then added to the strained soup stock. Simmered till spuds were done. Salt n pepper to taste. Served with a fresh, crusty, pull-apart loaf.

Very tasty. We all loved it.

Surprisingly enough, there were a couple of cups left in the bottom of the pot the next morning. Obviously I wasn't going to toss it. I thought about having it for brekkie but then I thought that just perhaps I could make a nice side dish out of it.

But what?

*insert light bulb here*

I know! I'll put it in the blender to liquefy it, then add an egg or two, then add enough self-raising flour till it's a batter. Then I'll deep fry small spoonfuls of the batter! Instant fritters! Wonderfully flavoured too.

That really is all there is to it. No, I can't give you amounts as this is definitely a "seat of the pants" type recipe. But to help you out, I do have pictures!

First though, if you have over 4 cups of blenderized soup then definitely use 2 eggs.

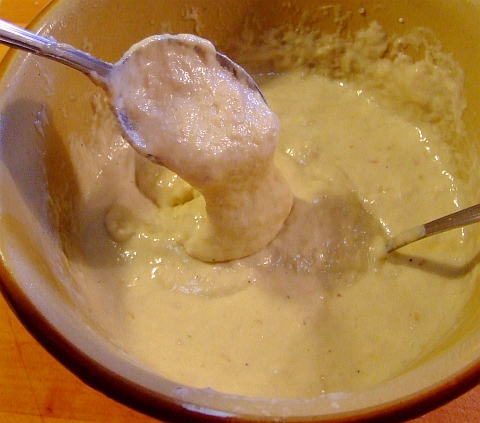
Here is the consistency of the batter you are aiming for:
soup fritters 01


Now just drop a small spoonful into some hot oil. You don't need a deep fryer, a wok over some flame will do fine. And make sure you use rice bran oil for your deep frying! Very high smoke point and very high in mono-unsaturated fats. It deep fries food wonderfully well!

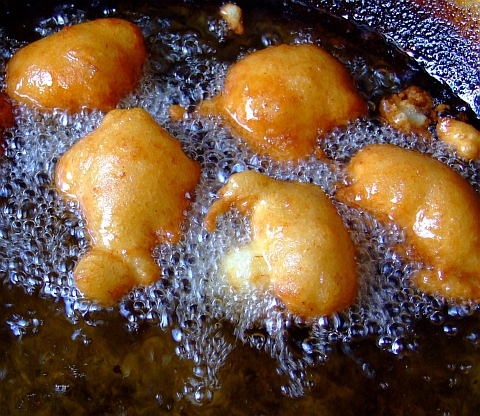
They'll swell up to around twice their size so don't crowd them. They'll also practically flip themselves in the oil once the submerged half is cooked! Here's a pic of a batch of the them deep frying after turning.
soup fritters 02


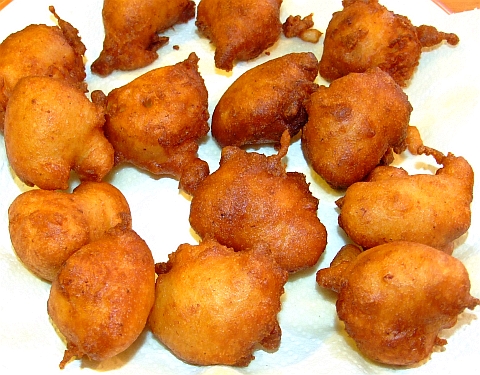
Once they are nicely browned all over and are just about done "bubbling" you'll want to remove from the oil and drain on paper towels. Like this:
soup fritters 03


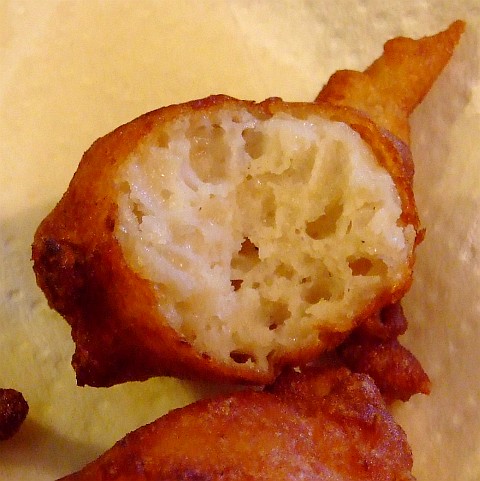
Give em a little sprinkle with salt and ENJOY! When you bite into one it'll be soooooo nice, light, and fluffy on the inside. See, look!
soup fritters 04


I found they are also very nice sprinkled with powdered sugar and cinnamon powder! Like savoury donut holes! Try it, you'll like it.

Friday, February 18, 2011

Cheesy Garlic Crumble

Yes, you read that right. No, it has nothing to do with the Aussie candy bar called Violet Crumble. But I thought the name sounded cool when I came up with it so you're stuck with it!

What do you do when it's 10 minutes before your spaghetti dinner and you realize you have no french bread with which to make garlic bread -with cheese, of course? Simple! Come up with something using breadcrumbs, fresh basil, garlic, olive oil, and cheese!

There's no measurements for this as I really did make it up as I went along, but I did take plenty of pics which really illustrate the process.

Garlic crumble

What you need:
some breadcrumbs
fresh basil leaves
garlic (I used the jarred stuff for this)
olive oil
cheese

The cheese I used was cheddar which down here is called Tasty. Cheddar is only called cheddar in Oz if it comes from the Cheddar Gorge which is just outside of Cheddar.


What you do:

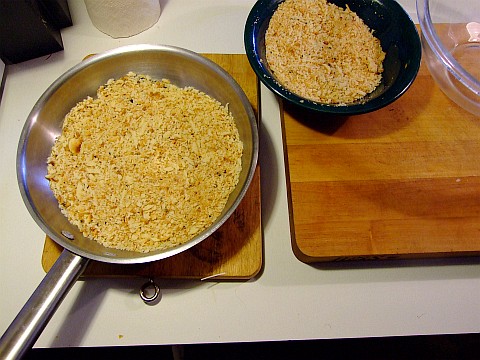
First, you'll need to find out the amount of bread crumbs you need. Use whatever oven-proof saucepan you need for making this and cover the bottom with 1 cm of breadcrumbs.
gc01


Then chuck that in a mixing bowl. See? Easy way to measure, isn't it?

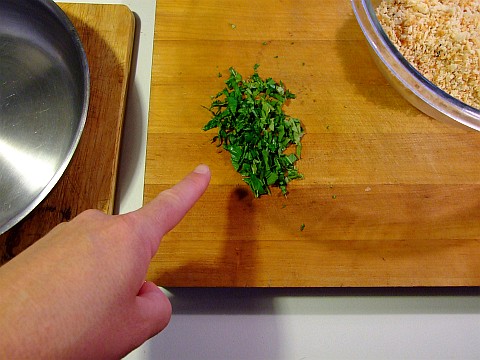
Go outside and snip some fresh basil, then chop it up. How much basil? About this much:
gc02


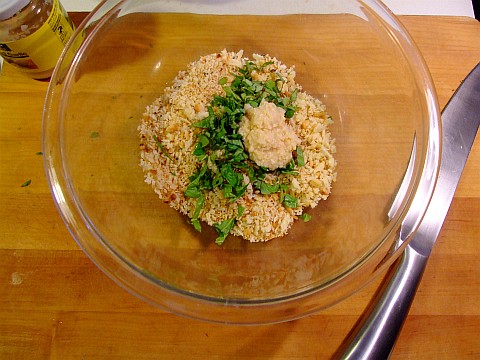
Now add a good sized splat of garlic. How much is a splat? This much:
gc03


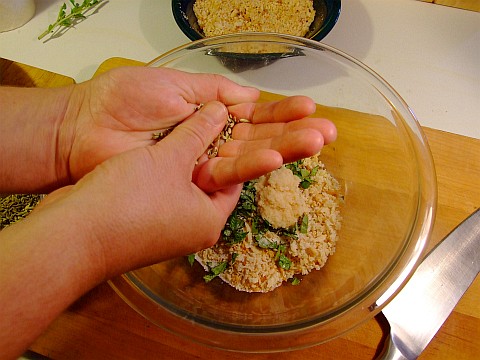
Put some fennel seeds in the palm of your hand. Run the thumb of the other hand over the seeds to partially crunch them, then add to the bowl. Here's what I mean:
gc04

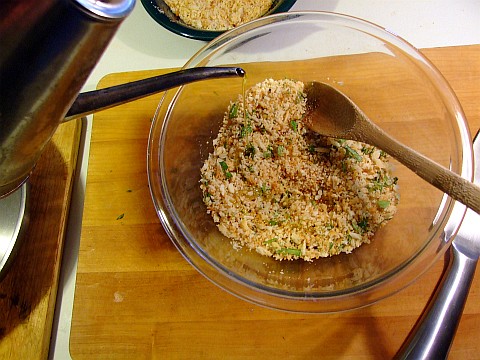
Mix it all together and then add some olive oil. Like my olive oil can? It's from India.
gc05


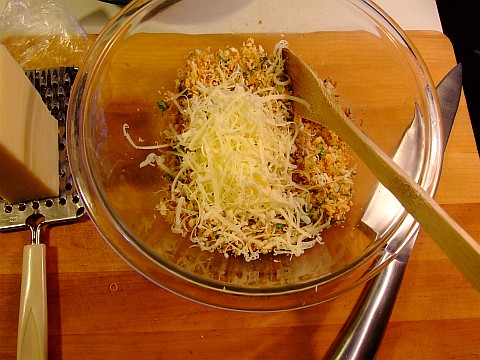
Stir it all together then add some grated cheese. I used around 1 cup's worth of cheddar (tasty).
gc06


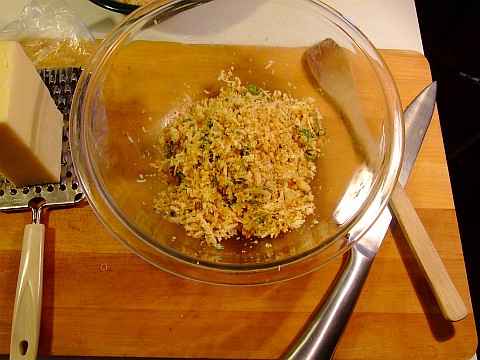
Mix it together using your fingers. Make sure you don't let the grate cheese clump together. Your bowl should now look something like this:
gc07


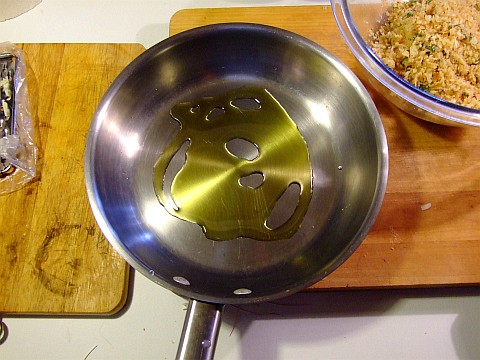
Add a bit of olive oil to whatever ovenable frypan you'll be using:gc08
This is my small Gabrial Gate (tm) small frypan from a set of two. The ONLY reason I have the set is that I got them on an 80% off sale at Harris Scarfe. Otherwise there wouldn't have been no way I could afford those two wonderful frypans.

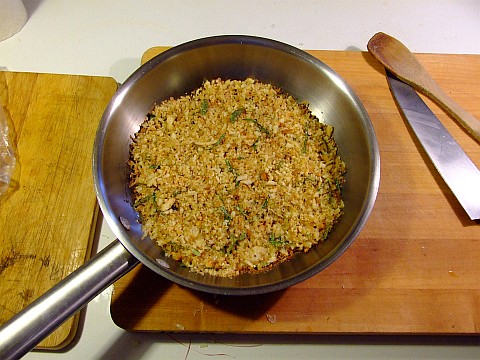
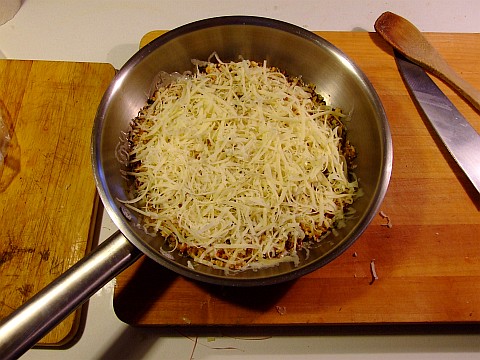
Now spread the mixture evenly over the bottom of the saucepan and cook on low heat on the stovetop till the bottom crumbs JUST start to brown. Do NOT leave the frypan unattended for any length of time as it can go from slightly browned to BURNT in the blink of an eye.

This was actually the second batch I made as I did turn my back on the first batch. Oops.

Now that the bottom is browned, it should look something like this:
gc09


Grate some more cheese over the top:
gc10


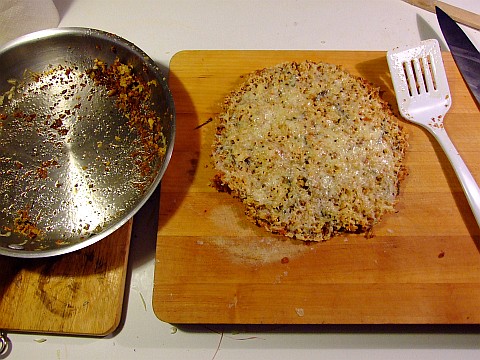
And then bake it in a hot oven till the cheese melts (only a few minutes). Slid it onto a cutting board
gc11


and then cut it up into pieces, serve on the side of your spaghetti in place of garlic bread.

Tada! Garlic Crumble!

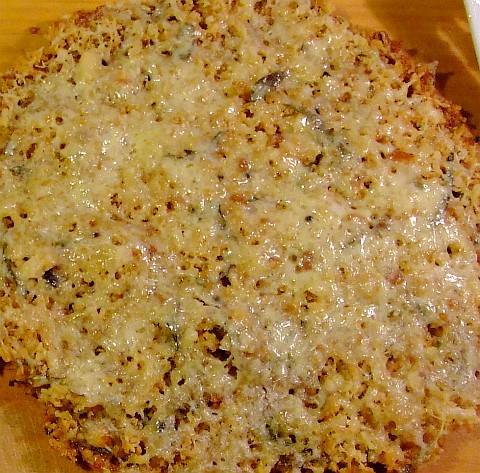
Here's a closeup
gc12


Mmmmm, it was tasty.

Friday, January 7, 2011

Dabbling With Dumplings

My guess is that there are many different ways to make dumplings as there are food bloggers. And that's a lot. Is any one particular way the "right way" to make dumplings? No, of course not silly. It's whatever suits YOU!

This happens to be the way I like them. I like them soft, fluffy and simple. And they should pick up the flavour of the soup nicely.

The very first time I wrote this recipe down would be... oh, right about NOW! It's one of those ones that is so simple you really don't need exact measurements and the ingredients are pretty easy to remember. And this is one of the few times I use self-raising flour.

Dave's Dumplings

What you need:
A big pot of soup you've made that the dumplings will go into
1 to 1 1/2 cups self-raising flour
2 to 4 tbsp butter
dash of salt
1 or 2 tbsp sugar
some water

See? Isn't that an easy list? You'll find you can vary the amounts easily, very forgiving it is.

What you do:
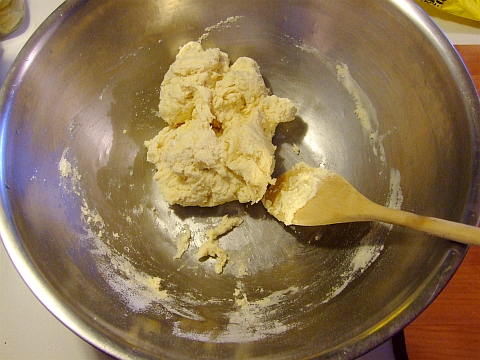
Mix all the dry ingredients together. Then add the butter and work the butter in using your fingers. Add water a few tablespoons at a time whilst mixing the dough --I use a wooden spoon for the mixing part. You want to end up with an almost sticky dough. Hopefully it'll look something like this:

dumpling dough


Now you want to tear off small pieces of the dough and quickly roll them into small balls. How small? Smaller than a ping pong ball. About the size of those small, bouncy, superballs you had when you were a kid.

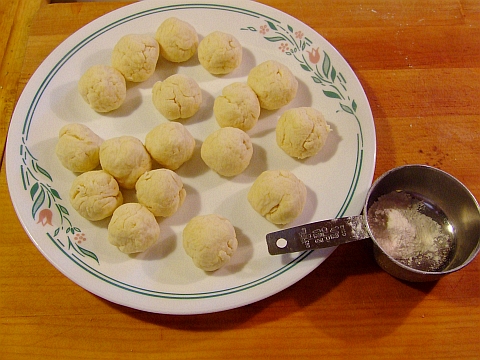
Your plate should end up looking like this:
raw dumplings
I put a 1/2 cup measuring cup so you can see the size of the dumplings.

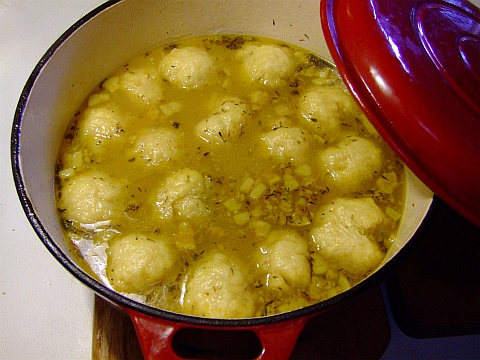
The last step is to put them in your lightly boiling soup. Don't crowd them as they'll more than double in size. Let them cook, covered for 20 to 25 minutes. Your soup pot should now look like this:
cooked dumplings


That cast iron dutch oven holds a lot of soup, more than enough for 2 days worth in fact. The plate you saw in the second picture fits inside it with room to spare. That should give you an idea at how large the dumplings get!

Dish it up, eat, and enjoy!

Friday, December 31, 2010

Satan's Trifle

Oh yes. The many folks on twitter and various blogs have been BEGGING me to post the how to for to make it.

Satan's Trifle.

Firstly, let me give full acknowledgment for the name to one of my twitter followers, Michelle Rodriguez.

Nextly, to my wonderful Wifey-Poo for coming up with the idea.

And finally, thanks to all of you for letting me string you along for a week as you wonder about this wonderful dessert.

Does anyone like chocolate? Does anyone like cherries? Does anyone like Baileys? If you answered, "Hell yeah!" to all of those queries then you'll love this trifle.

Wife and I came up with this as we were perusing the pantry trying to find trifle fixin's. We saw that if we made it all chocolate then we'd have everything 'cept the chocolate sponge roll. Poof! Idea was born!

Please note, I used Father O'Leary's instead of Baileys as O'Leary's is better. And Australian. So there.

And a last note, if you don't feel confident making your own chocolate custard (it is easy, trust me) then you can use a choc custard or choc pudding mix but you've got to make it THICK. Very thick.

Last note... I never measure for this type of dessert, but I did measure for the custard. You're welcome. For those of you who normally make your own custard, the amounts will seem "off". That's ok, it's is supposed to be very thick and set like chocolate concrete.

On with the show, cus the show must go on.

Satan's Trifle

What you need:
One chocolate sponge cake roll (see pictures)
Father O'Leary's Velvet Cream --or Baileys
Cornflour --cornstarch to you North Americans
Large bar of dark cooking chocolate
Skim milk powder --I usually use full cream milk powder
200 grams of pitted, halved, fresh cherries
milk chocolate melts
raw sugar
thickened whipping cream
drinking chocolate OR 100% cocoa powder plus confectionery sugar

Now doesn't that just put POUNDS on your middle? Ohhhhhhhhh... Yeaaaaaaaaaah!

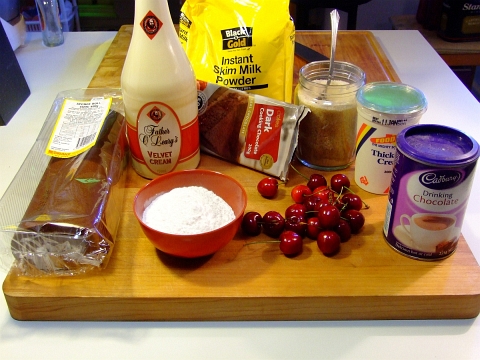
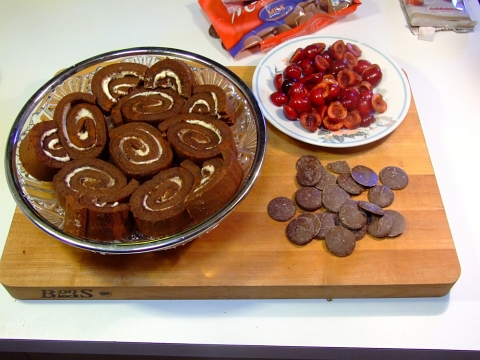
Here's the assembled goodies:
trifle ingredients


Lastly, you may want to use a trifle dish. You can't use mine as it's from the 1890's and is leaded crystal. It also has a big crack in it from MIL's mum. See, me granmum-in-law was kind of a dill in the kitchen and she had inherited this trifle dish from her mum. She thought cleaning it with boiling water after just serving up a cold trifle in it would be a good thing. Sigh.

But if you can't get a trifle dish, then use a large plate and make SURE the chocolate custard is very thick. Like mortar consistency thick.

What you do:

This particular "what you do" will be picture orientated as I know you all likes piccies. Food piccies, of course.

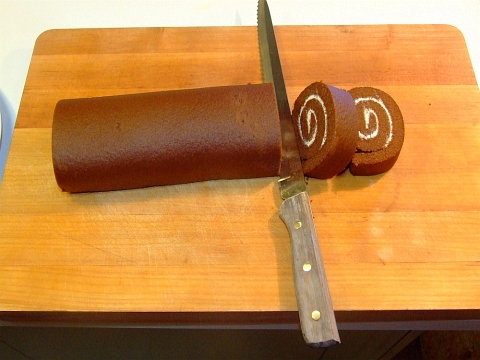
The first thing is to slice the chocolate sponge roll into one inch thick slices. Thusly,
trifle01
Yes, that is a 50 year old Pierre Santini bread knife, thankyouverymuch.


At this point you want to lay the slices out flat on a plate...
trifle02
and put them in a very warm place to dry out for an hour or two. Being in Oz, that means I just put em outside in the sun for a few minutes.

The reason you want the slices to dry out is so that when you saturate the slices with O'Leary's it (being the Baileys) doesn't cause the chocolate sponge cake to go mushy. If you aren't sure what I'm talking about, just trust me and dry out the slices, 'k?

Whilst the slabs of chocolate sponge cake roll are drying, you'll want to make the chocolate custard. If you choose to use packet mixes of chocolate pudding or chocolate custard, then you are excused from looking at the next few pics. Just make sure you make your custard THICK!

Now, let's assemble the stuff for the chocolate custard. That'd be raw sugar, cornflour (cornstarch), milk powder, thickened whipping cream, and dark cooking chocolate.
trifle03p
And a thick bottomed steel saucepan.

First, melt 100 grams dark cooking chocolate. You can use a double boiler, but I usually use a microwave on low.
trifle04


To make the really thick chocolate custard do this:
to 1 and 3/4 cup water (H2O), mix in
8 tbsp cornflour (cornstarch)
5 tbsp raw sugar
7 tbsp skim milk powder (or full cream, your choice)

Whisk it all together THOROUGHLY!

Heat it in your thick bottomed saucepan whilst whisking the whole time. It will, not surprisingly, thicken up till the whisk stands up!
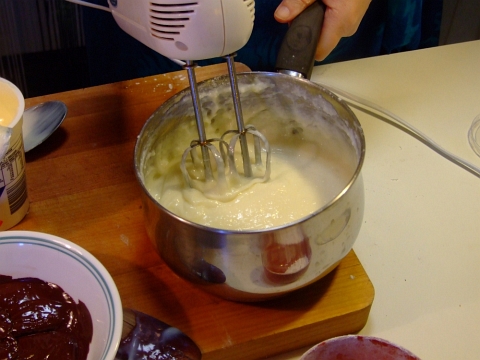
trifle05


Once it starts to really thicken, you obviously want to take it off the heat and let the heat from the pan base do the rest. At this point, it'll be close to concrete like consistency and you'll have thought you ruined it. No, you didn't.

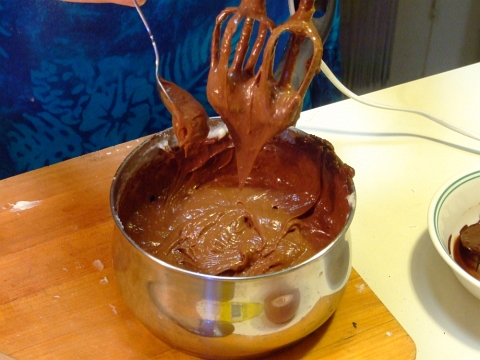
Now, to that pan add 1/2 cup thickened whipping cream plus 2 tbsp icing sugar and beat like crazy! I recommend an electric beater.
trifle06


Then add the melted chocolate as the electric beaters do their thing!
trifle07


You should (fingers crossed) end up with a chocolately custard of a consistency like thus:
trifle08


It really does only take ten minutes to make the custard, and no fridge setting time either. I much prefer this to using the pre-made powder packets.

Getting back to the trifle.
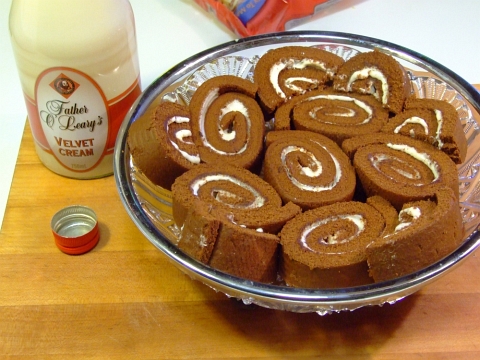
Spread your semi-dried slabs of chocolate sponge roll onto your trifle dish. Feel free to cut some of them in half so they all fit nicely into the dish:
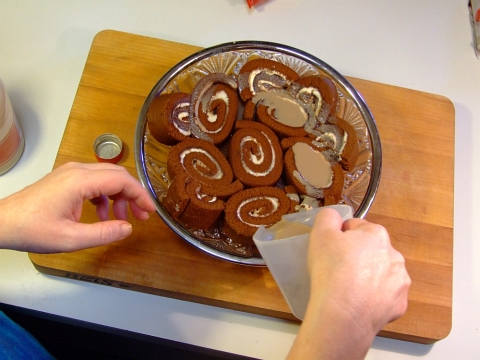
trifle09


Didja notice that bottle next to the dish? Of course you did. Next pour at least 1 cup of Baileys or O'Leary's over the slices.
trifle10
You'll be quite happy you dried the slices, otherwise the liquid would turn the whole thing into mush at this point. And you don't want that!

Remember those chocolate melts and the cherries?
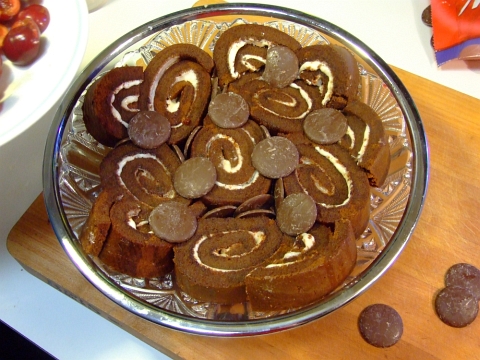
trifle11


First, fill all the gaps betwixt the chocolate cake slices with chocolate melts. Then layer a few on top just for the heck of it!
trifle12


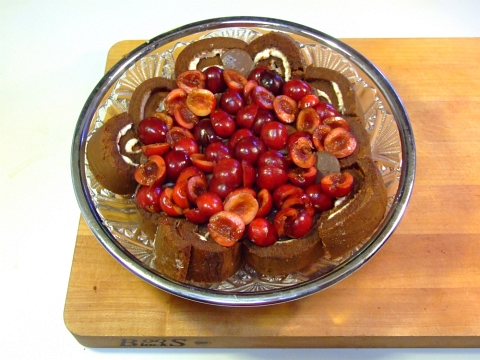
Your delicious, fresh, pitted, sliced cherries go on next:
trifle13


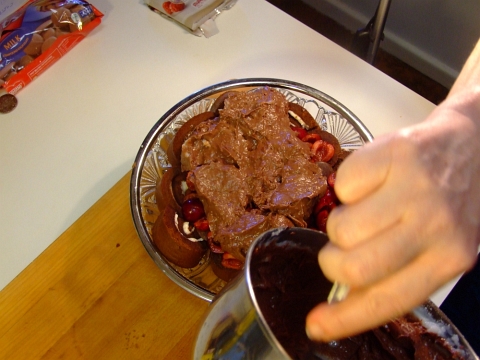
Now it's time to start packin' that chocolate custard on!
trifle14


As you are packing on the custard, you want to make sure it gets into all the gaps. Cus when you put this baby into the fridge to set, you'll have chocolate mortar betwixt the chocolate cake bricks!

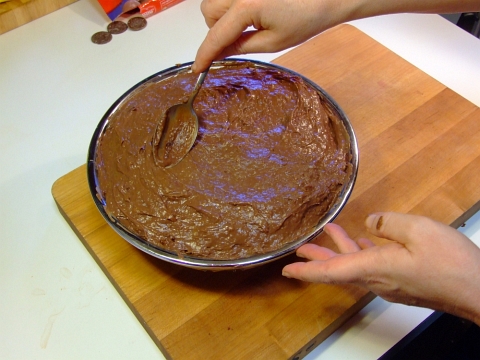
Smooth all the custard out till it looks all purdy like.
trifle15


Now it's time to make the chocolate whipped cream. If you are using "drinking chocolate" then add a 4 tbsp to 300 mls (that's one cup plus a bit) cream. Then beat with your electric beaters till "stiff peaks form". If you are using cocoa powder and icing sugar, then use a tbsp or two of each, no worries.

Your chocolate whipped cream should now look thusly:
trifle16


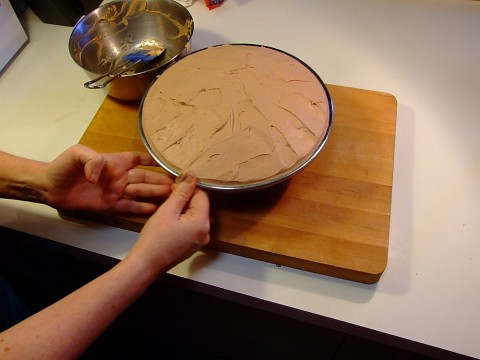
Not even sure if I need to tell you this next step, but go ahead and start slathering that chocolate cream over the chocolate custard which itself covers the cherries, chocolate melts, and chocolate cake.
trifle17


Don't forget to clean up the edges for presentation purposes!trifle18


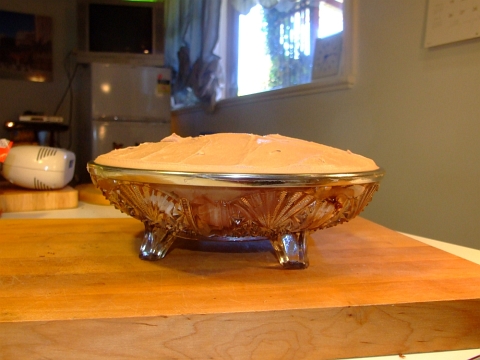
At this point, your Satan's Trifle should look something similar to this:
trifle19


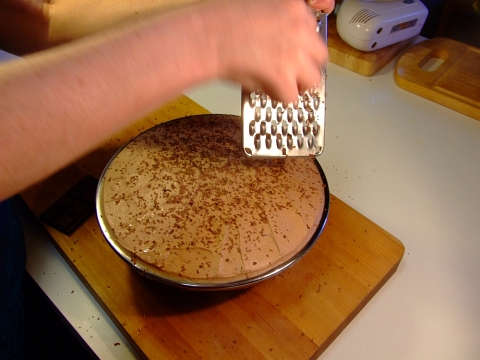
But we aren't done yet! Remember that other half of your bar of dark cooking chocolate? Good, you do. Go grab it and grab a cheese grater.
trifle20


Ladies and Gentlemen... Start your grating!
trifle21


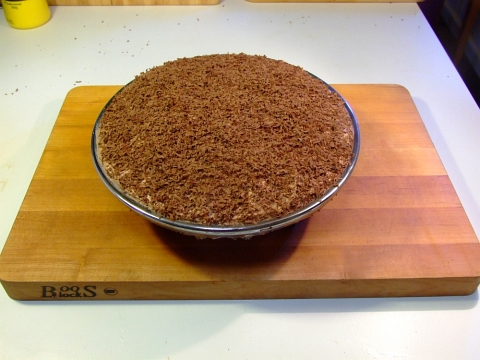
And don't stop grating till you are out of chocolate and your Satan's Trifle looks like THIS!
trifle22


Chill that baby in the fridge for a few hours, then ENJOY!

It took 4 of us 3 days to finish this. It is rather... rich.

Disclaimer: blog author is not responsible for pimples, heart palpitations, sugar highs, or anything else you can damned well think of. So there.